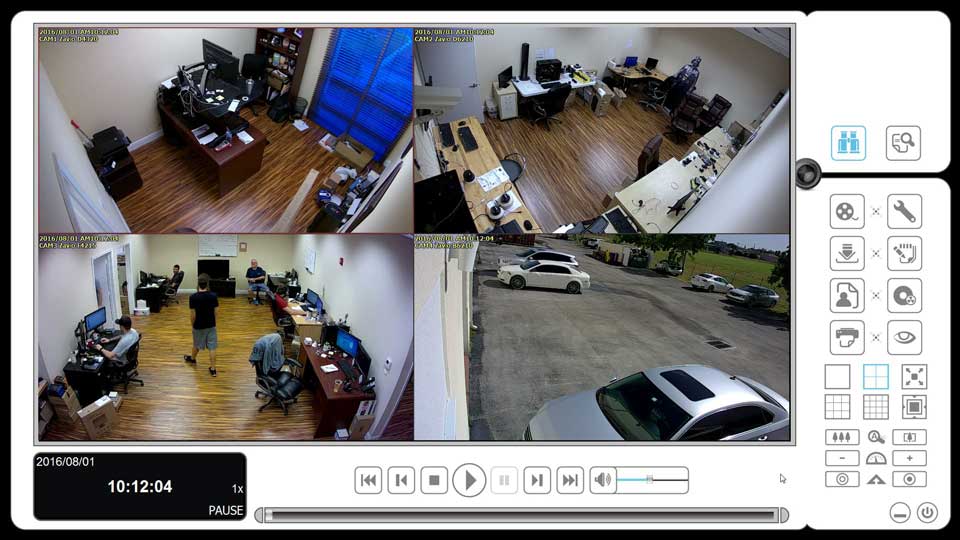
Zavio Stand-Alone NVR User Manual, Network Video Recorder (NVR) Support Zavio network video recorders are a Linux embedded NVR solution. They come in 8 and 16 channel models.Zavio NQ NVR Manual IP Camera Addition on Mac

In this article, we will be discussing how to manually add an IP camera to a Zavio NQ NVR (network video recorder) via a Mac personal computer. This article came to be because we had a customer contact us and state that they were unable to locate their Zavio IP camera on the network using the automatic IP camera search feature of the Zavio NQ NVR. Furthermore, the Zavio NQ NVR does not allow the manual addition of IP cameras via the NVR interface.
In this case, the customer had to manually add the IP camera to the Zavio network video recorder but did not have a Windows PC to run the Zavio Z Plus tool to locate the IP camera and only had a Mac to work with. Although you cannot view live video from a Zavio NQ NVR on a Mac, users are able to manage the NVR’s settings. The instructions below explain how to manually locate the Zavio camera’s IP address on the network without the use of the Zavio camera tools and add it to the Zavio NQ recorder using a Mac Safari web browser.
Setup Instructions
1. First, make sure the Zavio IP camera is connected to the same network as the Zavio NQ NVR and Mac computer.
2. Then, locate the MAC Address marked as MAC on the Zavio IP camera label. The MAC of a Zavio IP camera will typically start with 001BFE.
3. Now, on the Mac computer, run the Terminal utility found in the Utilities folder of the Mac.
4. Once the Terminal is running, type in arp -a and hit Enter. This should bring up everything that is connected to your network. You will see the IP Addresses followed by the MAC Addresses.
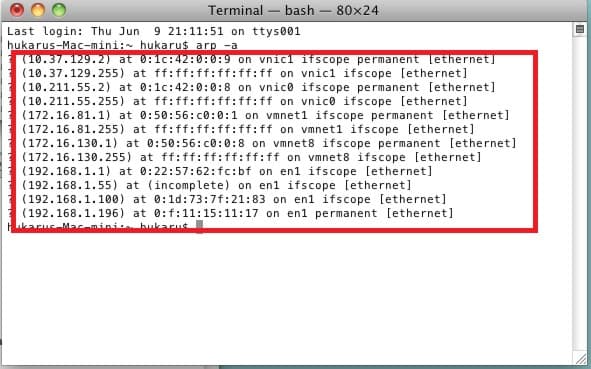
5. After the IP address of the Zavio IP camera is obtained, you can manually add it to the Zavio NQ NVR if it is not showing up on the auto IP scan. Please note that this will need to be done via a web browser on the Mac computer. Open a Safari web browser (or Chrome, Mozilla, and etc.) and type the IP address of the NVR into the address bar. To locate the IP address of the Zavio NQ NVR, look on the Live View status bar at the bottom of the Zavio NVR interface.
6. Now type the IP address of the NVR into a web browser (Safari, Chrome, Mozilla, and etc.). Once prompted type in the Username and Password of the NQ NVR (admin / admin by default).
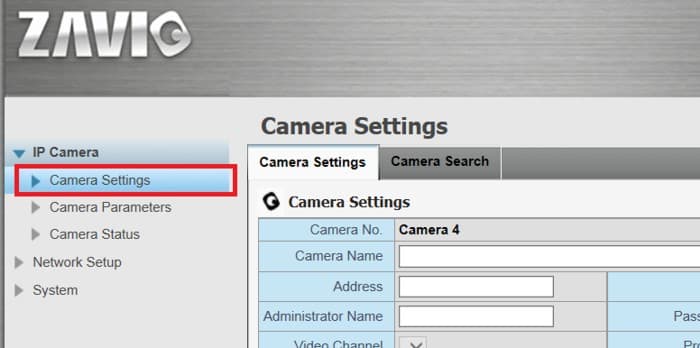
7. Once in the NVR web browser interface, go to Camera Settings under the IP Camera menu on the left-hand side.
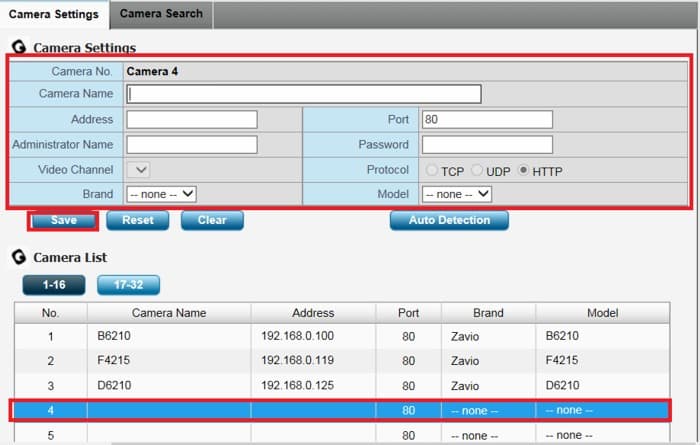
8. Select the camera channel / display position you would like to add the camera to and type in the following camera info:
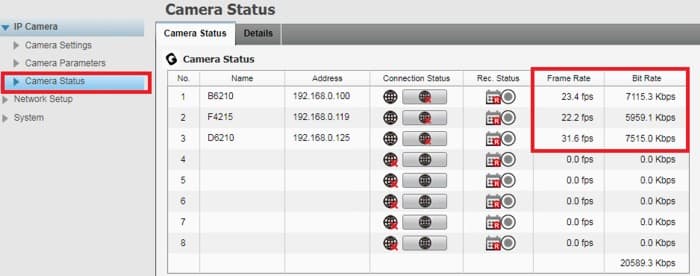
9. Finally, we are going to make sure that the IP camera is connected to the Zavio NQ NVR by going to Camera Status. If the camera is connected to the NVR, you will see activity under Bit Rate and Frame Rate.
Zavio NQ NVR Search and Add Cameras

In this article, we will be discussing how to search for and add cameras to a Zavio NQ NVR. This process is very user-friendly as most of the process is handled by the easy to follow NVR software interface.
Setup Instructions
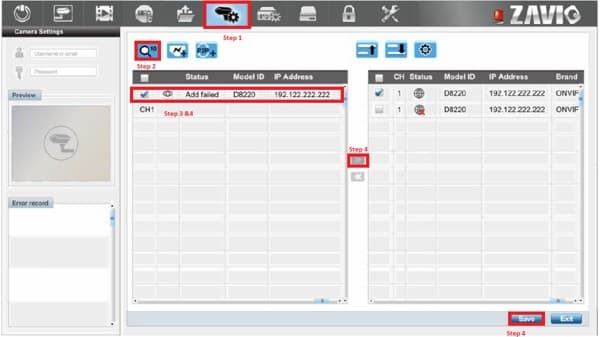
1. On the NVR, locate the button with the Camera + Gear icon and click Camera Settings.
2. Now you should see a blue button that looks like a Magnifying Glass. Click it.
3. Once you click the Magnifying Glass button, the NVR will search the network for any available cameras. Any found cameras will appear in the box on the left-hand side.
4. Check the cameras you would like to add to the NVR. Then, click the arrow that points to the right. You will notice that the cameras will go from the box on the left to the box on the right. Once all of the desired cameras are in the box on the right, click Save.
5. You should now be able to see the cameras in the Live View of the NVR.
Below is a reference image for steps 1~4. Click on the image for a larger view.
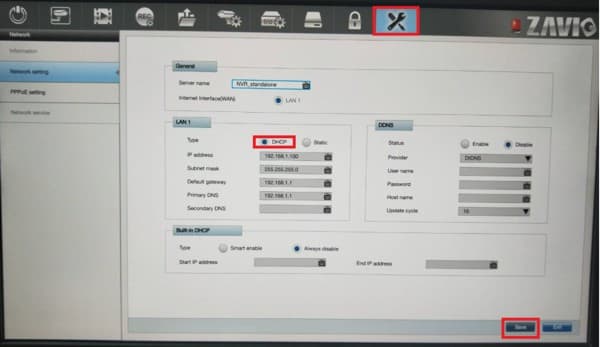
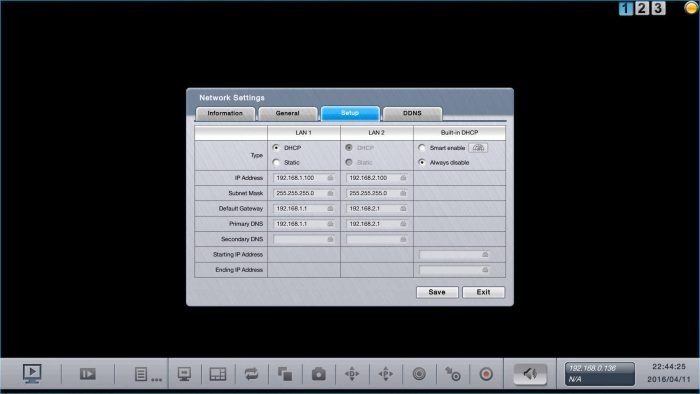
NOTE: If the above is not working, please go into the Network Settings of the NVR and make sure that LAN 1 is set to DHCP. This is shown in the image below.
Zavio NVC NVR Network Setup
Zavio Network Video Recorders are can be remotely accessed from a number of devices, including iPhone, Android, and PCs. The instructions featured in this article explain how to setup the Zavio NVC series network video recorder for remote access.
Network Setup
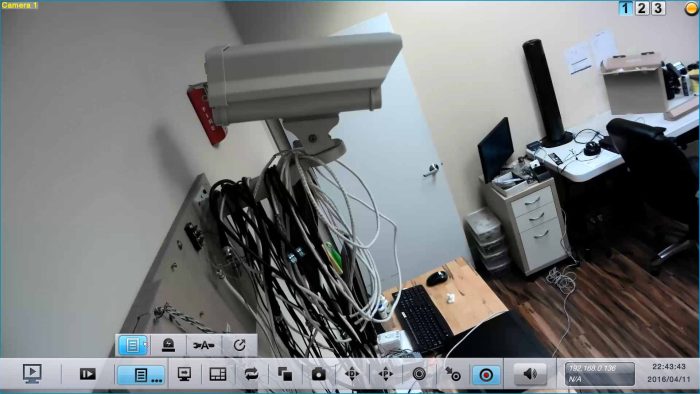
1. First, click the Menu icon in the lower portion of the screen. (Shown Below)
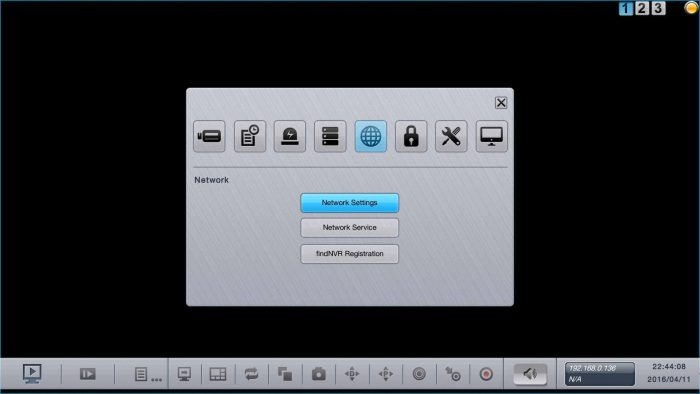
2. Then, click the Network icon, followed by Network Settings. (Shown Below)
3. Under the Setup tab, set LAN 1 to DHCP. Then write down the IP Address, as you will be using it later in this article. (Shown Below)
5. Now we will perform the port forwarding of the router connected to the Zavio NVC NVR. Please select the brand of your router below for specific instructions on port forwarding.
6. Now we will need to make sure the ports are open. You can do so by going to http://dvrport.net

7. The remote IP address will automatically populate under the Enter IP or Hostname, you will leave this info as is. Change the Enter Port To Scan field to read 80 and press Scan.
Note: If the port is open you will use the remote IP address you get from the http://dvrport.net . However, you will need to type it in as follows via a web browser – http://remoteipaddress, eg. if your IP address is 99.99.99.55 then it should look like this when you type it into your web browser – http://99.99.99.55
Note 2: If the ports are showing closed and you have a DSL provider, you will need to call your provider and have them bridge the modem to your third party router. This is a standard procedure.
View IP Cameras from iPhone App
View IP Cameras Live & Playback Recorded Video Surveillance from iPhone & iPad with the Zavio NVR App.
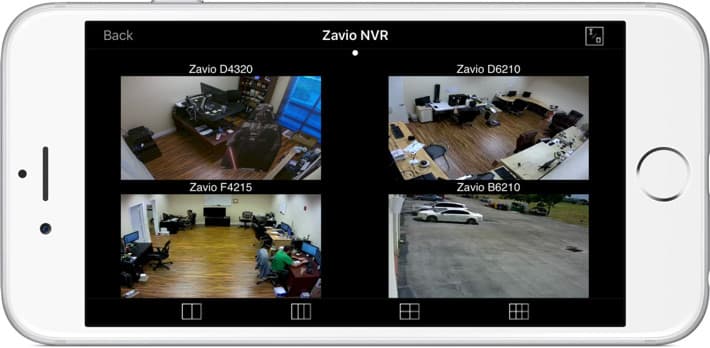
The CamGraba app for iOS lets users view their IP cameras live and also playback recorded video surveillance using iPhone and iPad mobile devices. The app also works with the IP camera recording software that is included with all Zavio IP cameras. The app is able to connect to Zavio network video recorders over WIFI and cellular networks. Users can access their IP cameras on the local network where the NVR is located and also remotely over the Internet.
This article was written to help familiarize users with the graphical user interface, functions, and controls that are available in the app. You can also watch an HD video demo here.
Works with Zavio NVRs & IP Camera Software
The CamGraba app works with Zavio NVRs and also with the IP camera software that is included with all Zavio IP cameras. Zavio IP camera software is installed on a Windows PC and turns the PC into a 64 channel network video recorder.
Connect to Multiple NVRs / Locations
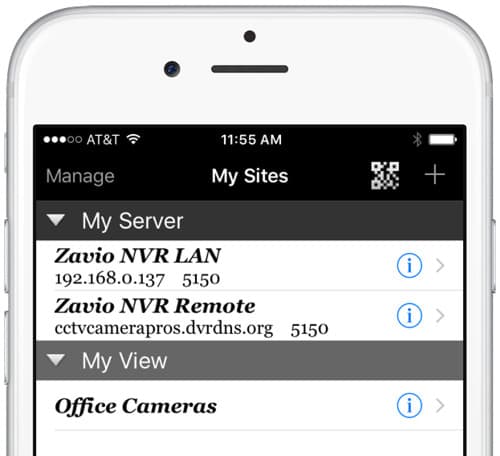
The CamGraba app can be configured to connect to multiple standalone and PC based Zavio NVRs. Users can also configure customized multi-camera views that consist of IP cameras at different locations / connected to different NVRs. In the above screenshot, the “My Server” section is where NVRs are configured and the “My View” section is where custom views are configured. Users can add additional servers and views by tapping on the + icon in the upper right of the screen.
Multi-Camera View & Digital Input / Output Controls
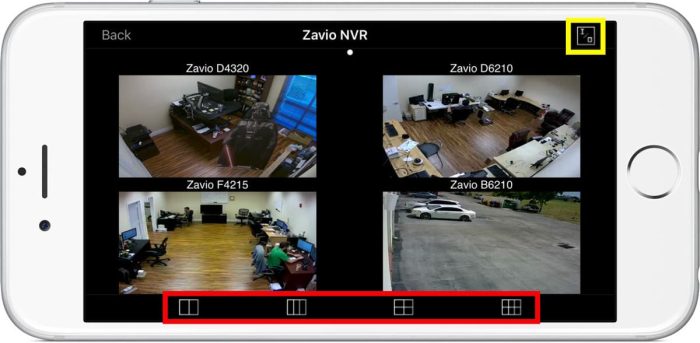
When a user connects to an NVR, the app starts in live camera view. The user can tap on any of the grid icons along the bottom of the screen (notes in red) to switch between different styles of multiple camera views. To view a single IP camera, users can double tap on any of the live views.
Users can access the digital input and output screens by tapping on the I/O icon in the upper right (noted in yellow). Users can turn digital outputs on /off remotely and can see the status of digital inputs. Digital I/O is not available on all camera models.
Live Camera View
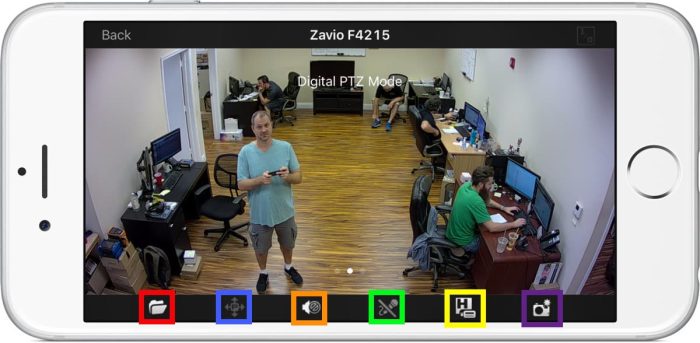
The above screenshot shows the live single camera view in the app. When in single camera view, users can toggle the bottom menu on / off by tapping on the screen. Here is what each of the controls does.
Remote Recorded Video Playback
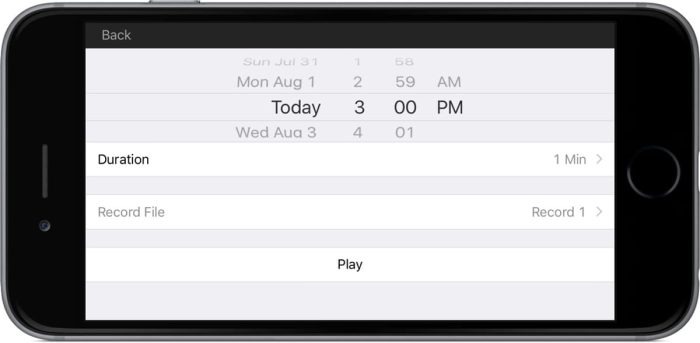
When users tap on the recorded video playback icon, this time search screen opens which allows the user to select a time frame of recorded video to play.
When the user taps on the play button, the recorded video playback screen opens and the video begins to play.
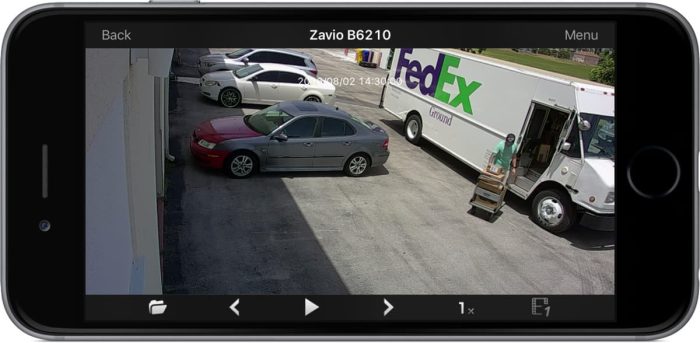
The user can use the controls on the bottom of the screen to play, pause, forward, reverse, speed up and slow down video playback.
Video Demo
Important Note: Click the gear icon in the lower right of the video player and select 1080p resolution so that you can view the video at the highest resolution available.
Live IP Camera View from iPhone
This video demonstrates live IP camera viewing capability of the Zavio iPhone app. Digital PTZ functions are also demonstrated.
App Downloads
You can download the latest CamGraba app for iOS here.
Zavio Stand-Alone NVR User Manual
Read More : Best Indoor Securıty Cameras 2023
IP Camera Android Security App
View Zavio IP Cameras and Network Video Recorders (NVR) Live and Playback Recorded Video with the CamGraba Mobile App for Android.
The Zavio video surveillance app for Android that is used to view Zavio IP cameras and control Zavio network video recorders (NVR) from remotely over the Internet. This mobile app allows users to remotely view their security cameras live and also playback recorded video from the hard drive of Zavio NVRs (PC based and stand-alone models). Other features include pan, tilt, zoom camera controls, digital IO controls and two-way audio (if the camera supports it).
This article will familiarize customers with the user interface, functions, and controls built into the app.
IP Security Cameras / NVRs
This app is designed to connect to Zavio Network Video Recorders and PC based NVRs that use the 64 channel IP camera software included with all Zavio cameras. Please note that this app cannot connect directly to IP cameras. Users MUST use a network video recorder.
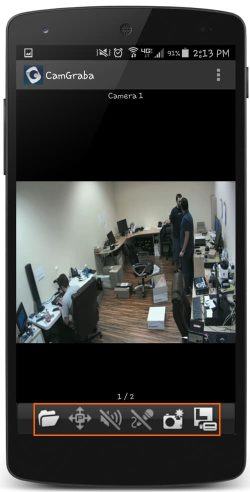
CamGraba Android App Controls
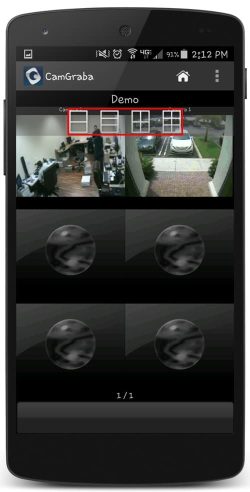
The above screenshot shows the live multi-camera viewing screen of the app. There are two cameras connected.
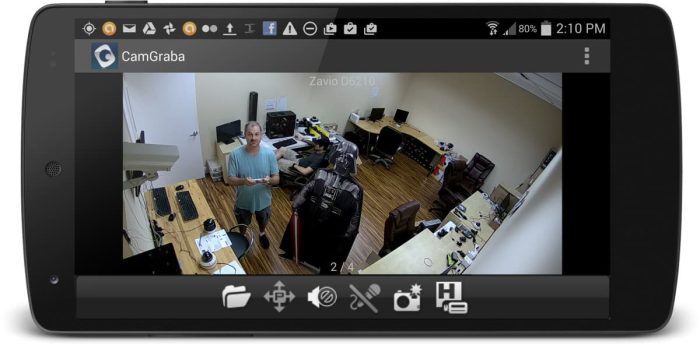
The screen above displays the controls featured on the app for individual cameras.
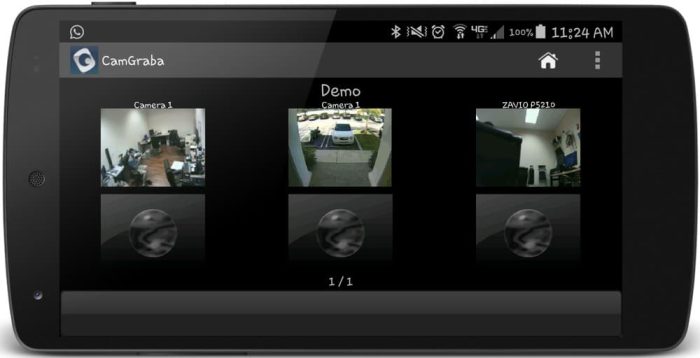
Portrait & Landscape View
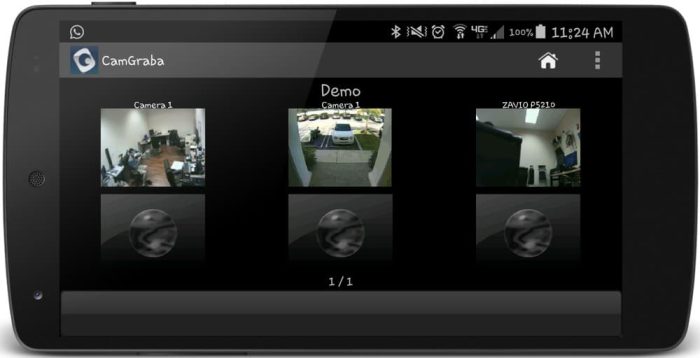
The app supports both portrait and landscape views. There are three cameras connected to the above app.
Here is the Android app viewing a Zavio IP camera remotely in HD portrait mode.
App Downloads
You can find the latest version of the CamGraba app here.
View IP Cameras from Mac
View IP Cameras Live & Playback Recorded Video Surveillance from Macintosh PCs with the Zavio NVR Web App.
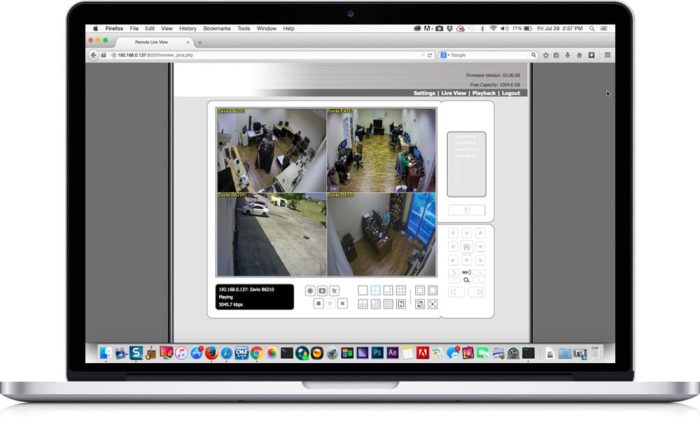
Users can remotely access live video from Zavio IP cameras using a Zavio NVR and the web app for Macintosh PCs. The web app is launched by accessing a stand-alone Zavio NVR or PC based NVR from a web browser on Mac. The app requires Java and will prompt the user to download the Java app the first time the NVR is accessed.
This article was written to help familiarize users with the graphical user interface, functions, and controls that are available from the Mac software.
Please Note: In order to access the Zavio NVC NVRs on Mac, a specific version of Mozilla Firefox must be used. Here is a link to the download for that version of Firefox and the instruction for setup – Accessing Zavio NVC NVR on Mac.
Works with Zavio NVRs & IP Camera Software
The CamGraba app works with Zavio NVRs and also with the 64 channel IP camera software that is included with all Zavio IP cameras. Zavio IP camera software is installed on a Windows PC and turns the PC into a 64 channel network video recorder.
Live IP Camera View Mode Controls
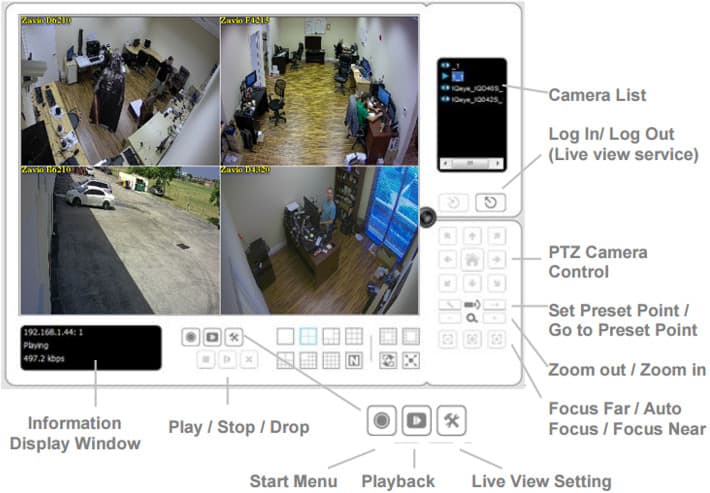
Once you connect to an NVR using from the Macintosh web app, you can click on the “Live View” link to enable live mode. The above screenshot notes all of the controls and menu that are available in the live mode of the app.
Users can right mouse click on the screen to bring up this menu.
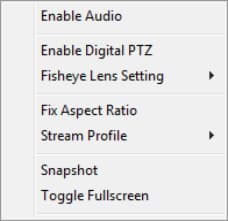
These controls perform the following actions.
Multi-Camera Screen Layouts
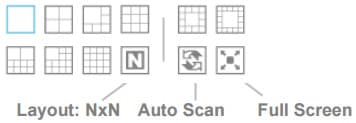
The grid icons on the live view allow the user to switch between different IP camera views and the number of cameras displayed on the screen. Users can also switch the app to full-screen mode.
Full-Screen View
The fullscreen mode removes all of the controls and menus from the view and displays the IP camera video full screen. Please click on these images for a larger view.
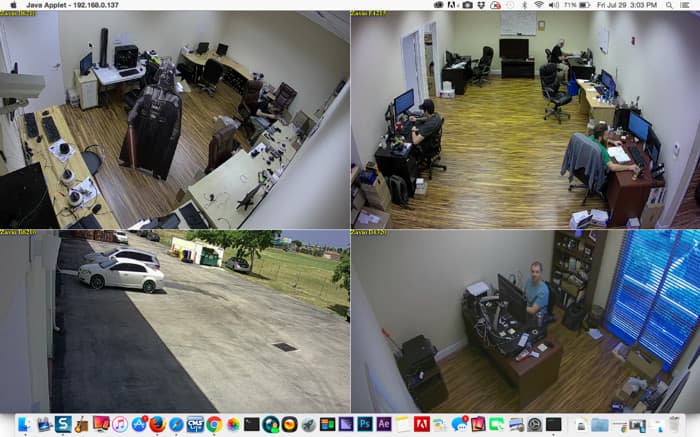
Here is a fullscreen view of 4 IP cameras.
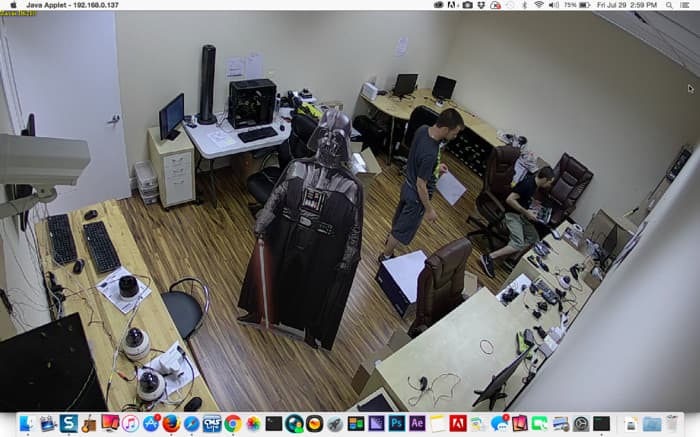
Here is a full-screen view of one IP camera.
Remote Recorded Video Playback
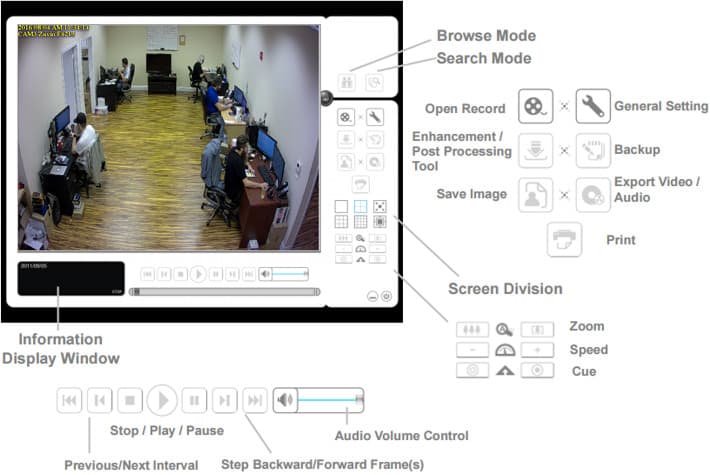
When users click on the playback link or the playback icon, the app changes into playback mode. Playback mode allows users to remotely search and playback video surveillance that has been recorded on the NVR’s hard drive. Below is the remote playback screen on Mac and a description of the available controls.
Recorded Video Search
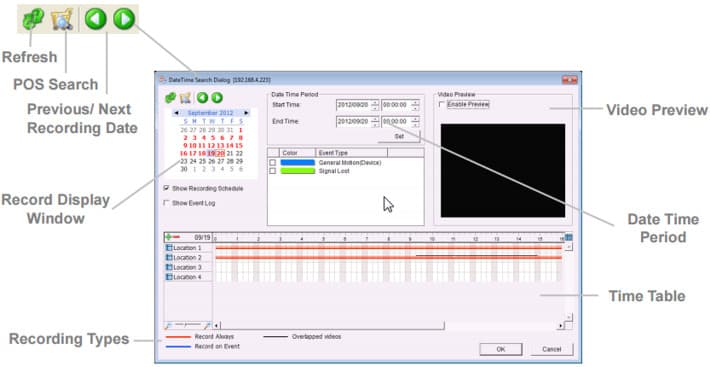
When users click on the “Open Record” button on the playback screen, the below window opens, which allows the user to search for recorded video.
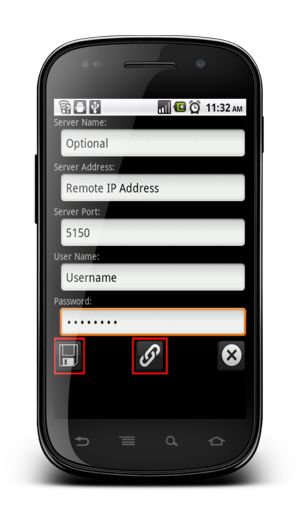
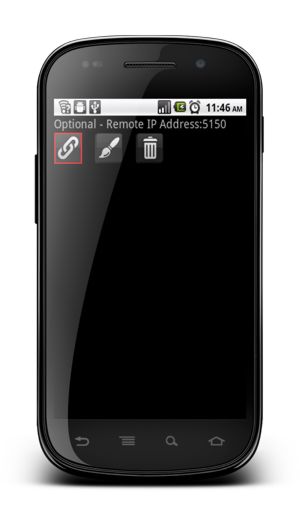
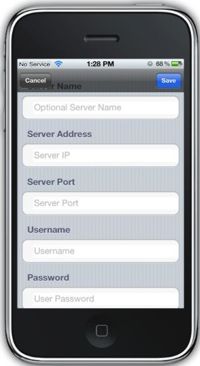
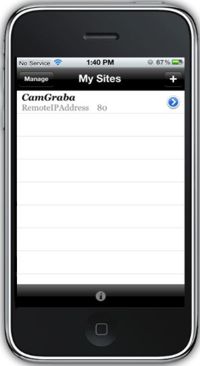
• The Zavio CamGraba surveillance NVR software is specifically designed to manage and record Zavio IP cameras. Zavio CamGraba offers the ability to be remotely accessed using an Android mobile device, allowing users to view and manage their NVR software from almost anywhere.
•
Zavio NVC NVR Recorded Video Surveillance Search and Playback
Zavio Network Video Recorders support 8 or 16 IP cameras depending on the model. The instructions below explain how to search for and playback recorded video data directly from the Zavio NVC series network video recorder. In these instructions, we are using the USB mouse included with the unit.
Search and Playback
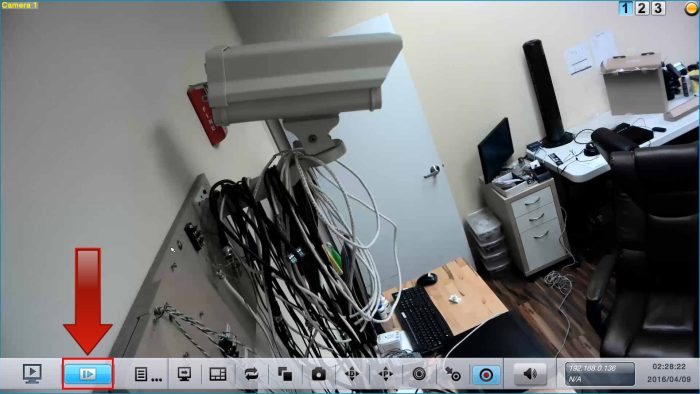
1. First, click the Playback icon in the lower left portion of the screen. (Shown Below)
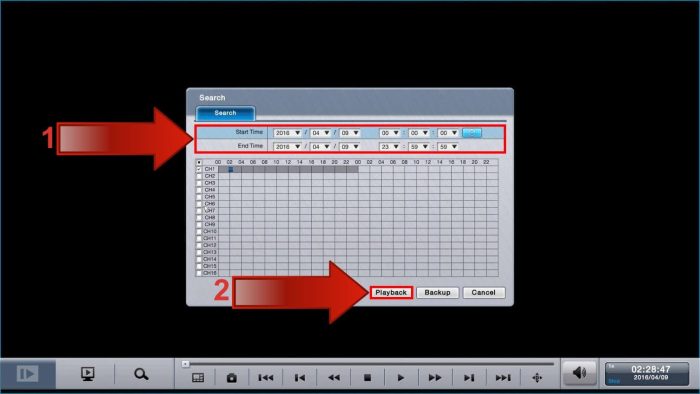
2. Then, select the Date and Time that you wish to view. Once you have the desired time frame selected, click the Playback button in the lower right portion of the screen. (Shown Below)
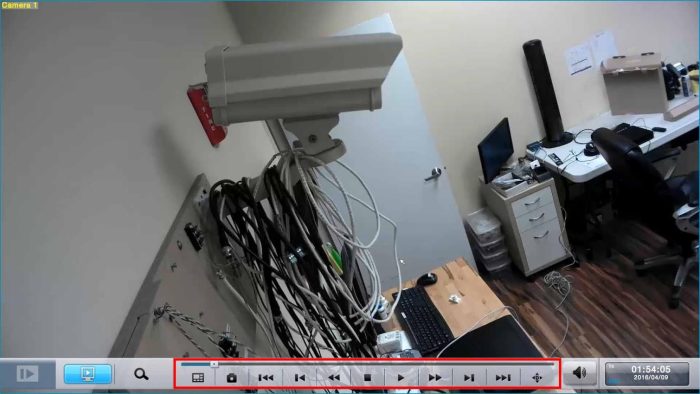
3. The video will now begin to play. All of the controls for the video playback are located at the bottom of the screen. (Shown Below)
Remote Live View Software for Zavio NVRs
View IP cameras live using the remote viewing software included with Zavio IP cameras.
The Remote Live Viewer application is used to remotely connect to Zavio stand-alone NVRs and PC based NVRs that are built using the 64 channel NVR software included with all Zavio IP cameras. The Remote Live Viewer app can be installed on Windows PCs. Macintosh users can refer to this article on how-to remotely access Zavio IP cameras from Mac.
This article contains photos captured while testing the Remote Live Viewer software and instructions on how-to setup the software on a Windows PC.
Remote IP Camera Viewer Photos
These screenshots were captured by connecting the remote live viewer application to the NUUO NVR at CCTV Camera Pros office / warehouse.
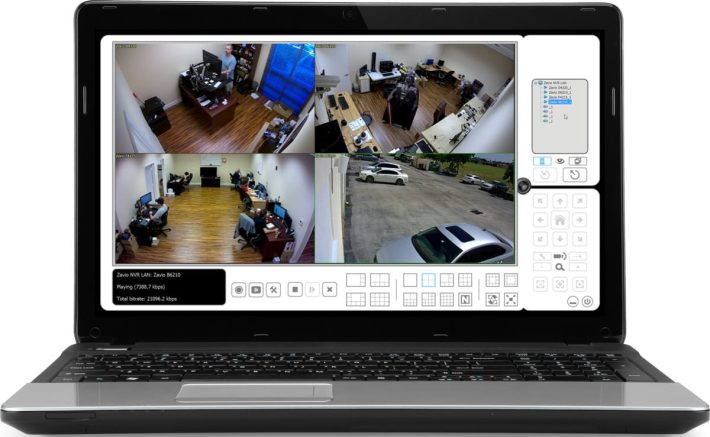
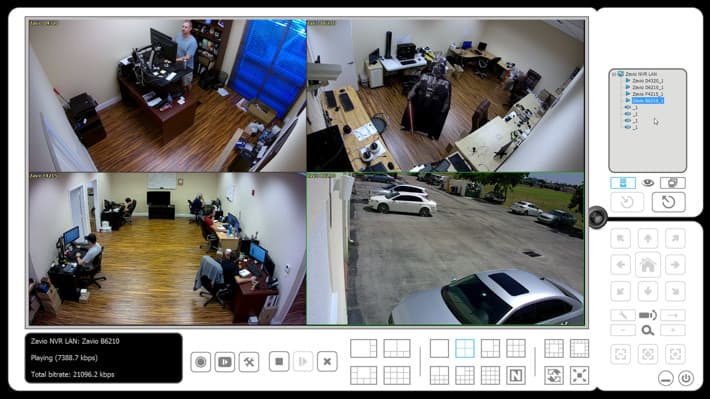
Here is the software viewing 4 Zavio IP cameras live at CCTV Camera Pros office and warehouse in West Palm Beach, Florida.
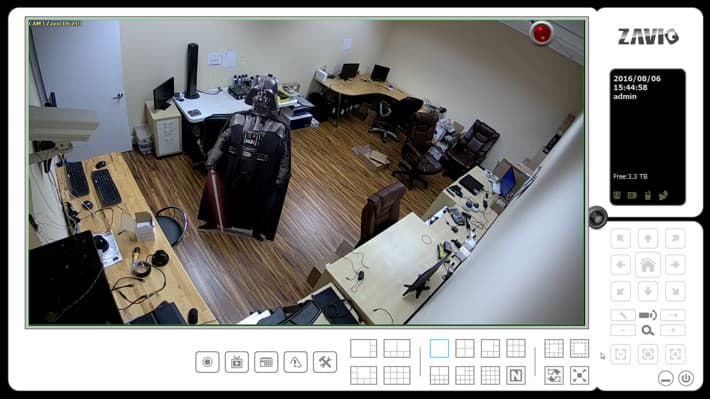
Here is the software viewing a single IP camera. Users can double-click on any camera view to open that camera in single camera mode.
Here is the single IP camera expanded to full screen, which hides all of the software menus and controls.
Setup Instructions
If you have not already installed the software on your PC, please do that. You can find overview and software installation instructions here.
1. First, ensure that the correct ports are forwarded in the router connected to the Zavio CamGraba PC. Then be sure that the correct network settings are applied in the CamGraba main console. If you have not done this, please visit our CamGraba Network Setup article.
2. Now open the Remote Live Viewer application on your desktop. This can be found by going to Start > All Programs > Zavio CamGraba IP System > Remote Live Viewer. (Shown Below)
![]()
![]()
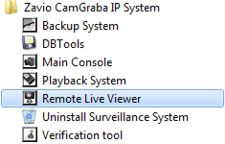
3. Now on the main menu of the Remote Live Viewer, click the General Settings icon. Then click Setting. (Shown Below)

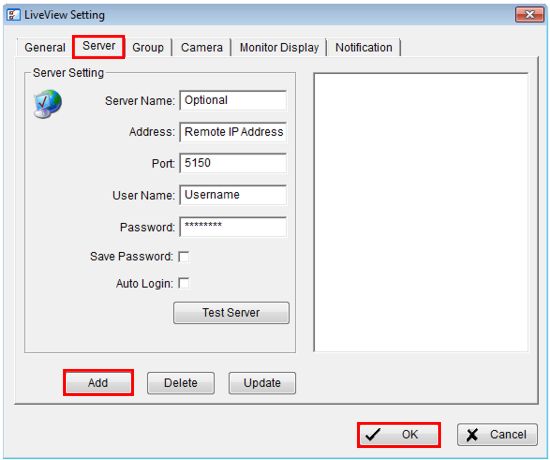
4. Then under the Server tab enter the Server Name, Remote IP Address, Port Number, Username, and Password of your CamGraba NVR software. Then click Add followed by OK to save the settings. (Shown Below)
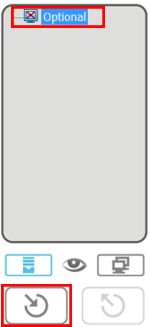
5. Then click the DVR you wish to view on the column to the right and click the Connect button. (Shown Below)
6. Now enter the Username and Password of you Zavio CamGraba NVR. (Shown Below)
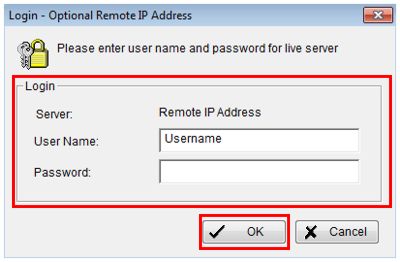
7. You should now have remote access to your Zavio CamGraba NVR software.
IP Camera Mobile App Push Notifications
How-to setup IP camera motion detection push notifications on iPhone & Android apps with the Zavio NVRs.
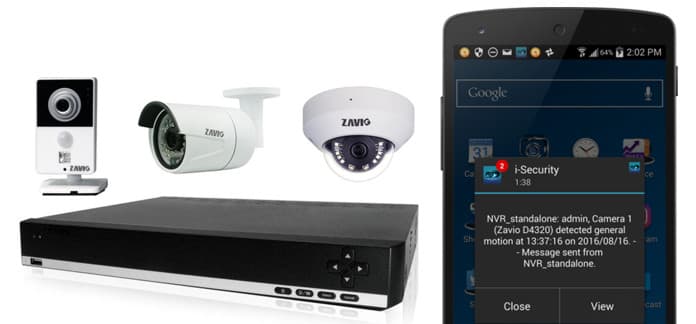
Zavio NVRs can send push messages notification alerts to the i-Security iPhone app and Android app when alarm events occur, such as motion detection from an IP camera. In addition to motion detection, the following other types of events can also be configured to send push messages: video loss / camera disconnected, alarm input, and scheduled messages. If any of your IP cameras have alarm inputs, you can use these ports to connect devices such as PIR motion detectors / sensors, window / door sensors, infrared trip wires, and any virtually any other type of burglar alarm device. Events from these external alarm devices can trigger push alerts. The scheduled event allows the DVR admin to send out push notifications on a set schedule.
This article was written to help familiarize users with how-to setup mobile push notifications based on motion detection using Zavio NVRs. The setup process for the other types of events is basically the same.
Motion Detection Setup on IP Camera
The first setup step is to configure the motion detection settings on the camera. To do this, you must log in to the IP camera directly (not the NVR). You can follow these instructions to setup motion detection on Zavio IP cameras. After you configure your camera(s), return here to resume the setup below.
NVR Setup
The next part of the setup occurs on the Zavio NVR using the mouse to access the menu of the DVR directly. You can also perform, this part of the setup remotely from a Windows or Mac PC by accessing the NVR from a web browser on Mac or using the Windows NVR client application.
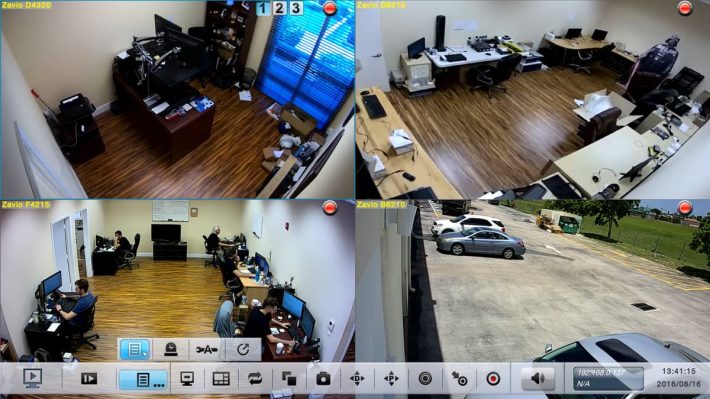
Access the main menu on the NVR by clicking the mouse in the lower area of the screen, then click on the menu icon. You can see this above.
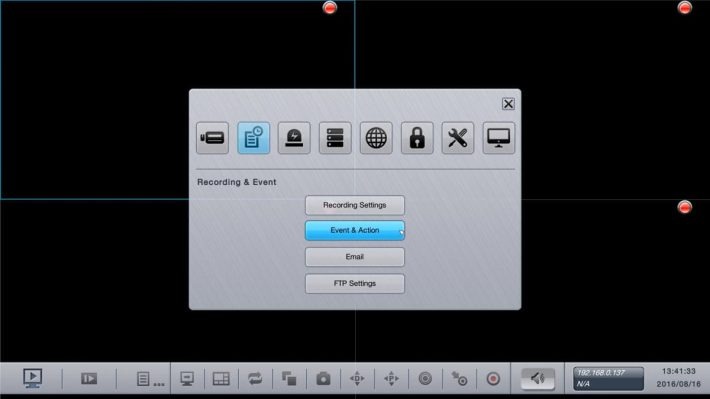
From the main menu, click on the Recording & Event button, then select Event & Action.
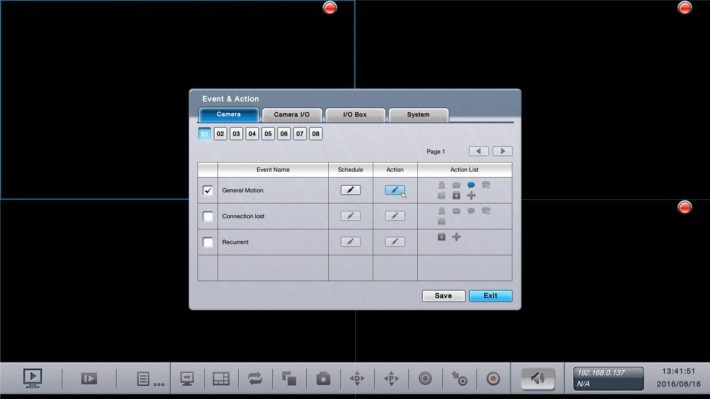
On the Event & Action screen, click on the General Motion checkbox, then click on the action button.
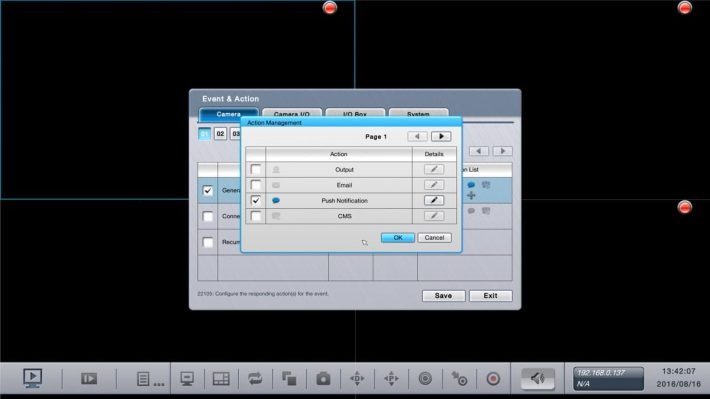
On the Action Management screen, check the Push Notification check box, then click on the Details button.
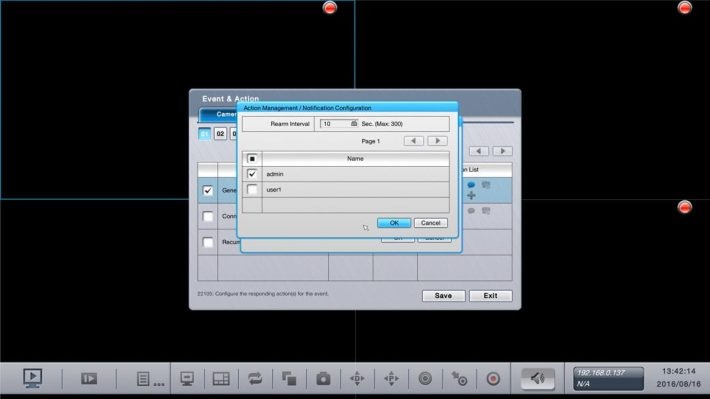
On the Notification Configuration screen, check the IDs of the users that should receive the push notification. You can also set the re-arm interval to configure the time interval (in seconds) between alerts. Press OK, then save until you exit the menu system and return to the live view of your cameras
Android App Push Notification
In order to receive push notifications from your NVR on an Android mobile device, you must log in to the Android app using the user ID that you configured for push notifications on the NVR. IMPORTANT NOTE: at the time CCTV Camera Pros wrote this article, the Zavio CamGraba Android app was not yet updated to support push messages. The i-Security app does support push messages. i-Security is the original manufacturer that makes the mobile apps for Zavio and NUUO.
It is the same as the Zavio Camgraba app, just a different brand, and name. If you want to use push notifications, please download the i-Security app in the Google Play store. The user interface of the i-Security app is exactly the same as the Zavio CamGraba app. You can learn more about the featured and controls built into the Android app here. You can read an NVR setup article for the Android app here.
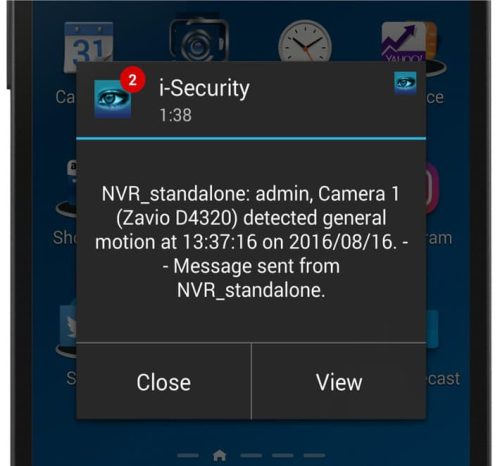
When the IP camera detects motion, the NVR sends out a push notification to the Android app. The above screenshot shows what it looks like when the push message is received and it appears in the alert banner area on an Android mobile phone. It also works on Android tablets
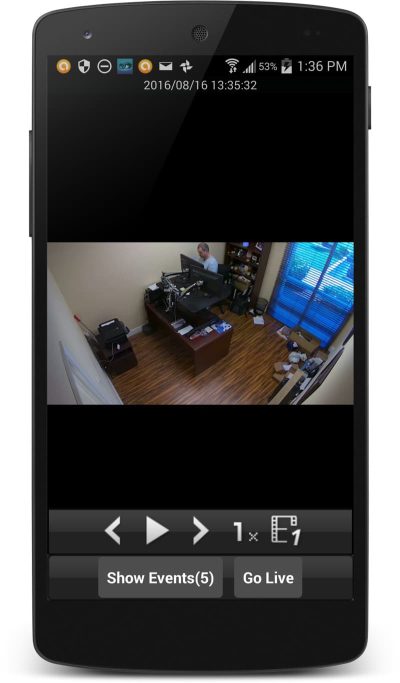
When the user taps on the push notification, the app opens and the user is brought to the recorded video playback screen. The recorded video of the event is queued and ready to play. The user can tap on the play button on the controls in the lower part of the app. The controls also allow the user to pause, reverse, speed up and slow down the video playback.
The “Show Events link” can be tapped to open the events log in the app.
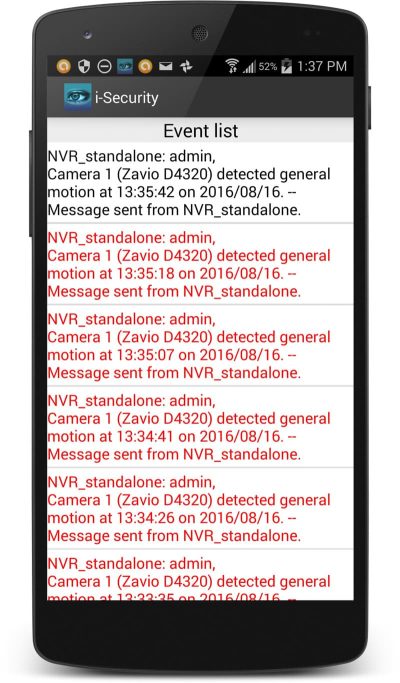
This is what the events log looks like in the Android app. it contains a list of all the events that recently occurred on the DVR that triggered video surveillance recording. The user can tap on any of the events in the log to open the video playback screen to view that event.
iPhone App Push Notification
In order to receive push notifications from your NVR on iPhone, you must log in to the iPhone app using the user ID that you configured for push notifications on the NVR. IMPORTANT NOTE: at the time CCTV Camera Pros wrote this article, the Zavio CamGraba iPhone app was not yet updated to support push messages. However, the i-Security app does support push messages. i-Security is the original manufacturer that makes the mobile apps for Zavio and NUUO.
It is the same as the Zavio Camgraba app, just a different brand, and name. If you want to use push notifications, please download the i-Security app in the Apple app store. The user interface of the i-Security app is exactly the same as the Zavio CamGraba app for iOS. You can learn more about the featured and controls built into the iOS app here. You can read an NVR setup article for the iPhone app here.
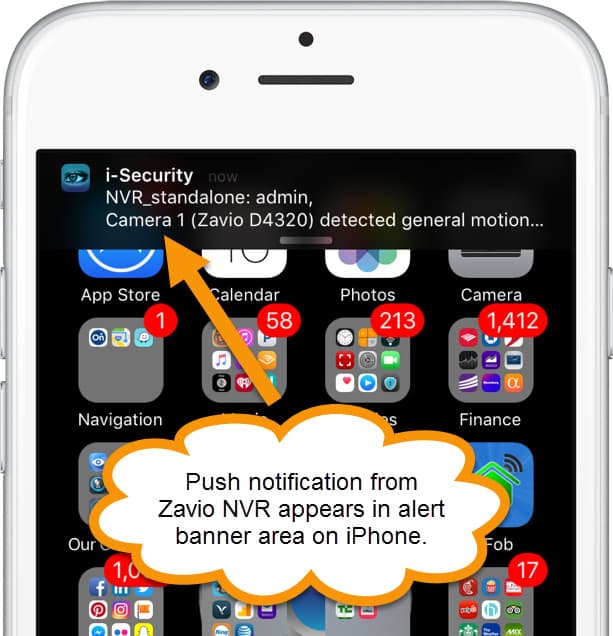
When the IP camera detects motion, the NVR sends out a push notification to the iPhone app. The above screenshot shows what it looks like when the push message is received and it appears in the alert banner area on iPhone. It works the same on iPad devices.
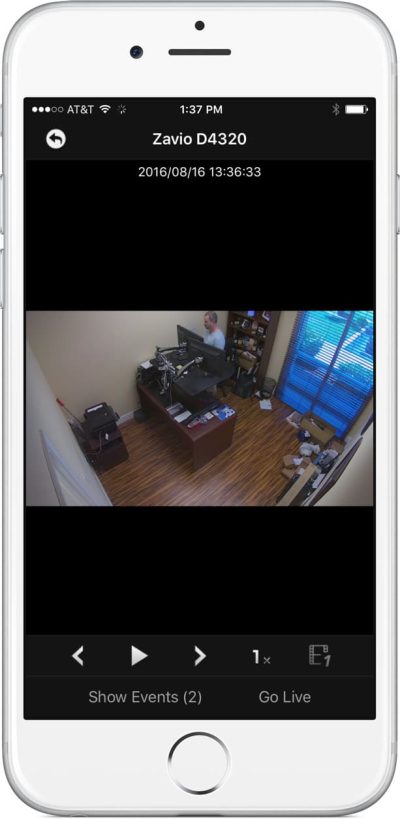
When the user taps on the push notification the app opens and the user is brought to the recorded video playback screen. The recorded video of the event is queued and ready to play. The user can tap on the play button on the controls in the lower part of the app. The controls also allow the user to pause, reverse, speed up and slow down the video playback.
The “Show Events link” can be tapped to open the events log in the app.
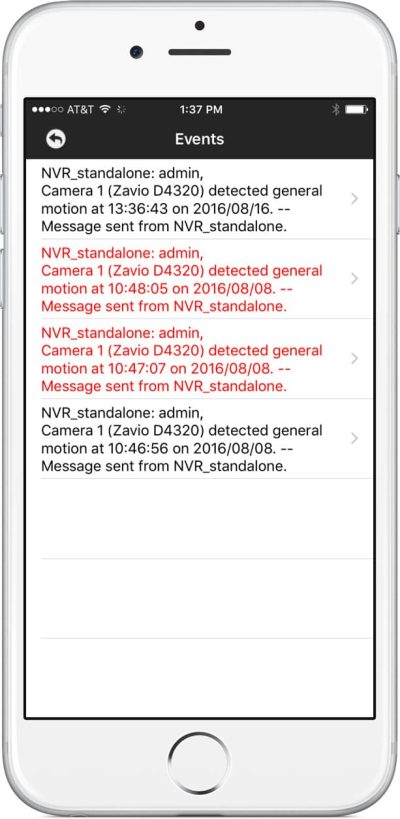
This is what the events log looks like in the iPhone app. it contains a list of all the events that recently occurred on the DVR that triggered video surveillance recording. The user can tap on any of the events in the log to open the video playback screen to view that event.
Mobile App Downloads
Download the latest i-Security app for iOS here.
Download the latest i-Security app for Android here.
