Here are the steps about how to set up the push function for the security system.
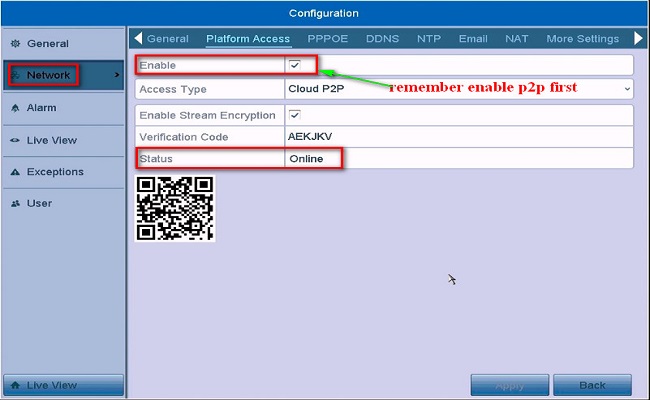
1. Log into the Annke DVR/NVR system, then go to Menu–>Configuration–>Network–>Platform Access. Make sure the status is ‘Online‘.
Note: If the status is ‘Offline‘, please refer to this instruction to make it online at first: What to do if P2P status shows offline?
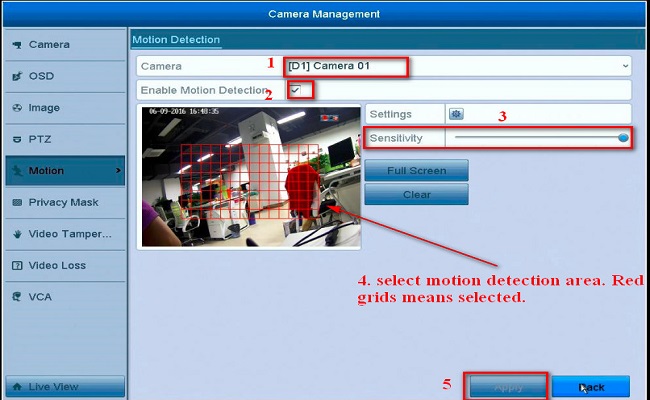
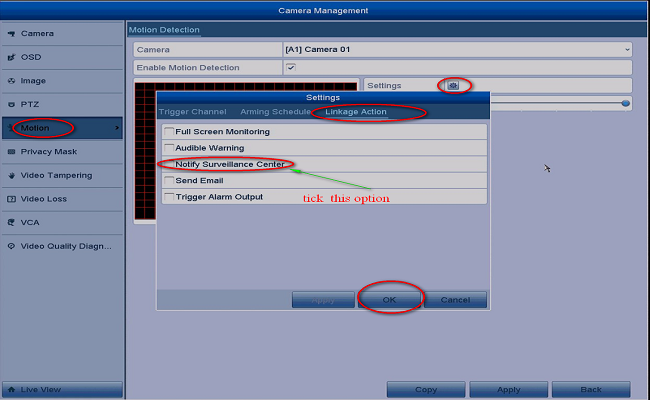
2. Go to Menu–>Camera–>Motion to enable motion detection and Notify Surveillance Center.
3. Add the system to app Annke Vision. Here is the instruction: How to connect system
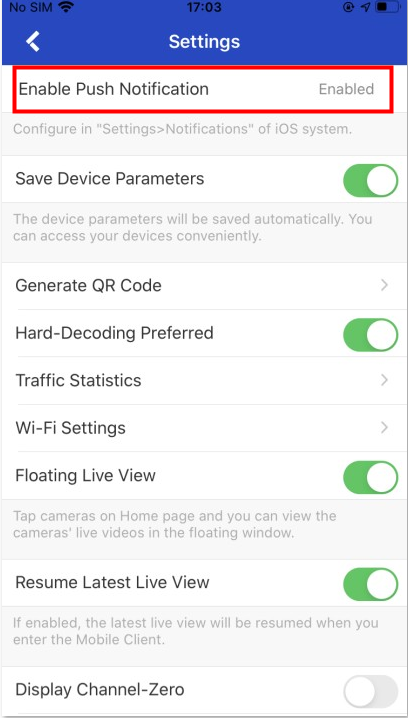
4. Enable the alarm push function on the app.
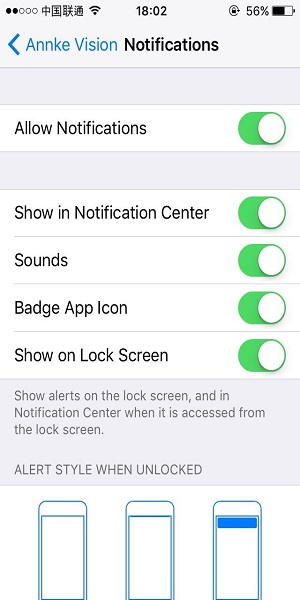
Go to the APP setting to Enable Push Notification:

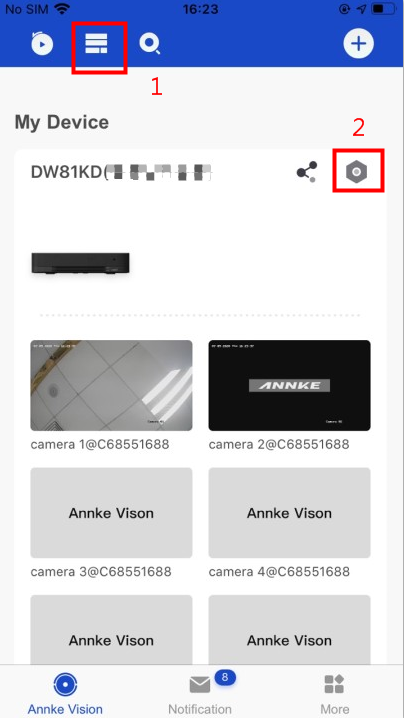
5. When finishing the APP setting, please connect the APP setting to the exact device. Go to the live view interface and enter the Setting page here:
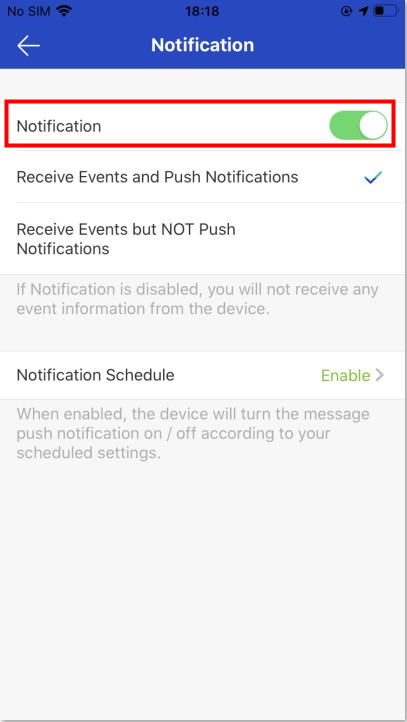
6. Finally, please go to Alarm Notification to enable it and set up the Notification Schedule:

Note:
For the notification schedule button description:
A. Disable: Default is disabled, disable means you can receive the push always. 24h*7
B. Enable: You can enable it to set your own notification schedule.
Such as Monday: 00:00–08:00 + 15:00–18:00 ( It default is 00:00–23:59, so if you want to add multiple time segments, please edit the default 00:00–23:59 to your first-time segment, and then add the second one. Or you will get an error prompt message: The time segments cannot be overlapped.) And please note that the setting will be effective from the next day.
So if you want to enable the push function always, we suggest you disable the notification schedule, and the push function will effective immediately.
When there is motion detection, your phone will receive a push.
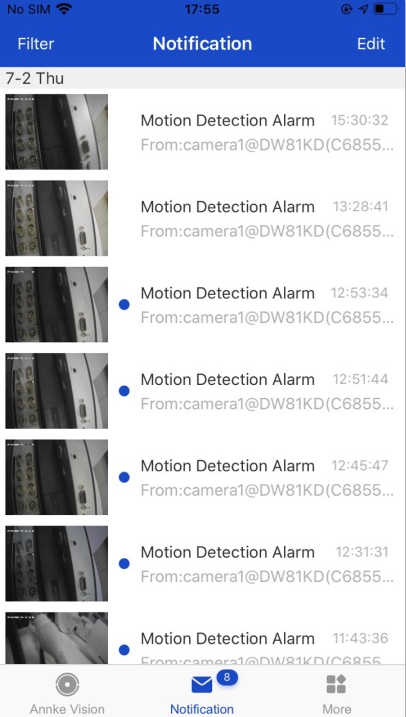
If you cannot receive a push, please double-check to make sure your phone enabled notification for the app Annke Vision.
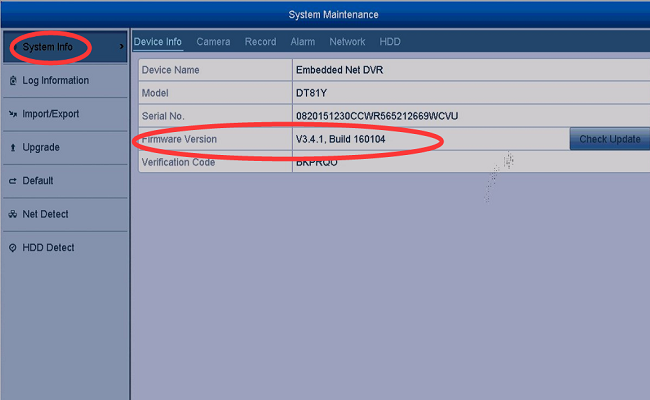
If you cannot receive a push, please contact support@annke.com with your system‘s firmware version and build date like the picture below.
