Overview
Surveillance Station provides strong device compatibility. Besides over 7,600 IP cameras supported, Synology has also secured a membership with ONVIF1 and supports all ONVIF protocol cameras. For cameras of renowned brands 2, Surveillance Station offers the Generic3 setup function where the system will automatically analyze camera functions and load the settings. The User Define function provides the best device compatibility and accommodates various types of network video streaming devices. As long as your device supports RTSP streaming, recorded footage can be saved to Surveillance Station.
Note:
- Before installing an IP camera to Surveillance Station, please check if it is listed on the Surveillance Station IP camera Support List. If so, please refer to Add an IP camera to Surveillance Station for complete setup information.
1. Launch IP Camera
To launch IP Camera, do either of the following:
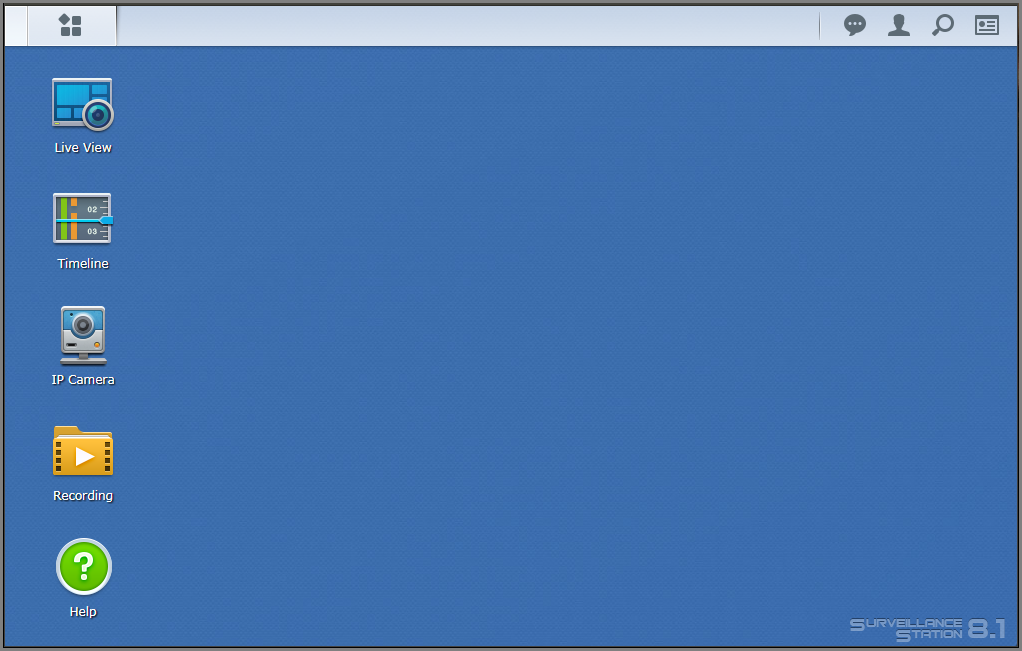
- Launch Surveillance Station and click IP Camera.
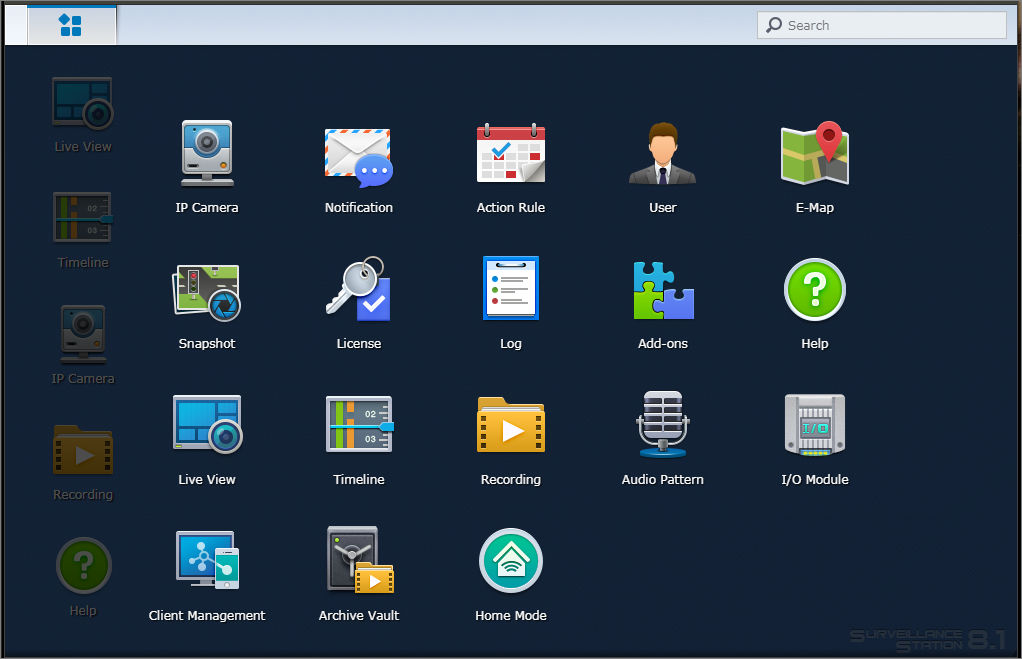
- Launch Surveillance Station and go to Main Menu > IP camera.
2. Add Camera
To add a camera to Surveillance Station, choose one of the following options:
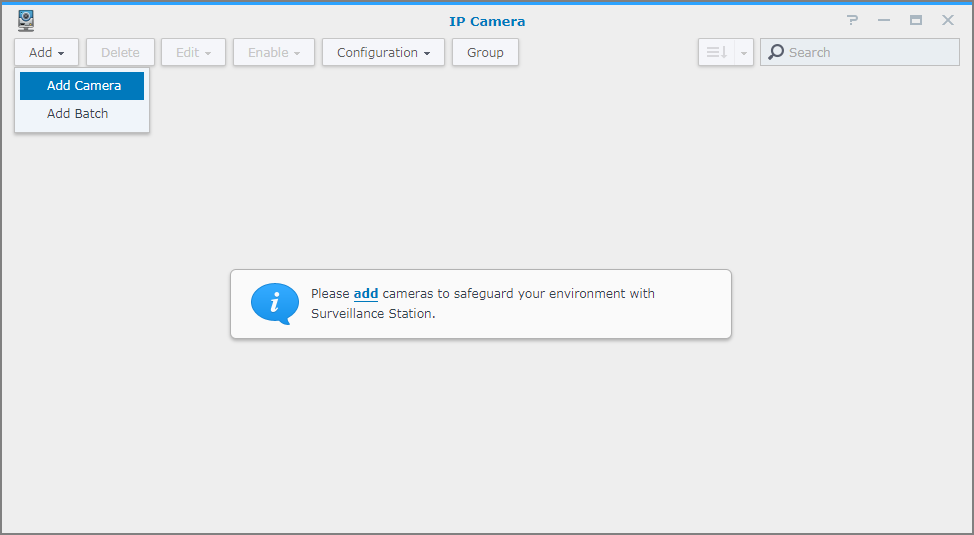
- If there are no already connected cameras, click Add in the dialogue box to activate Add Camera Wizard.
- In the top left corner, click Add > Add Camera to activate Add Camera Wizard.
3. Set up camera information
3.1 Load information through search
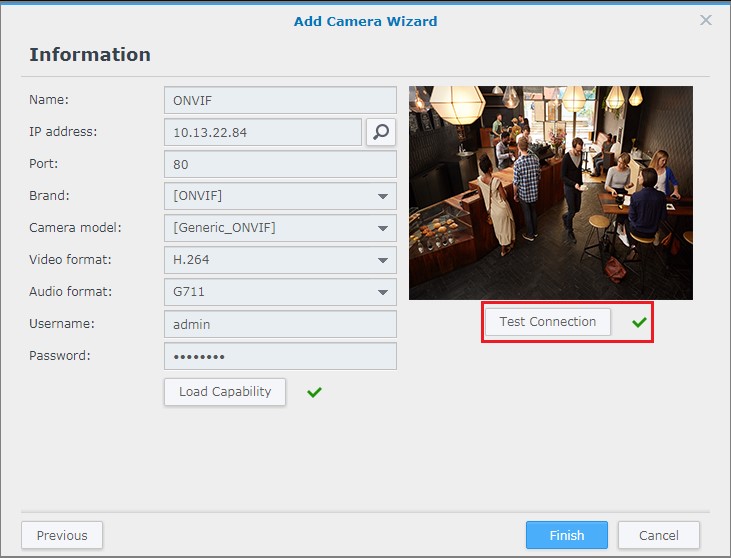
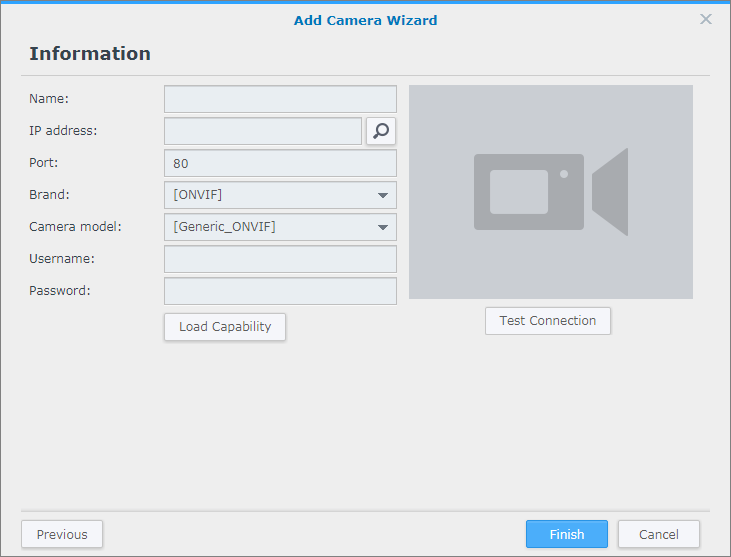
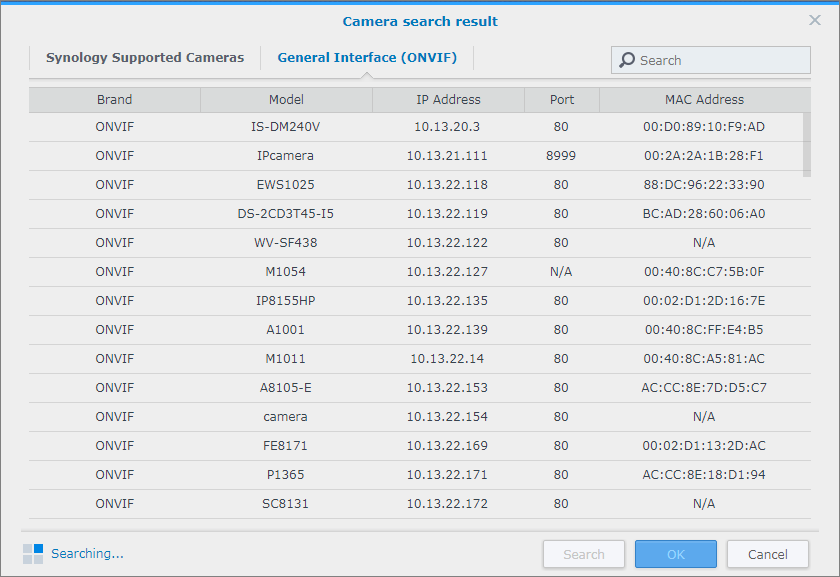
- Under Information, click the Search button to open the Camera search result window, and go to the General Interface (ONVIF) tab.
- Select the camera you wish to access and click OK. Surveillance Station will search for connectable ONVIF devices and automatically load the device Name, IP address, Port, and other settings.
3.2 Load information by brand name or camera model
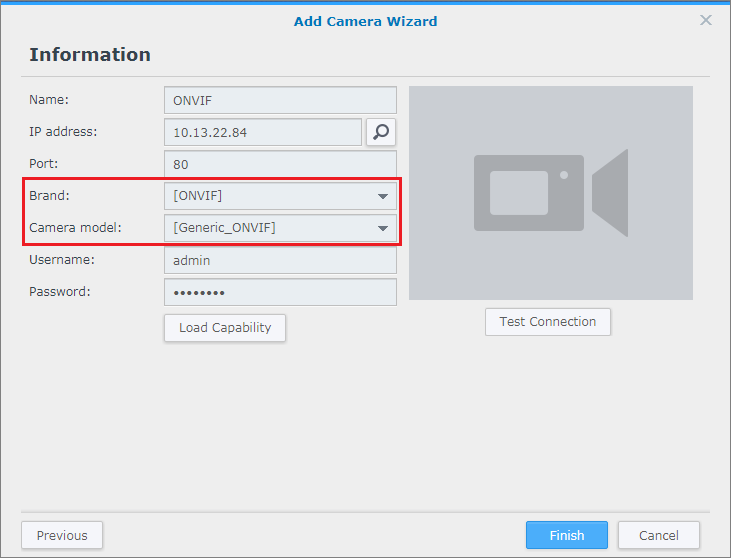
- Select [ONVIF] or your camera’s brand name from the Brand drop-down menu, then select the correct model from the drop-down menu under Camera model.
- Enter the Username and Password.
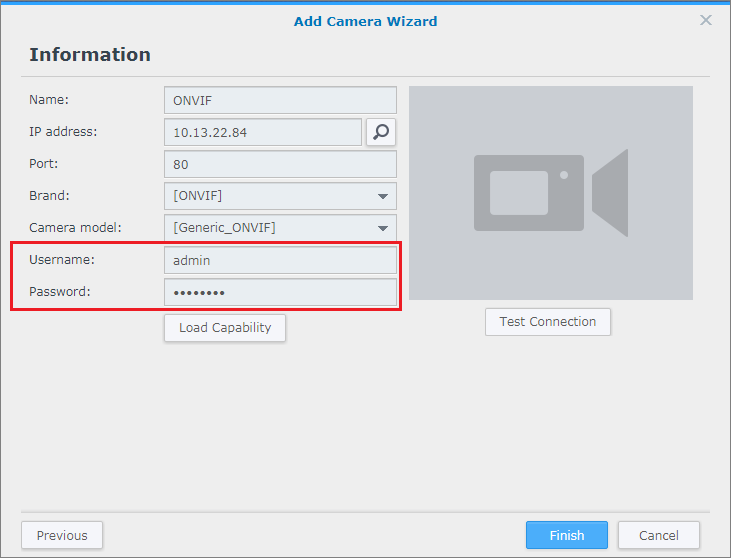
- Click Load Capability. Surveillance Station will try to connect to your device.
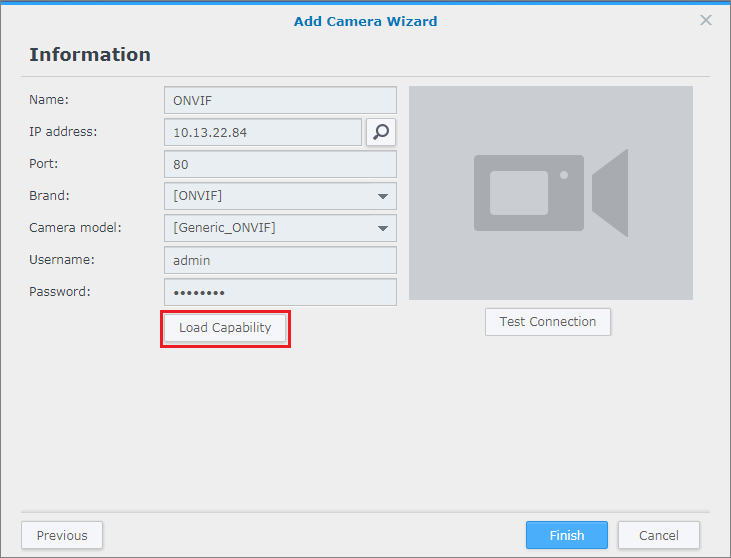
- A green check will appear after Load Capability is completed. Depending on your camera model, more settings may be needed. The settings will appear on this page if you are in Quick Setup mode or be shown on the next page in Complete Setup mode.

3.3 Define your camera
- Select [User Define] from the Brand drop-down menu. You will be directed to the page below.

- Confirm what type of file transfer you prefer. Choose between Streaming – RTSP, Streaming – HTTP, and File.

- Set Path in the format of [Username[:Password]@]IP:port/video_path. If you have any concerns, please contact your camera manufacturer.

3.4 Test connection
- Click Test Connection to make sure Surveillance Station is connected to your device4. If you are now connected to your device, a green check will appear and you can see the live feed in the box to the right5.


- Click Finish to finish the Information setting. If you choose Complete Setup, more video settings will be shown in the next page. If you chose Quick Setup, Surveillance Station will complete the action with default settings. See How to add an IP camera to Surveillance Station for more information.
3.5 Re-load capability
If you choose Generic in step 1 of Load information by brand name or camera, and your camera firmware, Surveillance Station, or Device Pack versions is updated after your initial setup, try clicking the Load Capability button to check if any extra camera features are available.

_____
1 ONVIF (Open Network Video Interface Forum) is a forum that promotes the use of a global standard for the interface of IP-based security products that provides effective interoperability. Surveillance Station now supports Profile S for video streaming and Profile G for edge storage.
2 Surveillance Station now supports AXIS, BOSCH, HIKVISION, DAHUA, and AMCREST Generic setup. See the chart at the end of How to set up a camera that is not on the Support List.
3 Surveillance Station will try to connect to your camera and analyze the supported functions. If new camera models are introduced or an existing model acquires new features, try using Generic setup for more compatibility with the latest functions. Surveillance Station will be updated and be able to analyze and support more cameras and new features.
4 Even if the test connection is successful, some cameras may not function properly. See Why is the camera status displayed as Disconnected even when Test Connection was successful?
5 Some cameras do not provide snapshots, so snapshots may not be displayed properly.
