How to Access System Using P2P via Mobile Application
Description
View your recorder and cameras on the go. With Dahua’s mobile application IDMSS(IOS)/GDMSS(Android) allows you to add Dahua recorders and cameras to the mobile app using P2P.
Prerequisites
- Smartphone (IOS device or Android)
- IDMSS/GDMSS already downloaded in your mobile device.
- P2P must be turned on from the recorder and connected to a network with internet access.
Video Instructions IDMSS/GDMSS version 4.50.000
Step by Step Instructions iDMSS/gDMSS version 4.50.000
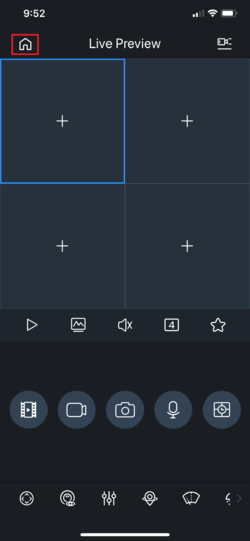
1. Open iDMSS/gDMSS on the phone, and select the home icon located on the top left corner.
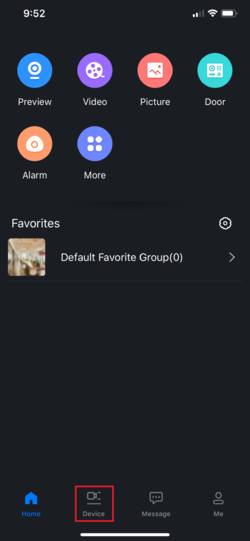
2. Select the “Device” button/icon on the bottom to add the recorder/camera.
3. Select the “+” sign then select “Scan” to add the device.
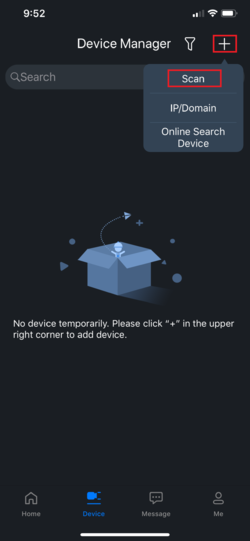
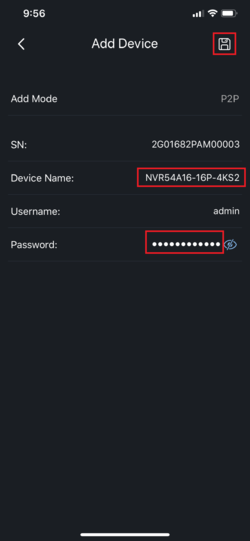
5. Input the device for easy identification. It’s required to input the password for the added device then select the save icon located on the top right corner.
Step by Step Instructions IDMSS/GDMSS version 4.20.000
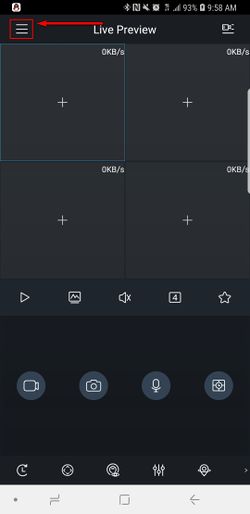
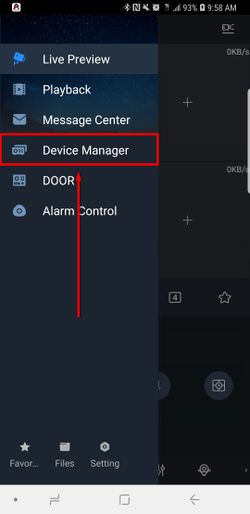
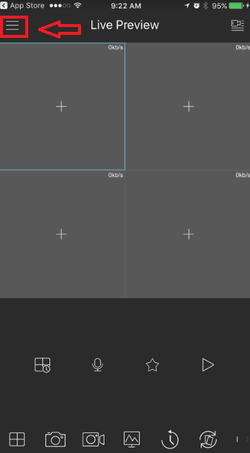
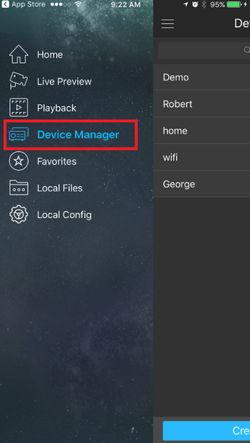
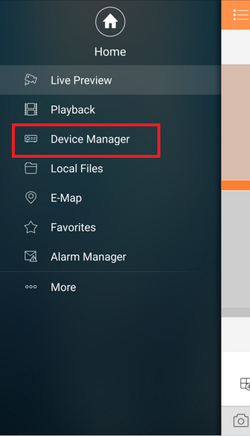
1. Select the Menu Icon
2. Select “Device Manager”
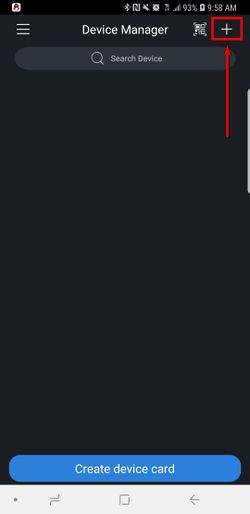
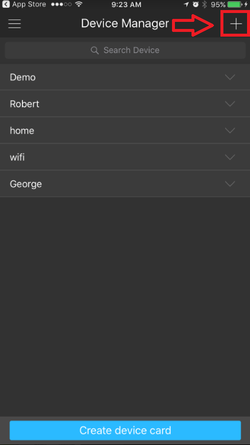
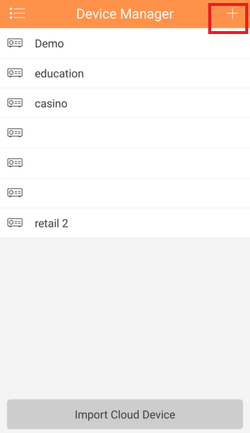
3. Select the Add Icon
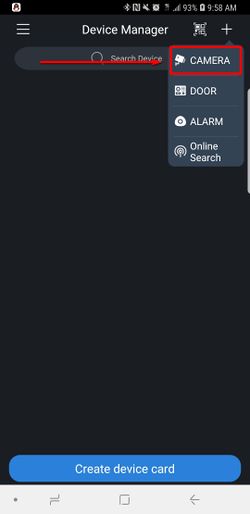
4. Select “Camera”
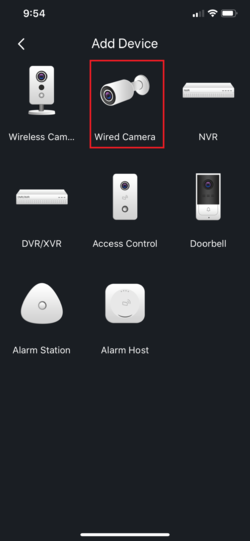
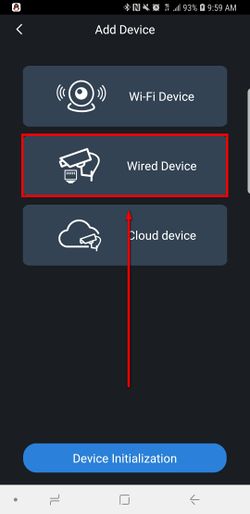
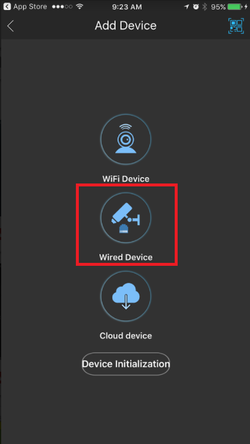
5. Select “Wired Device”
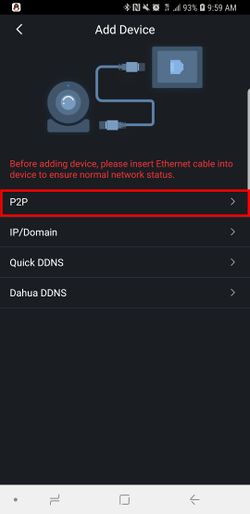
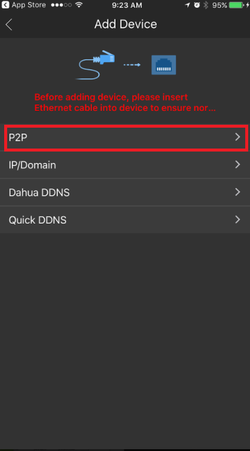
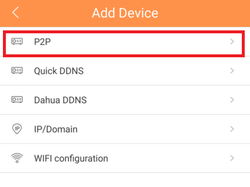
6. Select “P2P”
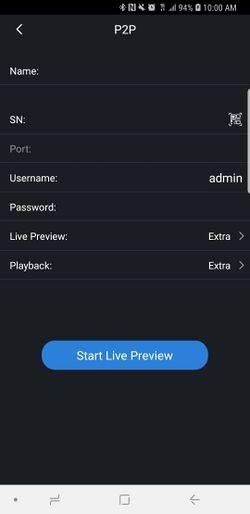
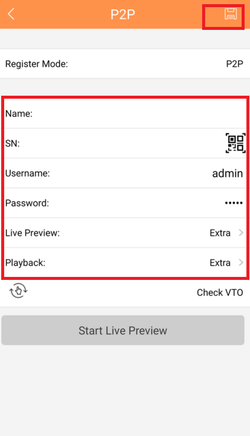
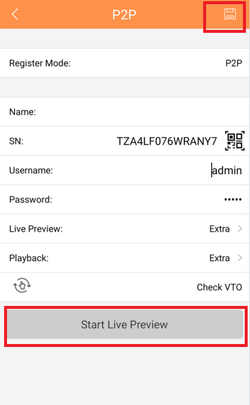
7. Input Info and select “Start Live Preview”
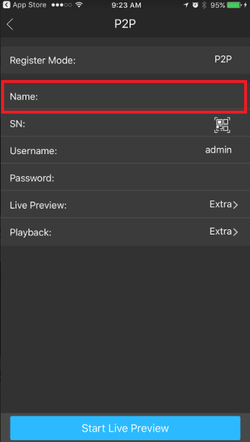
- Name: (nickname)
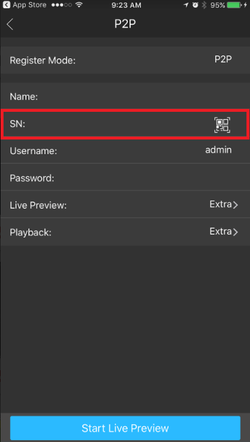
- SN (serial number, you can either scan the QRcode or type the SN manually)
- Port (will auto populate after entering the SN)
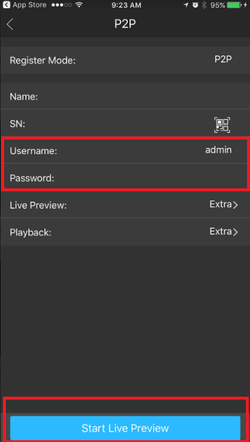
- Username (Username of the recorder’s account)
- Password (Password for that Username)
- Live Preview (Extra=Substream, MAIN= Mainstream)
- Playback (Extra=Substream, MAIN= Mainstream)
Video Instructions IDMSS/GDMSS version 3.50.000
Step by Step Instructions IDMSS/GDMSS version 3.50.000
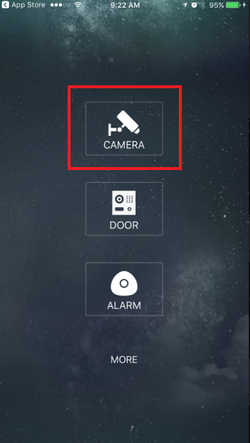
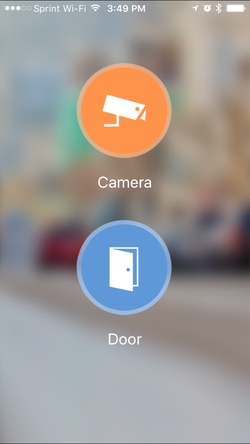
1. From the home screen of the mobile application select “Camera”.
2. Select the menu button.
3. Select Device Manager.
4. Select add button to add device.
5. Select Wired Device.
6. Select P2P.
7. Name your device -> tap the QR code to bring up QR code scanner.
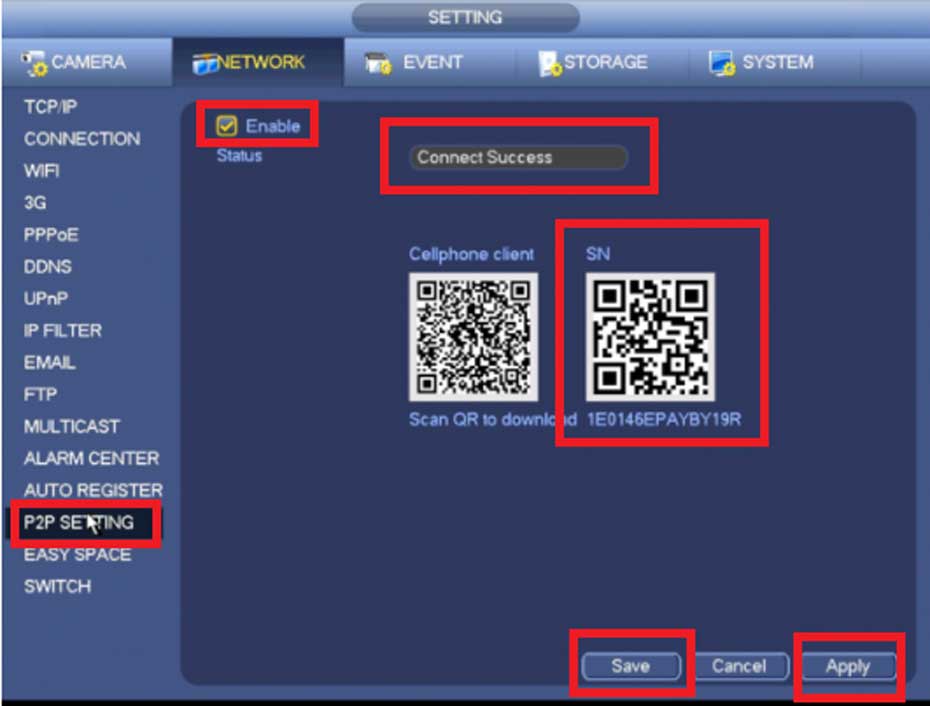
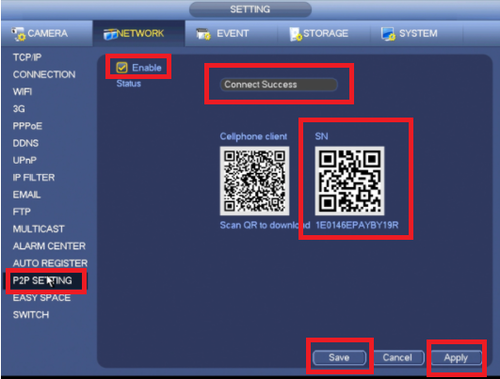
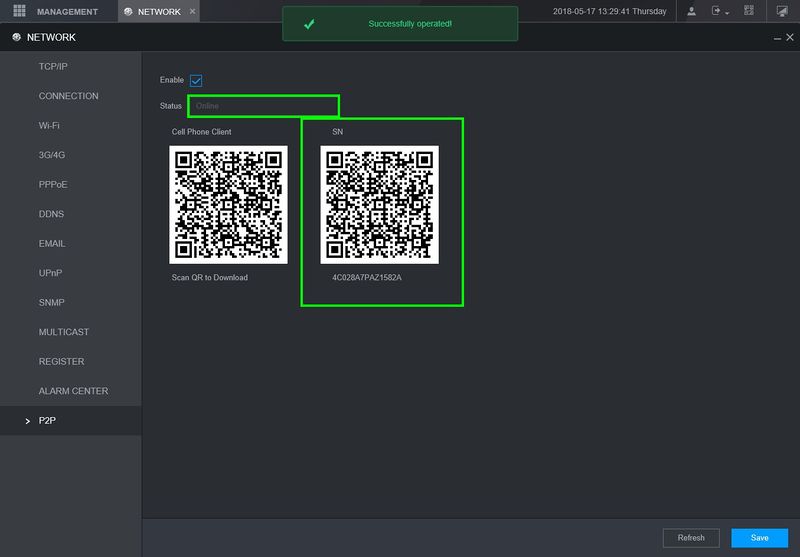
- With your mobile device in hand, go to your local recorder, navigate to the P2P/Easy4IP settings and scan QR code to the right hand side. You will also see the SN (Serial Number) of the recorder underneath the QR code, you may use that to manually type in the SN into the SN field of the IDMSS/GDMSS mobile app. Note: you must have P2P/Easy4IP “enabled” from the local recorder with a status that either shows “online” or “connect success”.
8. Input the username -> password -> and select live preview. By selecting “Start live preview” device will be automatically saved into the application.
IDMSS/GDMSS Version 3.40.003
Video Instructions Version 3.40.003
Step by Step Instructions Version 3.40.003
1. Click, “Camera”
2. Select the Menu Icon
3. Select “Device Manager”
4. Select the Add Icon
5. Select “P2P”
6. Choose a name for the device → Scan in QR code for SN number which you can access from the physical recorder under the main menu → Setting → Network → P2P. You may input SN number manually which can also be found under the recorder. → Enter Username and Password. For best results , leave Live Preview and Playback on the Extra Stream.
7. Select the Disk Icon to save → Select Live Preview, At which time the app will connect to all cameras.
Create port forwarding rule in the router
Description
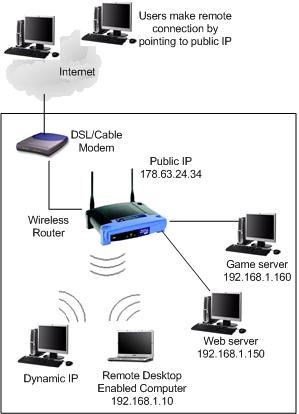
Port forwarding is a function of network routers that allows a user to configure specific communication ports to be routed to devices on an IP (Internet Protocol) network, such as a computer, DVR, or IP camera.In this case for CCTV equipment, it allows the user to view and control CCTV equipment remotely. Follow the step by step instructions and the instructions your manufacturers hardware to setup port forwarding, or try PortForward.com to search for your routers settings.
Prerequisites
- Network Video Recorder
- Connection to the internet
- Access to the router(s) and/or modem
- A computer that can access the network
Video Instructions
Step by Step Instructions
1. Connect NVR to network with a CAT5 cable.
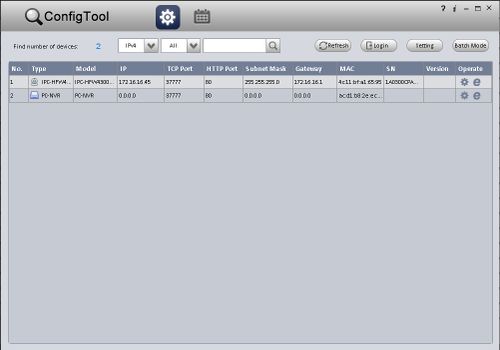
2. Download and install ConfigTool from DahuaSecurity.com, under Support->Download Center->Software
3. Run the ConfigTool.
4. The ConfigTool should display your IP Camera. Click the, “![]() ” icon to open Internet Explorer and access your NVR.
” icon to open Internet Explorer and access your NVR.
5. Configure Internet Explorer security settings to allow the plugs to work. Link to Internet Explorer Setup
6. Login with the default credentials: User Name: admin Passsword: admin
7. Under, Main Menu -> Setup -> TCP/IP Change the IP Camera to, “Static” if the camera is currently set to, “DHCP”
8. Open another tab and enter the, “Gateway” address listed under your NVR’s Network settings. Example: 192.168.1.1, 192.168.0.1, 10.0.10.1
9. Login to your gateway and locate the, “Port Forwarding” section.
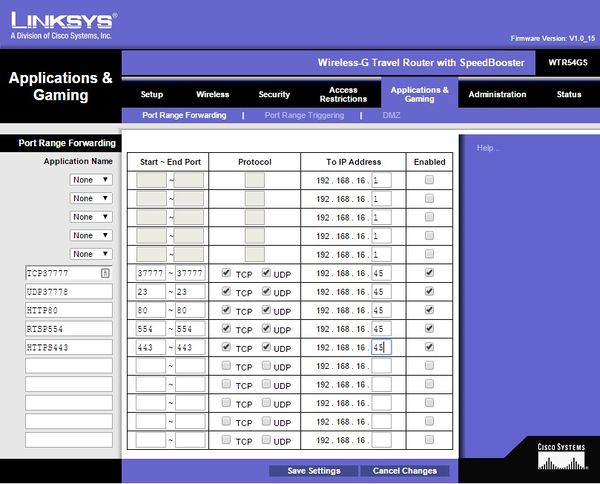
10. Create port forwarding rules for each port you wish to forward for the NVR. (Usually you will only need to forward the HTTP and the TCP port.) Default Ports: TCP: 37777 UDP: 37778 HTTP: 80 RTSP: 554 HTTPS: 443
11. The end result should look like the below image. We used a Cisco router for this example.
12. Hit, “Save” in the gateway interface, and open another tab.
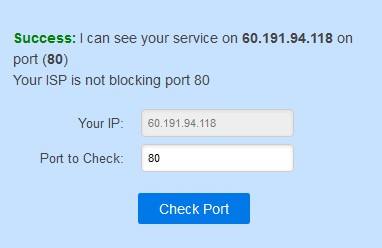
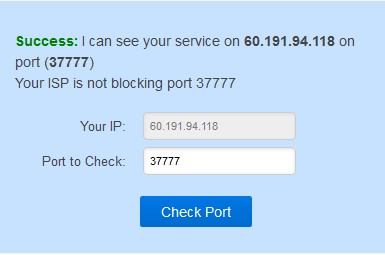
13. Go to, “www.canyouseeme.org” and check that the ports you opened on the gateway.
New GUI – P2P Setup
Description
This article will go over initializing P2P on our New GUI devices
Prerequisites
- Recorder with New GUI
- Internet Access to the recorder
Step by Step Instructions
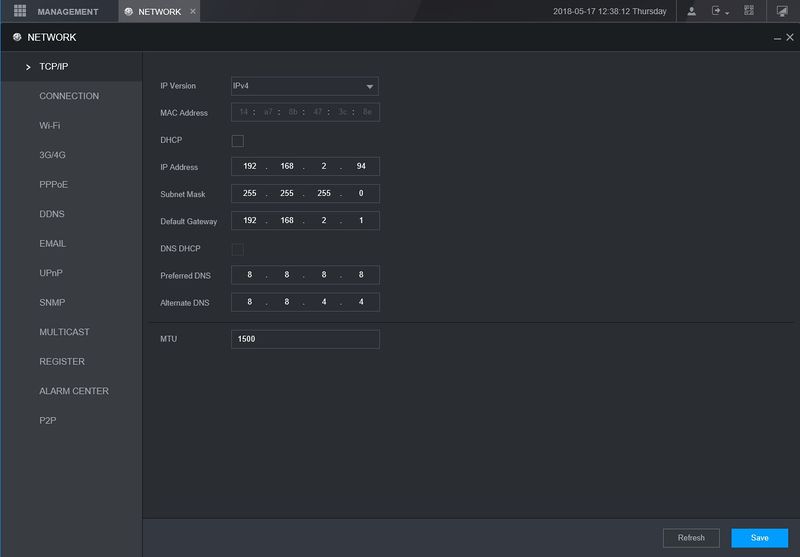
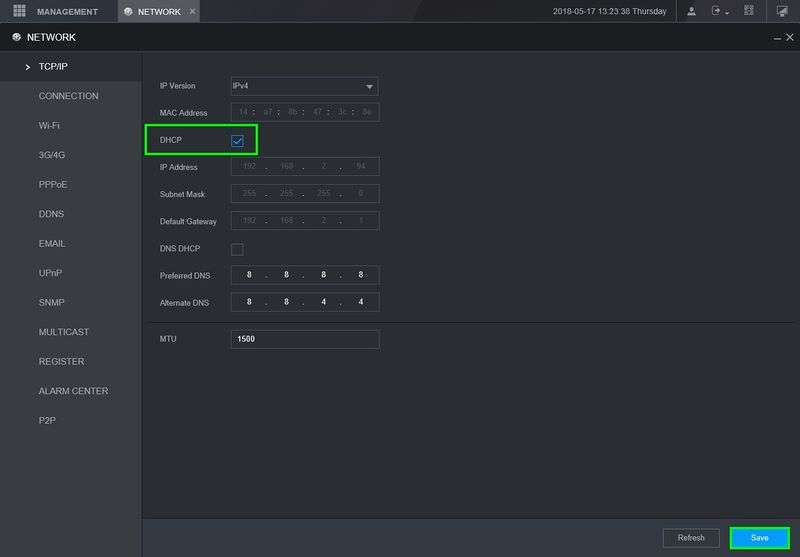
1. Under “Management” go to Network>TCP/IP
2. You can either set the device on a static ip or turn DHCP on to automatically grab an IP from the network. Save any changes
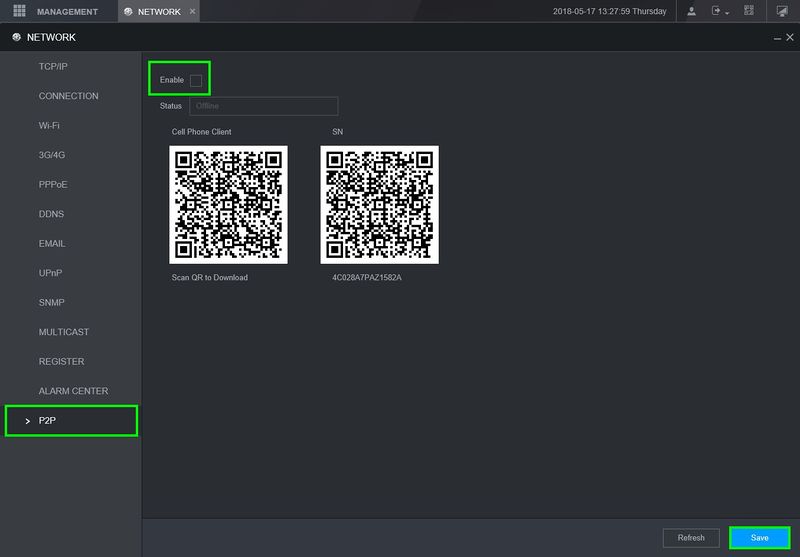
3. Locate P2P tab on the lower left and enable P2P
4. After saving it you should see the the status change to “Online”, You can now use this device for remote viewing on our software
- If you run into any issues getting the P2P to show online, reboot the device and try again. If that still doesn’t work you may have a firewall on the network that is blocking the connection to the P2P servers
