Hikvision Hik-Connect Device management In this Article you can add devices to the Mobile Client and configure device functions such as video and image encryption.
Activate an Inactive Device
When adding a device, if the device is not activated, a window will pop up to ask you to activate the device.
The device and the phone running the Mobile Client should be in the same LAN.
Note:
For the access control device, you should activate it via other clients (e.g., iVMS-4200 client software).
Add a device.
Note:
See Add Device for Management for details.
Hikvision Hik-Connect Device Management

Load More : What is Hik-Connect, and How to setup Hik-Connect app
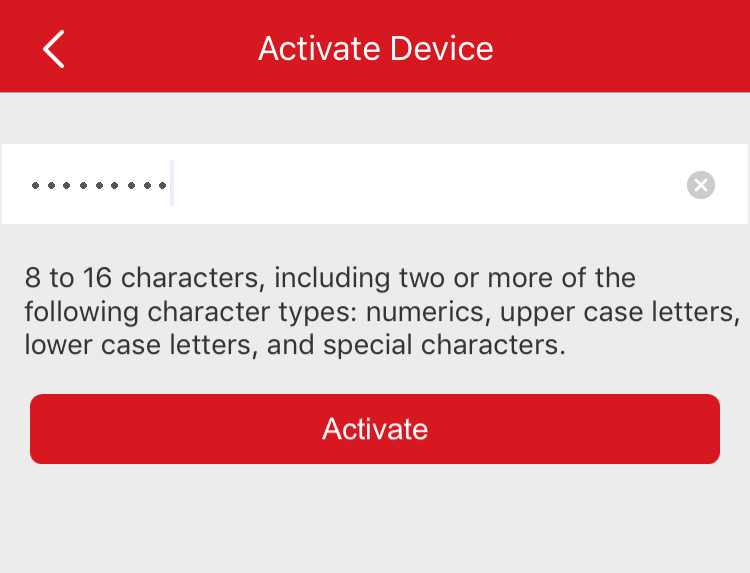
On the Activate Device page, tap Set Device Password.
Create a password.
Figure 1. Activate Device

Add Device for Management
You need to add devices to the Mobile Client first so that subsequent operations such as live view and playback can be available. If you want to receive alarm event information from a device, you should add it by scanning QR code or Hik-Connect domain.
Note:
-
For details about adding Pyronxi control panel, see Add Pyronix Control Panel to Mobile Client.
-
For details about managing alarm event information, see Alarm Notification.
Connect Offline Device to Network
When adding a device to the Mobile Client, if the device is offline, you should connect the device to a network first. The Mobile Client provides the following four methods for connecting offline devices to networks.
Note:
For access control device, you should connect it to a network via other Clients (e.g., iVMS-4200 client software).
Connecting to Wired Network
Using this method if a router is available for the device to connect to.
Note:
Make sure the device is powered on.
Connecting to Wireless Network
Use this method if a wireless network is available for the device to connect to. “Device” here excludes wireless doorbell, wireless security control panel, and Mini Trooper (a kind of battery camera).
Note:
-
Make sure your phone has connected to a Wi-Fi network before using the method.
-
The device should support connecting to wireless network.
Connecting to Network by Wi-Fi Configuration
You can use this method to connect wireless doorbell to the network by using the doorbell to scan the QR code generated by the Mobile Client.
Tap Connect to a Network on the Result page and then follow the instructions on the subsequent pages to connect the device to the network.
Connecting to Network by Access Point
In the Mobile Client, Access Point (AP) refers to a networking hardware device (e.g., wireless doorbell or wireless security control panel), which can provide a Wi-Fi network for the phone to connect to.
Note:
You should have turned on WLAN in the phone’s operation system.
Tap Connect to a Network on the Result page, select Wireless Connection as the connection type, and then follow the instructions on the subsequent pages to complete the connection process.
Enable Hik-Connect Service for Device
Hik-Connect is a cloud service provided by Hikvision. When adding a device via Hik-Connect Domain or scanning QR code, the service should be enabled. You can enable the service via the Mobile Client, the device web page, or iVMS-4200 client software. This section introduces how to enable the service via the former two methods.
Enable DHCP Function on Device Web Page
You can enable DHCP by following the steps below to allow allocating DNS address automatically.
Note:
If you want to enable the access control device’s DHCP function, you should enable it via other systems (e.g. iVMS-4200 client software).
Unbind Device from Its Original Account
When adding a device by scanning QR code or Hik-Connect domain, if the result shows that the device has been added to another account, you should unbind it from the account before you can add it to your account.
Make sure the device and the phone running the Mobile Client are in the same local area network.
Device Settings
On Settings page, you can view and edit a device’s basic information, delete the device, and configure other functions such as video and image encryption, changing device verification code, transferring the device to another user, etc.
Upgrade Device Firmware
For a device added via IP/Domain, its new version can be detected by the Mobile Client. Once detected, you can upgrade the device to its latest version.
Transfer Device to Others
You can transfer the devices in your account to another person’s account. After that, the transferred device will be unavailable for you, and the target account will have all the configuration and operation permissions of the devices.
Video
 .
. .
. and then tap Settings.
 to scan the target account’s QR code and then tap