2MTECHNOLOGY DVR Setup and User Guide, 2M Technology Inc. is a leading provider of comprehensive end-to-end low-voltage audio and video solutions tailored to the needs of the institutional and commercial sectors. Our company provides a complete suite of integrated security solutions encompassing intrusion detection, cutting-edge video surveillance, and advanced audio security technologies. As a trusted industry leader, we ensure unparalleled protection and peace of mind for a diverse range of applications and environments.
How can I reset the password for the new 2M 5000 and 7000 Series DVR?
If you have forgotten the password, please note the date displayed on the monitor of the DVR. Contact 2M Tech Support and give us the model number and the date displayed. We will then give you a reset code that will default the password to 123456. It is recommended to change your password after resetting.
How to Configure for Motion Recording
Motion Recording is when the cameras record only when motion is detected in the camera view. It is recommended to set recording up this way because it greatly saves storage space for more video, and makes it easier to find an event when searching through playback video.
Steps to Configure Motion Recording
The first step to configuring recording based on motion is to set the recording schedule. This tells the DVR what to record and when. In order to find the schedule go to the Main Menu → Storage → Record Plan.
The Plan will show colors with a legend at the bottom that will tell you what each color means.
In order to set the schedule you only need to select the channel you want to set and click on the Setting button next to the row. It will open another window that shows the three different recording options, the days of the week, and different periods. By default, everything is set to normal recording. To set for motion you only need to check the boxes down the column for MD and check Select All for the days of the week. Period is for 24 hours a day by default. Hit App. (apply) and OK.
The last few steps you need to take to finish the configuration is to make sure the channel is set to actually detect motion. Go back to Main Menu → Channel → Detect
Make sure the alarm type is Motion Detect and that Enable is checked. By default, the area is set to full screen and Working Period is 24/7. Linkage Config is configure any notifications for motion detection. Hit App. and OK.
2MTECHNOLOGY DVR Setup and User Guide
Read Also : CCTV Cabling and Installation Guide
How to Set Up 2M Live for Windows
2M Live is the desktop app used to view your DVR cameras on and offsite.
This is valid for models: 2MT-5004, 2MT-5008, 2MT-5116, 2MT-7004, 2MT-7008, 2MT-7116
NOTE: MAC version does not support the P2P option, so your device will only be able to be viewed locally. If you are wanting to view your device from a different location from a MAC then the DVR will need to be port forwarded.
When you first open 2M live it will prompt for a username and password. By default, this is admin/123456. After the first login it is recommended that you change the password.
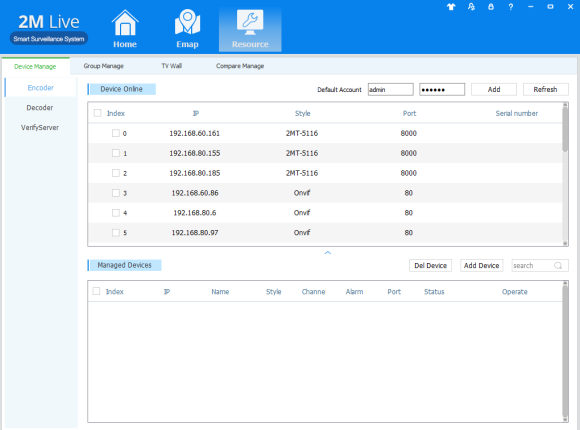
In order to add your device go to Resource Manage → Encoder. If the DVR is on the same network as your computer then it will appear under Device Online. It is possible to add the device if it will only be viewed locally, but if you are wanting to view the cameras from a different location then it will need to be added by P2P.
In order to add a P2P device you will need to click on Add Device in the Managed Devices section. It will open another window, Device Edit. Change Way to Login to P2P Login.
Then it will prompt you to fill out the following information:
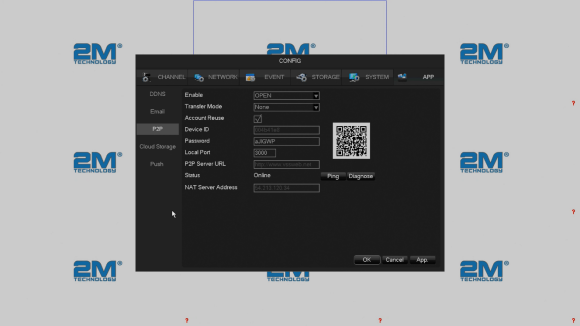
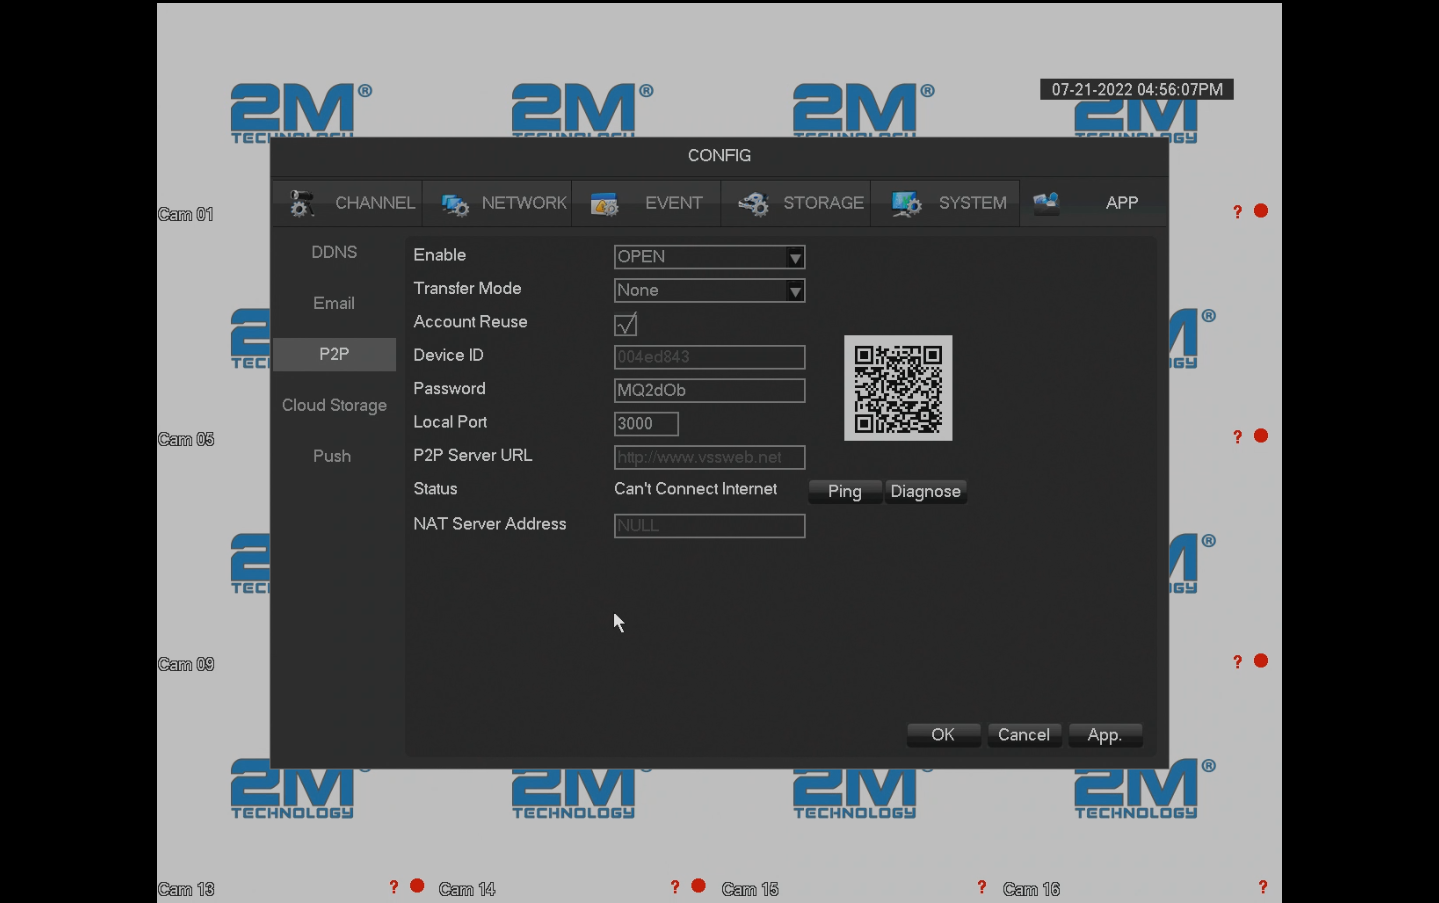
To find this information, we need to obtain it from the DVR menu, so you will need to make sure you are either in front of the DVR at time of set up or that you have saved the information somewhere. Go to Main Menu → App → P2P → Device ID and Password.
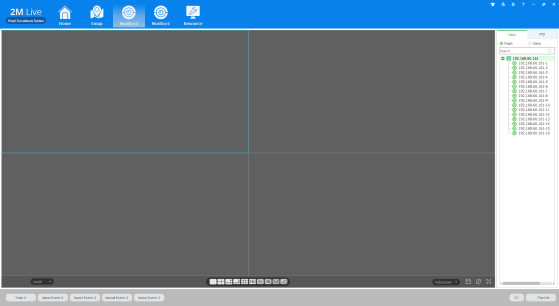
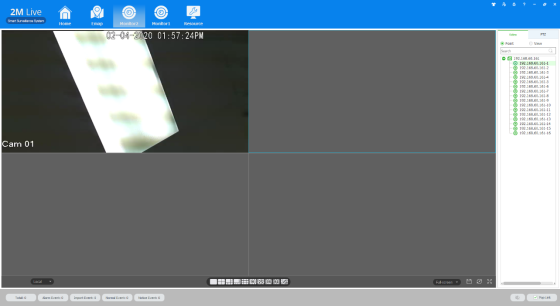
Once the device has been successfully added, to be able to view the cameras, go to back to the menu of 2M Live and click on Realtime Video. This will bring up the live view screen and all added devices will show on the right side of the screen. Click the DVR name and drag it onto the screen to show all camera views.
If only one or a few cameras are wanted in the view screen, then you can click on the plus sign to the right of the device name and it will show a list of cameras. You can click and drag a specific camera to the windows.
At the bottom of the screen you also will be able to edit the number of windows you would like to be open at a time.
How to Set Up 2M Live Pro/VSS Mobile
2M Live Pro and VSS Mobile are apps used to view your DVR cameras on your phone offsite. 2M Live Pro works for iPhone and VSS Mobile works for Android. Both apps have the same layout and options.
This is valid for models: 2MT-5004, 2MT-5008, 2MT-5116, 2MT-7004, 2MT-7008, 2MT-7116
How to Set Up Email Notifications Using Gmail
This is valid for models 2MT-5004, 2MT-5008, 2MT-5116, 2MT-7004, 2MT-7008, 2MT-7116.
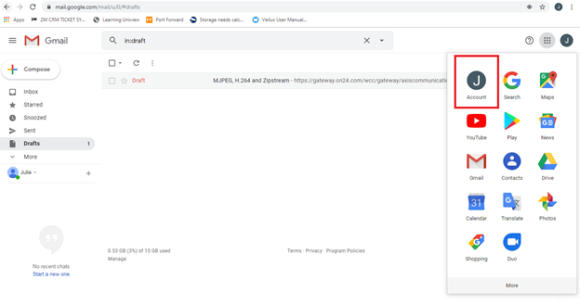
Gmail will have automatic security settings that need to be disabled before configuring email settings in the DVR. You will need a computer in order to edit these settings. First, log on to your Gmail account and then click on the square icon in the upper right corner of the page. Click on Account.
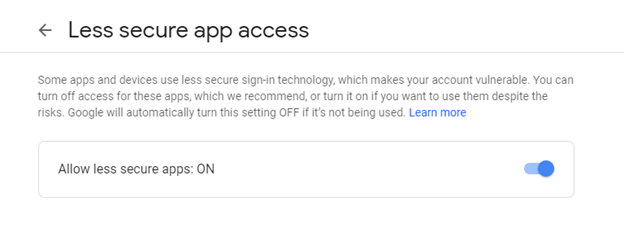
Security → Scroll to the bottom until you find “Less secure app access” → “Allow less secure apps: ON”
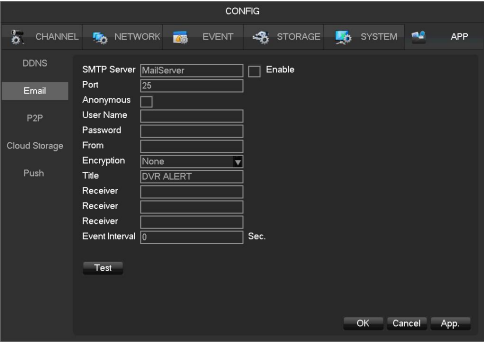
Now that Gmail has been set to allow app access, we can move on to the DVR settings. These can either be configured through the web page or through the DVR itself.
Through the DVR: Main Menu → App → Email
After you input all of the correct settings, please Test to see if the DVR can successfully connect. It will send a test email to the receiver account.
In order to enable email notifications you will need to enable them under the Linkage Config for the camera that you want notifications on.
My P2P setup is no longer working. What do I do?
Please check if your DVR is the model: 2MT-7004, 2MT-7008, 2MT-7016. If it is, then we need to switch your P2P setup to Port Forwarding. Unfortunately P2P is no longer supported for those models. We understand that you might not know how to port forward, so please contact tech support to get help with it.
To confirm that your P2P is no longer working, please check if your DVR shows the message “Can’t Connect Internet” on this menu option: Main Menu > App > P2P:
Before you contact tech support, please make sure you have a computer/PC/laptop connected to the same network as your DVR. This means that your computer needs to be connected to the same router/modem as your DVR. If you do, please download and install the following software: AnyDesk
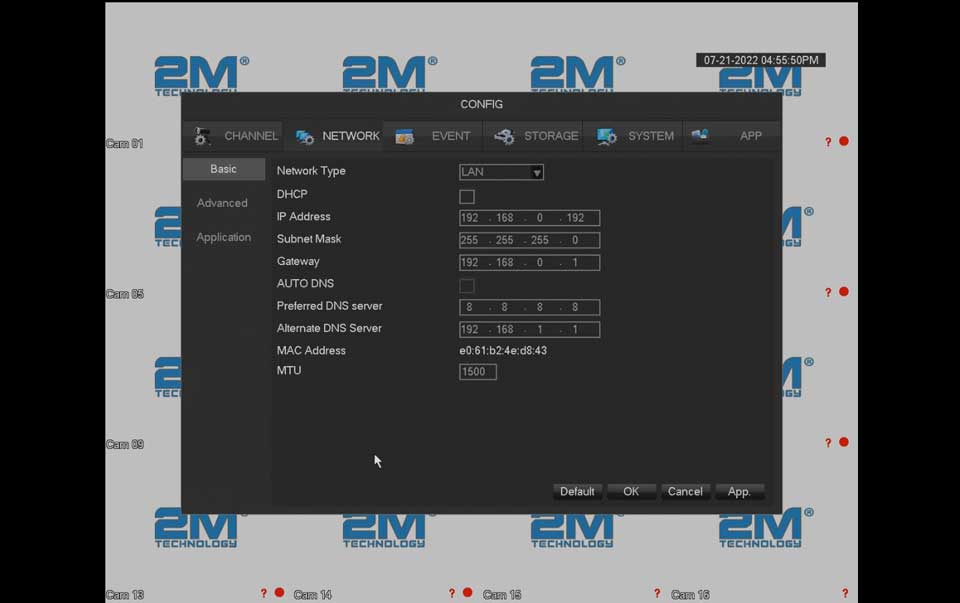
When you have the software installed, please get the following information from your DVR: Your IP Address and if your device is using DHCP. You can find this information on Main Menu > Network > Basic:
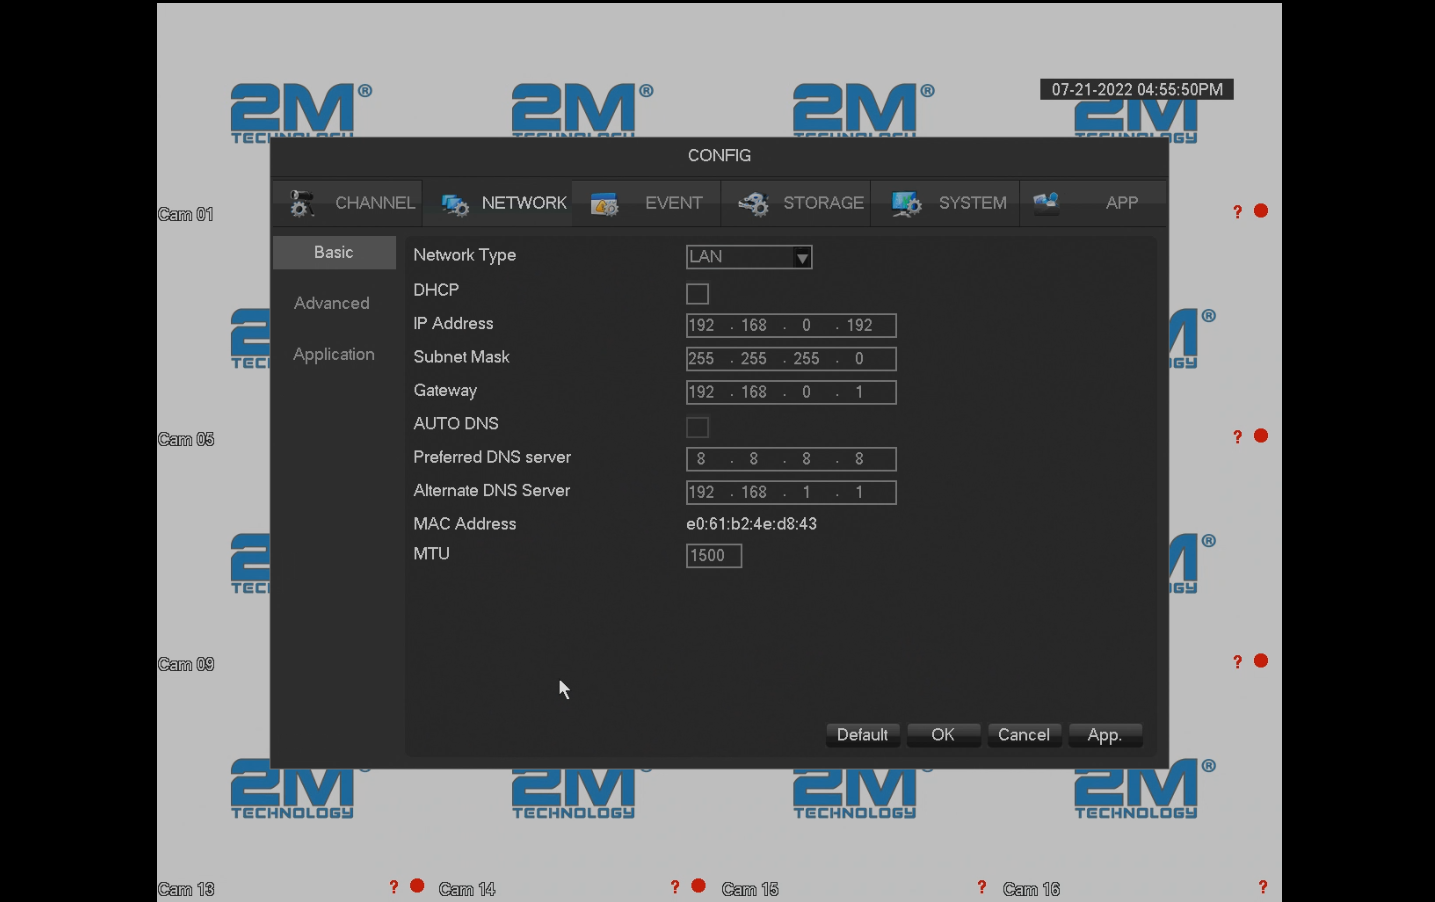 For example, this DVR has an IP: 192.168.0.192. and it also has the DHCP option disabled.
After you have the information taken and AnyDesk installed, please contact tech support and we will help you port forward your device to have it working on your phone/tablet/ipad again.
What is the default password for the 2M 5000 and 7000 Series DVR?
The default username and password are admin/123456. It is highly recommended you change the password once you receive it
This is valid for models 2MT-5004, 2MT-5008, 2MT-5116, 2MT-7004, 2MT-7008, 2MT-7116
What software do I use to view my cameras on my PC, and where can I download the software?
2M Live: 2MT-5004, 2MT-5008, 2MT-5116, 2MT-7004, 2MT-7008, 2MT-7116
Windows Download Link
MAC Download Link
Which phone app do I use to view my cameras?
For iPhone:
2M Live Pro: 2MT-5004, 2MT-5008, 2MT-5116, 2MT-7004, 2MT-7008, 2MT-7116
For Android:
VSS Mobile: 2MT-5004, 2MT-5008, 2MT-5116, 2MT-7004, 2MT-7008, 2MT-7116
How can I reset the password for the 2M 7000-O Series?
This is valid for models 2MT-7232 and older models of 2MT-7000 series.
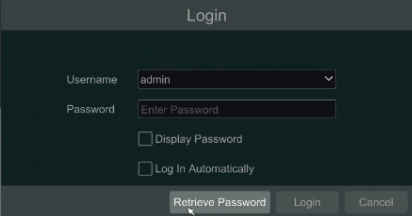
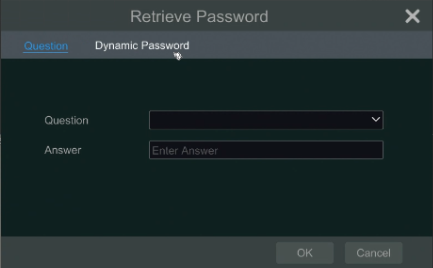
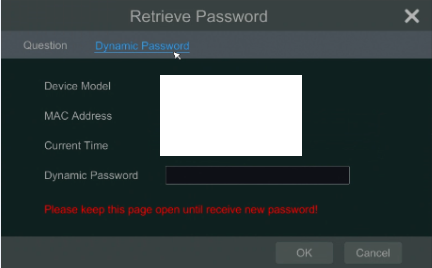
If you have forgotten your password, open the log-in screen on the DVR. It will say “Retrieve Password” on the bottom of the box. Then there will be tabs on the top where you will click “Dynamic Password.”
Contact Tech Support and give them the information that will display on the screen (Model, MAC, Date and Time).
We will then give you the reset password that will default the DVR back to 123456. Please do not close the Dynamic Password window, or the reset process will have to be started again because then it will display a different time which will give a different reset code.
How to Set Up SuperLive Plus
This is valid for our older 2MT-7XXX models and 2MT-7XXX-O models only.
First, you will need to download the application onto your phone and ensure that the DVR is connected to a network. We will focus on obtaining information from the DVR first before we focus on the phone app.
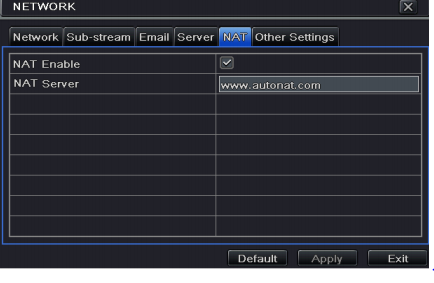
On the DVR, log into the menu, and then navigate to Setup → Network → NAT. Make sure that NAT is enabled (Note: you will not be able to access the cameras if NAT is not enabled).
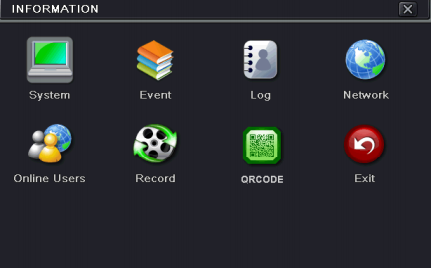
Once NAT has been enabled, a QR code should appear. But if it does not, do not worry. The QR code can be found in a different section. If the QR code does not appear in NAT, it can be found in Information → QRCODE. If you are unable to scan the QR code for some reason, there will also be a serial number that will show below the QR code that you can input manually in order to connect your cameras to your phone.
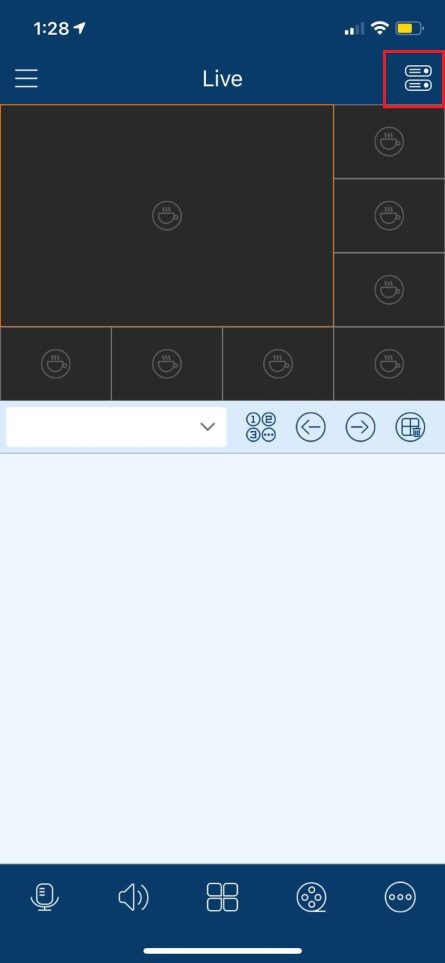
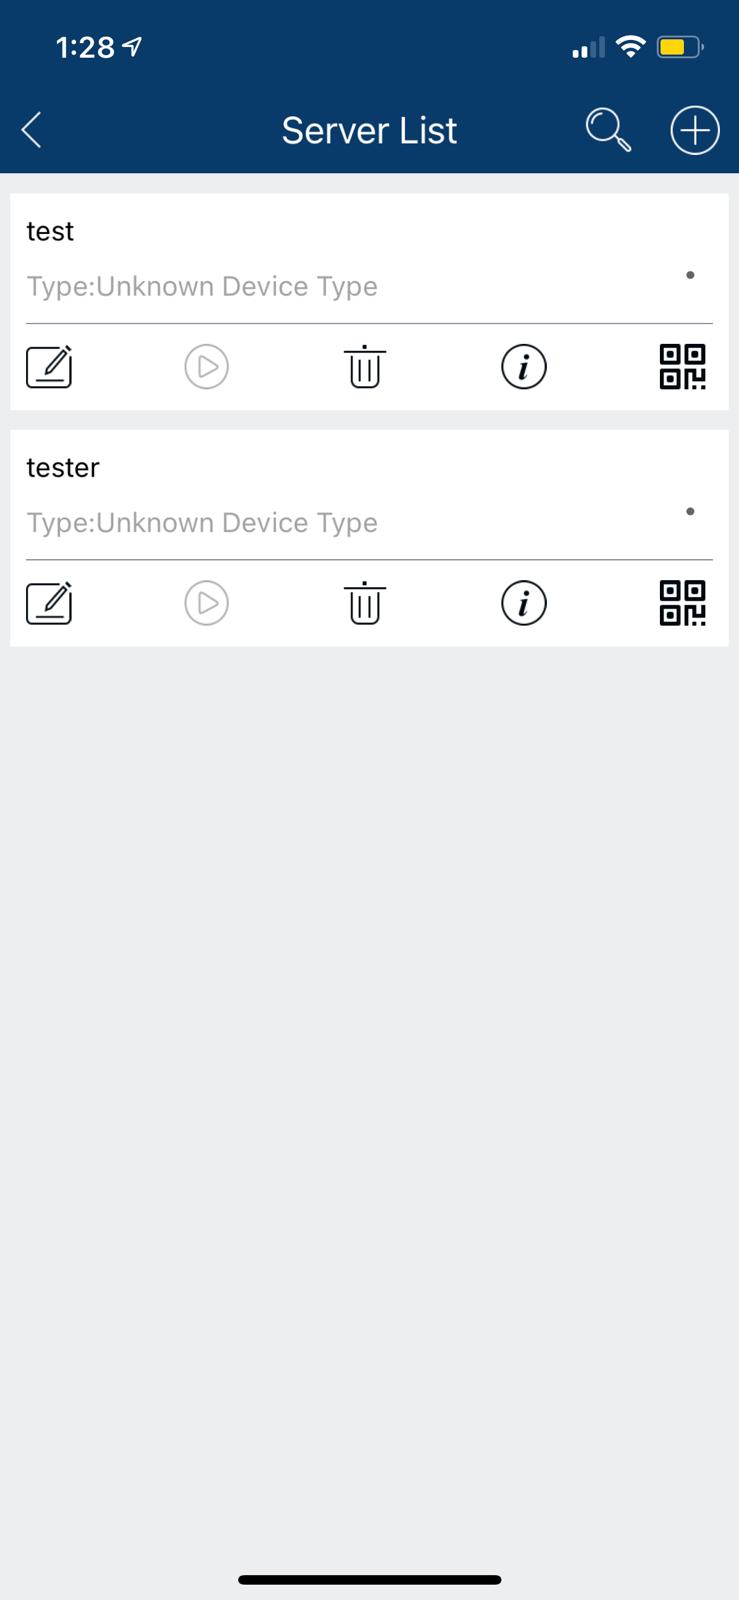
Now that the QR code/serial number has been found we can focus on setting up the application. The first screen that you will see when you open the app is the Live View screen. From here, you can add a device by hitting the icon in the upper-right hand corner. This will open up the Server List.
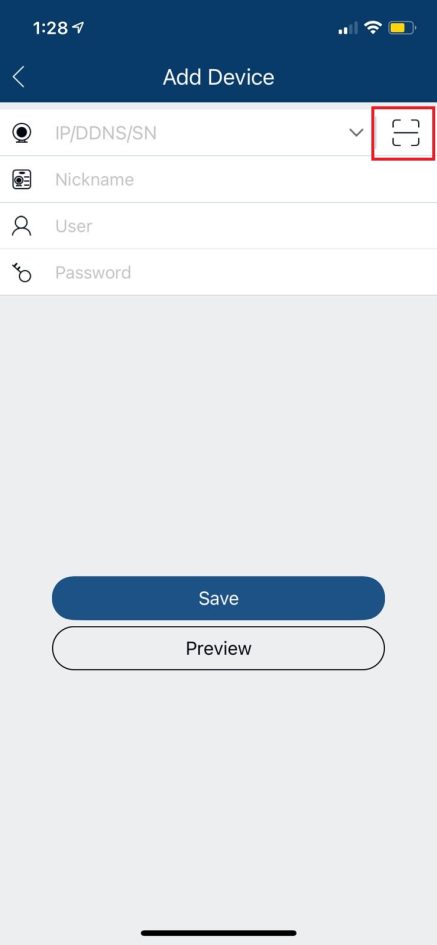
Hit the Plus sign to add your device by either scanning the QR code or manually inputting the serial number that shows beneath the QR code. If you choose the QR code method, tap on the square icon and enable access to the phone’s camera. Then, the only other information that will need to be filled out is the name of the device (can be anything you would like for it to be), the username, and the password of the DVR.
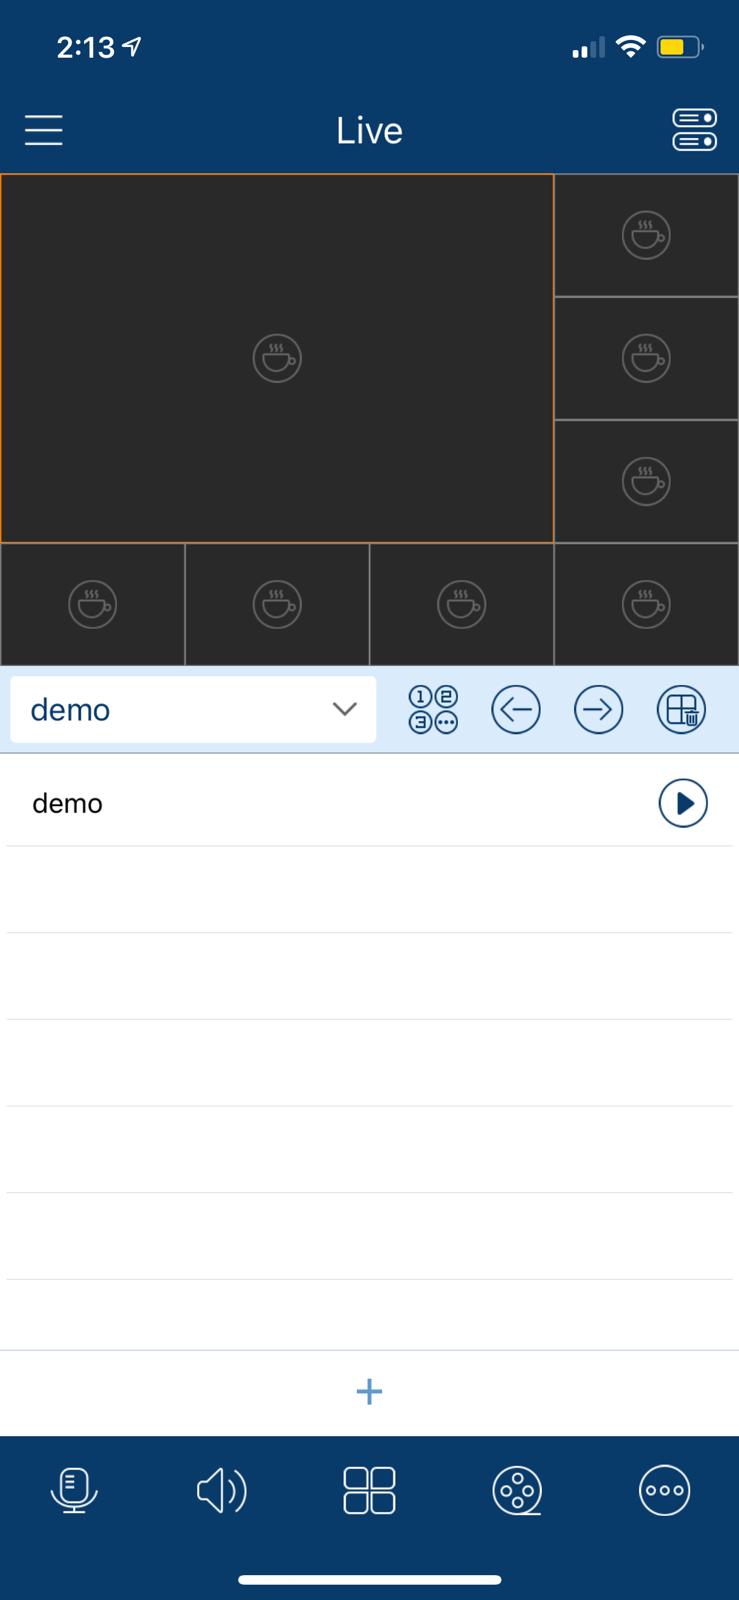
Save the device, and go back to the Live View screen so that we can add your device to the Live View windows. There should be a drop down list underneath the windows that show your online devices. Just select the device, and the cameras should show on your screen.
Where can I find the QR code to scan for 2MT-7232 and 2MT-7XXX-O series?
There are two different methods to use in order to find the QR code to scan to add the device to your phone app. This is good for models 2MT-7232, older models of 2MT-7116, and any models that are part of the 2MT-7XXX-O series.
Both of these methods will start from the same place: Main Menu → Network Settings → Make sure “Obtain IP address automatically” and “Obtain DNS automatically” are checked → NAT → Enable NAT
Method 1: once you enable NAT the QR code should automatically appear on the same page
Method 2: this method will not show the QR code on the same page. You will need to go to → the first page of the Main Menu → Information → QR Code
Which phone app do I use to view my cameras?
Super Live Plus: 2MT-7232
Guarding Vision: 2MN-7116
Why can my device not be accessed through the IP address?
Sometimes you might try to log into your device through the IP address on a computer but it gives you an error (ie. “Cannot be reached”, “Cannot be found”). This can mean a few things:
If you are getting that error you can check to make sure all physical network connections are secure (network cables). Also check to make sure that the device and computer are in the same network because if they are not then the two will not be able to communicate with each other.
Why can’t I see my cameras on Google Chrome/Firefox or other web browsers?
In order to view the cameras on a web browser, it uses a web plugin. But they are usually not compatible with other browsers other than Internet Explorer. If you are unable to view or log into your cameras, please use Internet Explorer, download the plugins when prompted, and then allow the plugins to be enabled. Pop-ups will appear for all of these options.
