Synology Surveillance Station Quick Start Guide, Surveillance Station is a professional video management system (VMS) package bundled with DiskStation Manager (DSM). You can use Surveillance Station together with your existing surveillance equipment to gain situational awareness, allowing you to make informed decisions to efficiently safeguard your home or office environment.
What is Surveillance Station
Surveillance Station is a professional video management system (VMS) package bundled with DiskStation Manager (DSM). You can use Surveillance Station together with your existing surveillance equipment to gain situational awareness, allowing you to make informed decisions to efficiently safeguard your home or office environment. Enhance deep learning video analytics with powerful real-time features including Face Recognition, People & Vehicle Detection (includes License Plate Recognition), Intrusion Detection, and occupancy monitoring.
Why use Surveillance Station
Before you start
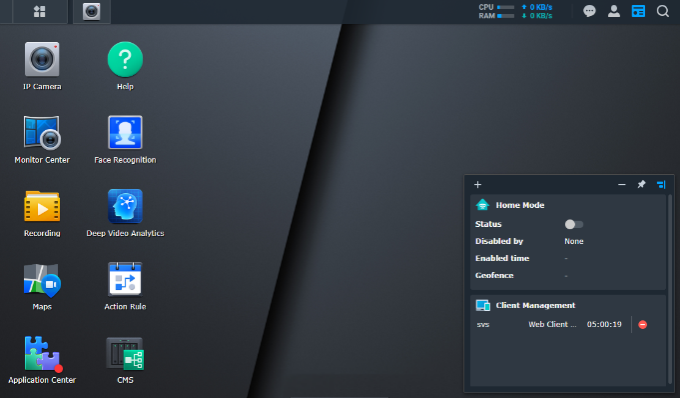
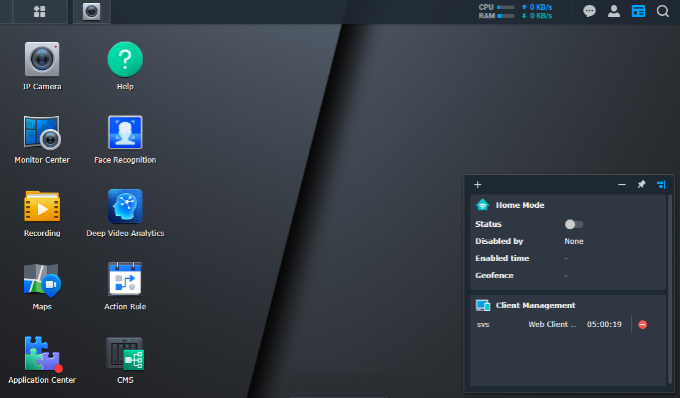
Navigate your way in Surveillance Station desktop
Sign in to Surveillance Station
Two ways are available for you to sign in to Surveillance Station using a browser.
For more information, please see the “Sign in to Surveillance Station” section of this article.
Deploy IP cameras
In Surveillance Station, you can easily configure and organize your IP cameras to enhance management.
Manage IP cameras
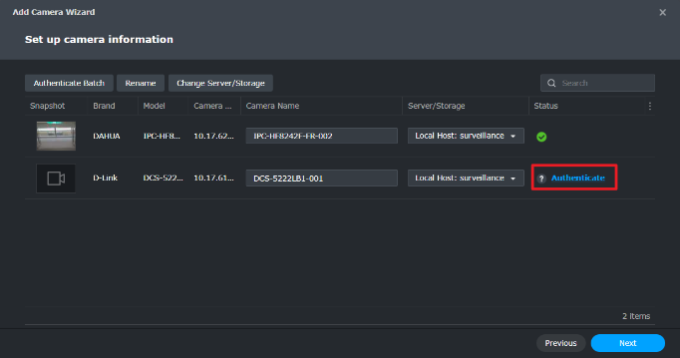
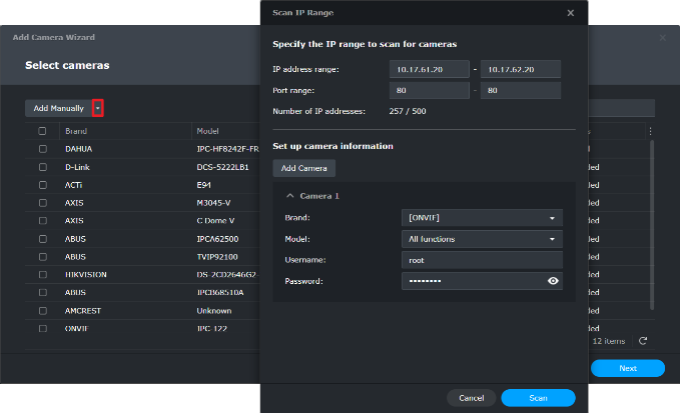
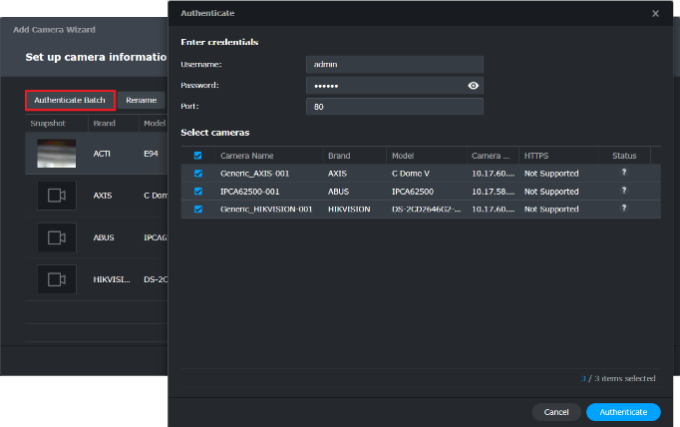
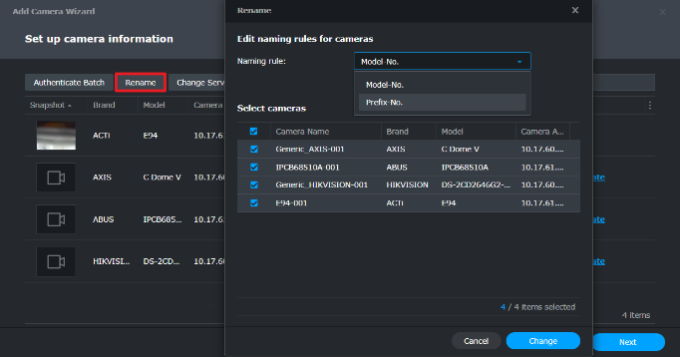
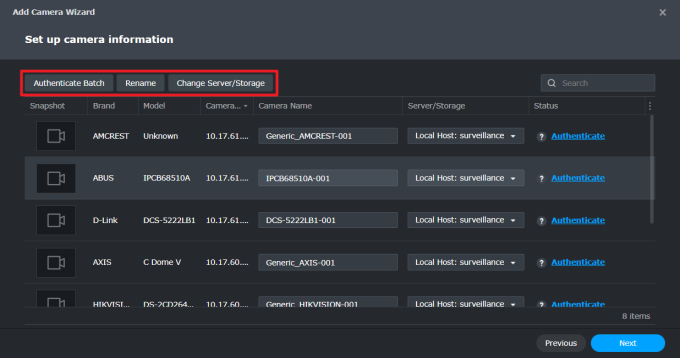
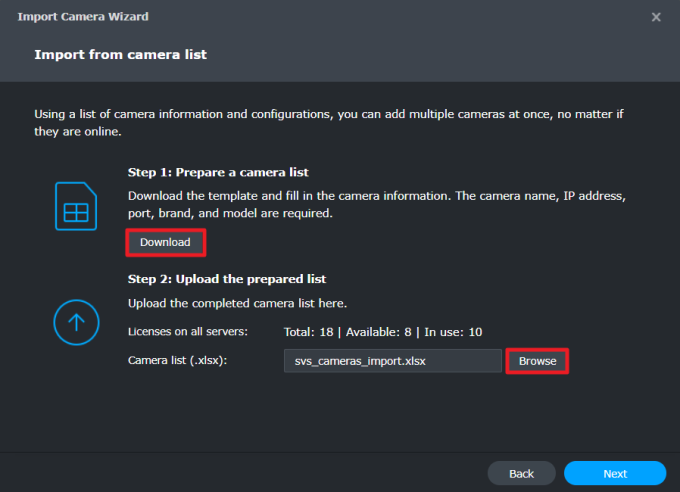
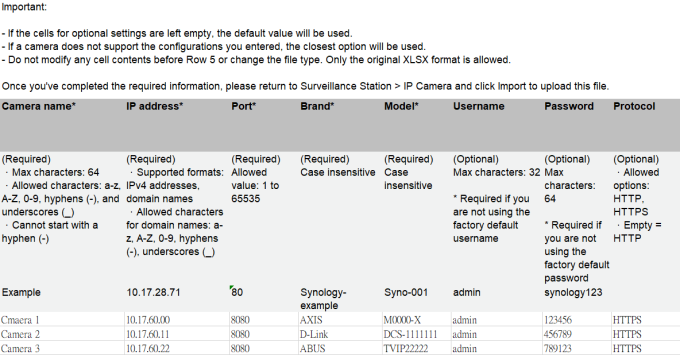
Surveillance Station allows you to manage IP cameras easily and efficiently from one central location. Multiple cameras can be added simultaneously through IP range scans and importing pre-configured spreadsheets.
For more information about adding IP cameras to Surveillance Station, please see this article.
Monitor camera feeds
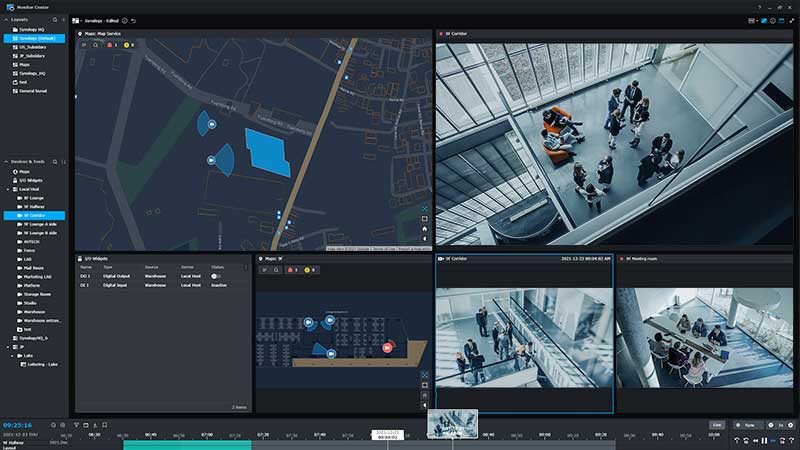
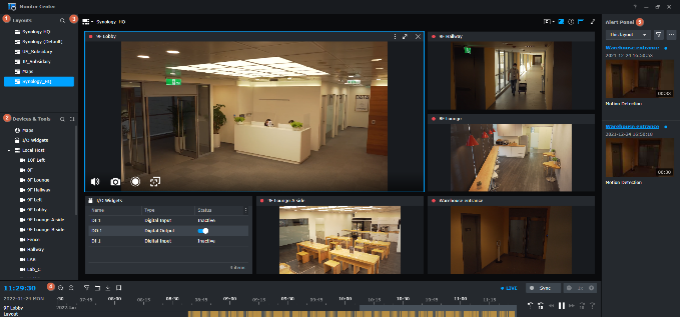
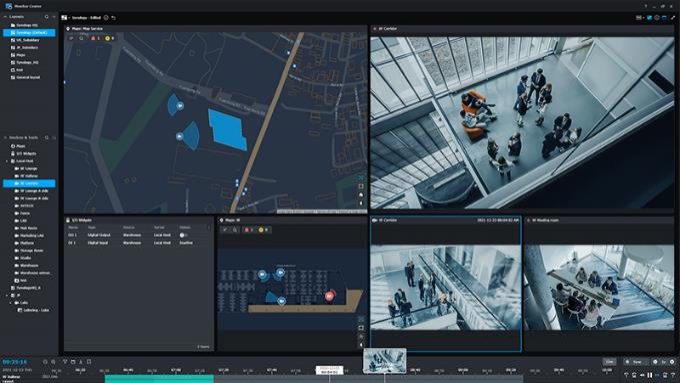
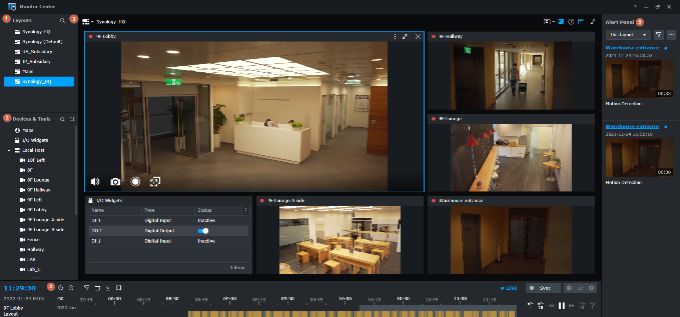
Surveillance Station allows you to watch surveillance video footage of multiple cameras simultaneously and manage a large number of recordings in a single window.
You can easily drag and drop devices into the layout to set up a customized layout or choose to use a default layout with a click.
For more information about configuring layouts, please see this article.
Configure alerts
Alerts allow you to track targets during live video viewing and recording.
For more information about configuring alerts, please see this article.
Monitor surveillance devices on multi-site
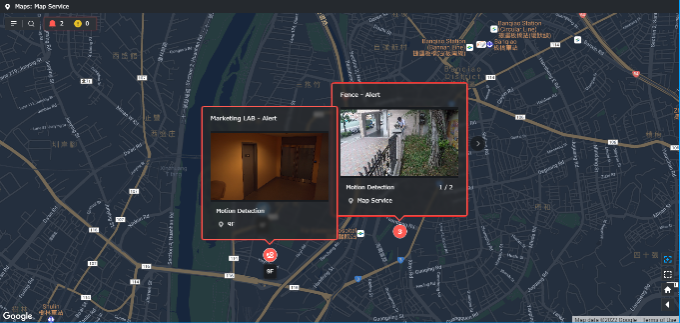
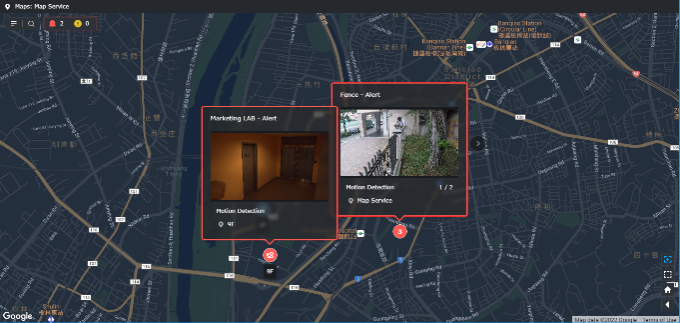
Maps allow you to add, edit, delete, and preview image maps and map groups. You can view the locations of added network cameras, I/O modules, maps, doors, and more.
Other map services, such as OpenStreetMap, Google Maps, or a custom map server, can also be used to manage multiple monitoring locations.
For more information about configuring maps, please see this article.
Synology Surveillance Station Quick Start Guide
Configure notifications
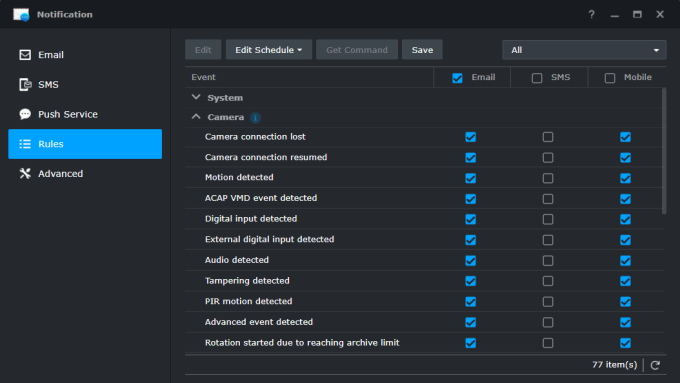
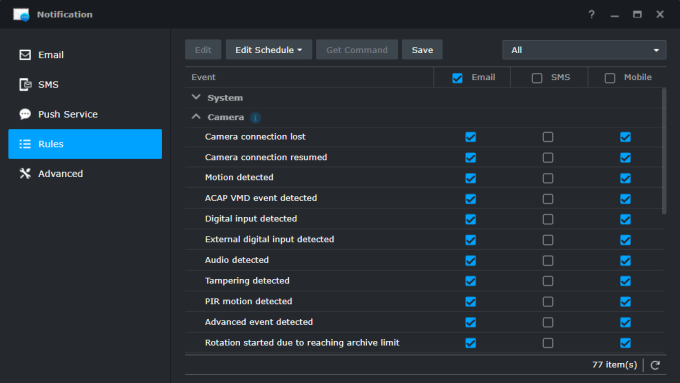
In Notification, you can set up notifications to receive messages via email, SMS, or mobile devices when the system status changes or when errors occur.
Please see this article for more information.
View recordings
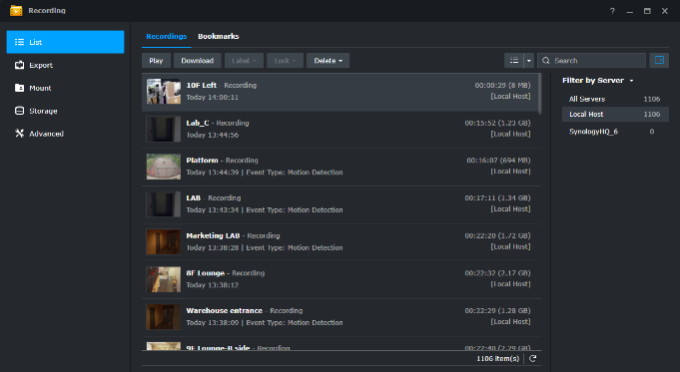
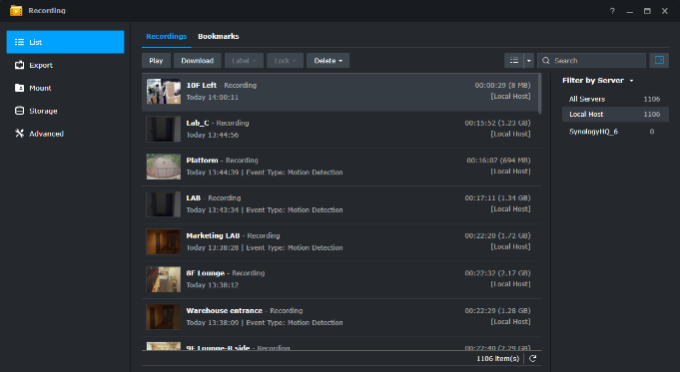
In Recording, you can view a list of footage recorded with IP cameras and manage bookmarked recordings in the Bookmarks tab.
Please see this article for more information.
Configure multiple servers
CMS (Centralized Management System) allows you to set your Synology NAS/NVR as a host server while adding multiple Synology servers as recording servers to to expand your surveillance network. You can enable CMS in Application Center > CMS to add or update recording servers and manage cameras installed on such servers.
Please see this article for more information.
Surveillance Station on the go
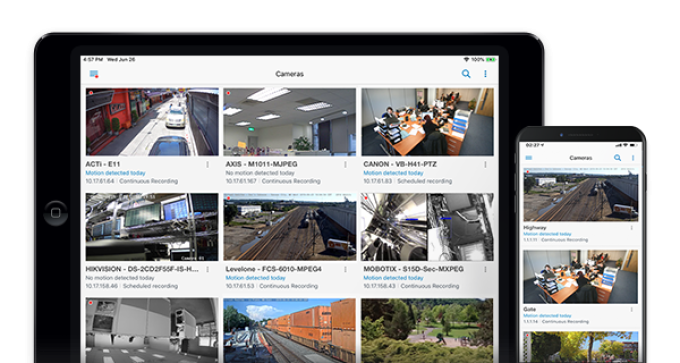
Synology DS cam is the mobile extension of Surveillance Station that allows you to monitor and playback on the go.
System requirements and QR code
iOS and Android DS Cam are available for free for:
Further reading
Software specs
Related articles
Surveillance Station Quick Start Guide for Users
Surveillance Station is a professional video management system (VMS) package bundled with DiskStation Manager (DSM). You can use Surveillance Station together with your existing surveillance equipment to gain situational awareness, allowing you to make informed decisions to efficiently safeguard your home or office environment. Enhance deep learning video analytics with powerful real-time features including Face Recognition, People & Vehicle Detection (includes License Plate Recognition), Intrusion Detection, and occupancy monitoring.
Why use Surveillance Station
Before you start
Navigate your way in Surveillance Station desktop
Sign in to Surveillance Station
Two ways are available for you to sign in to Surveillance Station using a browser.
For more information, please see the “Sign in to Surveillance Station” section of this article.
Deploy IP cameras
In Surveillance Station, you can easily configure and organize your IP cameras to enhance management.
Manage IP cameras
Surveillance Station allows you to manage IP cameras easily and efficiently from one central location. Multiple cameras can be added simultaneously through IP range scans and importing pre-configured spreadsheets.
For more information about adding IP cameras to Surveillance Station, please see this article.
Monitor camera feeds
Surveillance Station allows you to watch surveillance video footage of multiple cameras simultaneously and manage a large number of recordings in a single window.
You can easily drag and drop devices into the layout to set up a customized layout or choose to use a default layout with a click.
For more information about configuring layouts, please see this article.
Configure alerts
Alerts allow you to track targets during live video viewing and recording.
For more information about configuring alerts, please see this article.
Monitor surveillance devices on multi-site
Maps allow you to add, edit, delete, and preview image maps and map groups. You can view the locations of added network cameras, I/O modules, maps, doors, and more.
Other map services, such as OpenStreetMap, Google Maps, or a custom map server, can also be used to manage multiple monitoring locations.
For more information about configuring maps, please see this article.
Configure notifications
In Notification, you can set up notifications to receive messages via email, SMS, or mobile devices when the system status changes or when errors occur.
Please see this article for more information.
View recordings
In Recording, you can view a list of footage recorded with IP cameras and manage bookmarked recordings in the Bookmarks tab.
Please see this article for more information.
Configure multiple servers
CMS (Centralized Management System) allows you to set your Synology NAS/NVR as a host server while adding multiple Synology servers as recording servers to to expand your surveillance network. You can enable CMS in Application Center > CMS to add or update recording servers and manage cameras installed on such servers.
Please see this article for more information.
Surveillance Station on the go
Synology DS cam is the mobile extension of Surveillance Station that allows you to monitor and playback on the go.
System requirements and QR code
iOS and Android DS Cam are available for free for:
Further reading
Software specs
Related articles
IP Camera Quick Start Guide
How should I add IP cameras?
Surveillance Station has integrated 8,300 IP cameras, ONVIF profiles, and various monitoring devices. Depending on the scale of your deployment, we recommend different adding methods.
Before you start
Refer to the support list to see if your camera is compatible. If not, refer to this article to add cameras.
If your Synology server and camera need to communicate over the Internet, port forwarding rules are required. Refer to this article for more information.
Setup for home users
To add a few cameras to a single server:
If you wish to set up customized streaming devices or stream RTSP/HTTP videos, refer to this article.
Setup for SMBs
To batch add cameras to a single server:
Setup for large-scale deployments
To add multiple cameras at different locations to selected servers:
Scan IP range
Import configuration list
Add more cameras
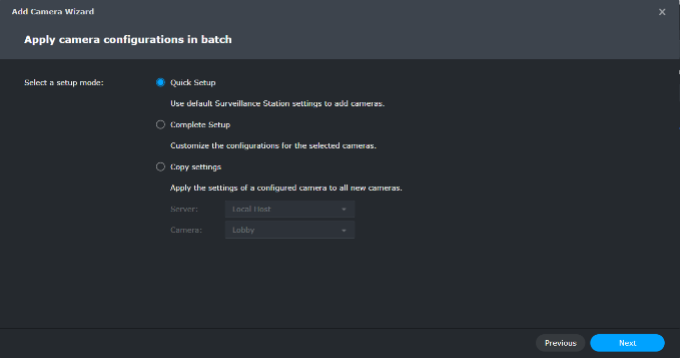
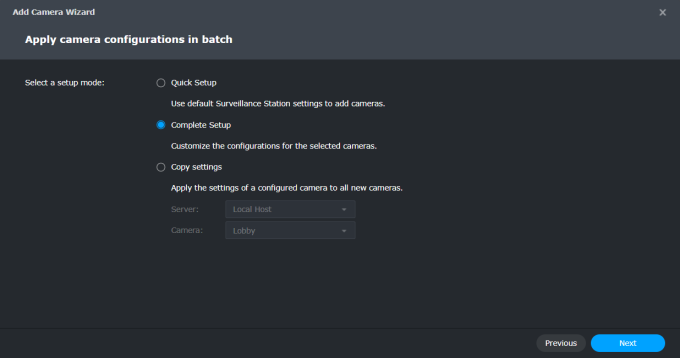
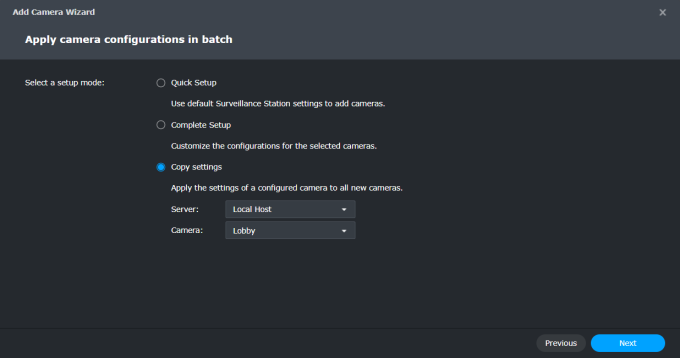
You can add more cameras to expand your deployment in the future. Add or Import cameras, follow the wizard, and select Copy settings to apply your previous configurations to the new cameras.
Further reading
Help articles
Troubleshooting
