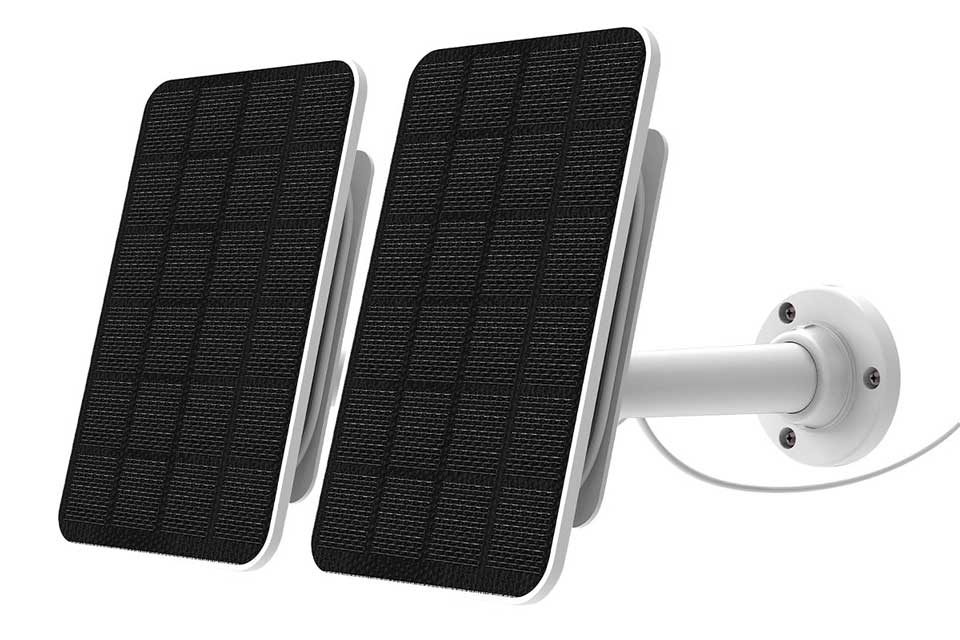
Keep your Lorex Battery Operated cameras continuously charged and prevent downtime with your security with this Lorex Solar panel. Tired of removing and charging batteries? This solar panel does not only reduce manual charging frequency but also helps reduce energy costs. With an easy setup and a long-lasting build, the solar panel is both an effortless and an environmentally friendly way to prolong the life for you cameras.
ACSOL3 Series – Solar Panel for Battery-Operated Cameras: Frequently Asked Questions
The following frequently asked questions (FAQs) provide more information about the Lorex Solar Panel (ACSOL3 Series). Where applicable, the FAQ includes links to articles where you may find more information.
General Questions:
What is the purpose of this product?
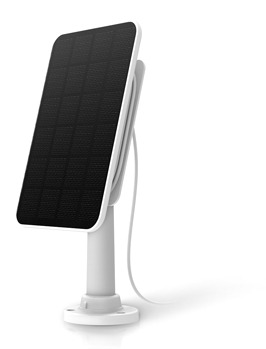
This product is a Solar Panel that converts sunlight into energy that your Battery-Operated Camera can use.
What are the dimensions of the Solar Panel?
Width: 7.28″ / 185 mm Depth: 4.72″ / 120 mm Height: 0.26″ / 6.5 mm
What are the Electronic Specifications?
What is the weight of the Solar Panel?
The weight of the solar panel is 0.63 lbs / 0.286 kg.
What kind of power interface is used?
The Solar Panel uses a Micro USB power interface which is included in the package.
What is the length of the included Micro USB cable?
The length of the Micro USB cable is 13 ft / 4 m.
Is the Solar Panel waterproof?
The Solar Panel has a waterproof level of IP65. This means the Solar Panel can withstand rain and storms, but should not be submerged in water.
What is included?
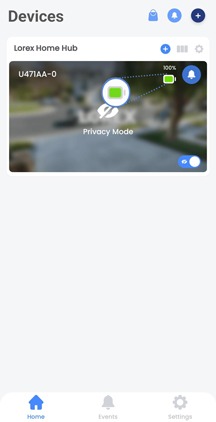
How do I check the battery of my camera?
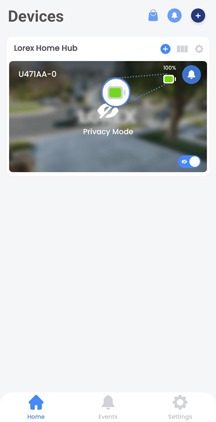
Open the Lorex Home app, and then check the device battery status to ensure the Solar Panel is receiving enough light to power on the device.
What devices are compatible with the Solar Panel?
Please see the ACSOL3 Series Solar Panel Compatibility Chart
Setup Questions:
Do I need to charge my camera before using the Solar Panel?
Yes. The Solar Panel is designed to maintain the camera battery pack’s charge. Please fully charge your battery pack first using the Micro USB cable included with the camera. This will take 4-6 hours. The purpose is to allow for camera setup time and if the initial days are not sunny.
How do I install the Solar Panel?
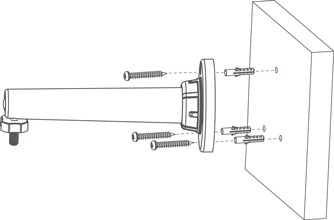
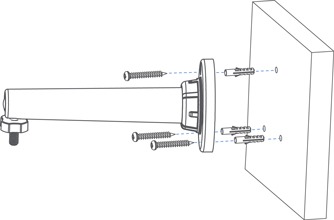
Optional: If you are mounting the Solar Panel into drywall, use the provided drywall anchors.
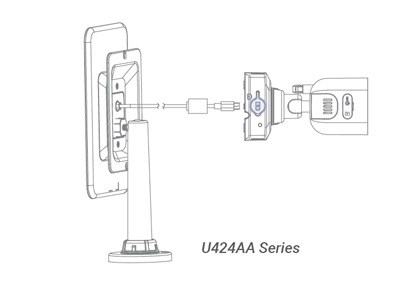
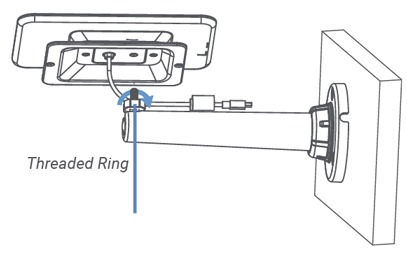
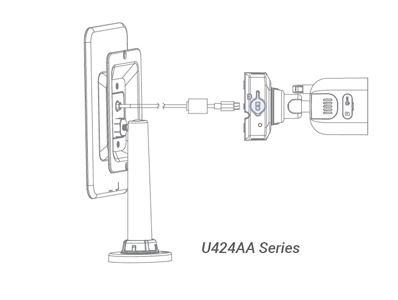
How do I connect the Solar Panel directly to my camera?
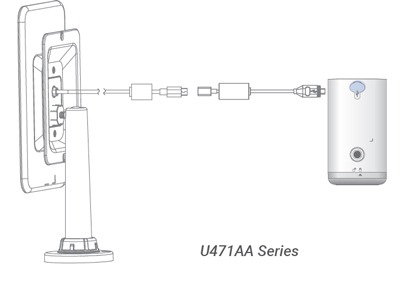
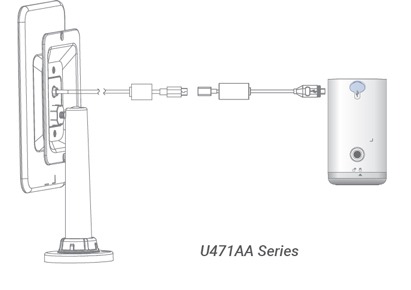
How do I connect to my camera using an adapter?
What are the ways that I can mount the Solar Panel?
The Solar Panel can be secured to a wall horizontally, to a roof vertically, or on a flat surface indoors.
Note: If installed indoors vertically and in a secure location, it is not necessary to use screws to hold the Solar Panel upright. The mount is able to hold the weight of the Solar Panel when standing vertically.
Why is my Solar Panel not charging my camera?
Make sure of the following:
Please refer to your camera’s NVR, Home Hub, or Lorex Home Center Device instructions, for information on updating your device’s firmware.
Solar Panel for Battery Operated Cameras FAQ
How do I position the Solar Panel to get the most sunlight?
Location: Choose a location for your Solar Panel that gets the most sunlight. Avoid placing the Solar Panel in a shady spot or in front of trees and buildings, as they will significantly reduce the power output.
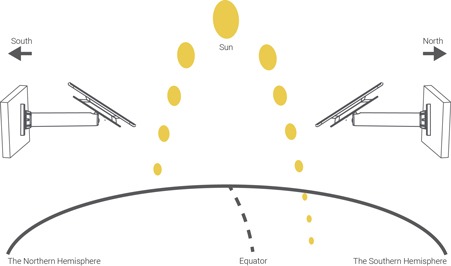
Direction: The optimal angle varies throughout the year, depending on seasonal changes and your geographic location. As a general guideline, the Solar Panel should be facing the equator; in the northern hemisphere, the Solar Panel faces south and in the southern hemisphere, the Solar Panel faces north.
Note: In North America that means pointing the panel south.
How do I adjust the angle of my Solar Panel?
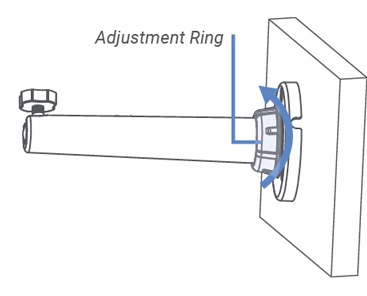
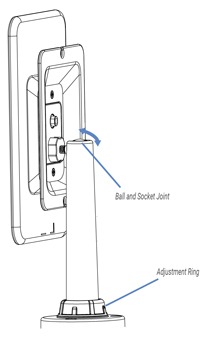
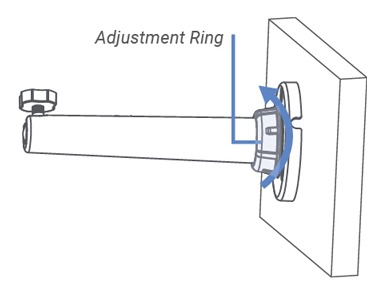
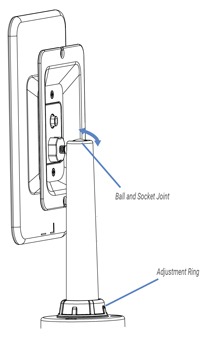
Use the adjustment ring on the wall mount to angle the Solar Panel towards direct sunlight. You can manually change the angle of the Solar Panel using the ball and socket joint at the top of the mount.
Where can I use the Solar Panel?
What factors can affect the efficiency of my Solar Panel?
External factors can affect the effectiveness of the Solar Panel generating power, such as shade, temperature, cloudy or snowy weather, and the amount of dust or debris on its surface.
ACSOL3 Series – Solar Panel for Battery-Operated Cameras: Installation Guide
This article provides instructions for installing your ACSOL3 Series Solar Panel for Battery-Operated Cameras.
Installation Tips:
Optional: To install the camera without any gaps between the device and the wall, drill holes to run the Solar Panel power cord through the wall.
Installing the Solar Panel:
Optional: If you are mounting the Solar Panel into drywall, use the provided drywall anchors.
Connecting the Solar Panel directly to the camera
Connecting to the camera using an adapter
ACSOL3 Series – Solar Panel for Battery-Operated Cameras: Troubleshooting Guide
The following article provides troubleshooting solutions to common issues for your ACSOL3 Series Solar Panel.
The Solar Panel is not charging my camera:
Make sure of the following:
Please refer to your camera’s NVR, Home Hub, or Lorex Home Center Device instructions, for information on updating your device’s firmware.
I can’t find the battery level of my camera:
Open the Lorex Home app, and then check the device battery status to ensure the Solar Panel is receiving enough light to power on the device.
The Solar Panel’s angle needs to be adjusted:
Use the adjustment ring on the wall mount to angle the Solar Panel towards direct sunlight. You can manually change the angle of the Solar Panel using the ball and socket joint at the top of the mount.
The cable is too long:
If the cable is longer than needed, there is a cable management accessory on the back of the Solar Panel. This can be used to hold on to excess cable that is wrapped around it.
