Security Systems Setup Guide, Find step-by-step guides and answers to frequently asked questions on setting up and installing Security Products. Note: This article is based on Swann products.
Camera Location Tips
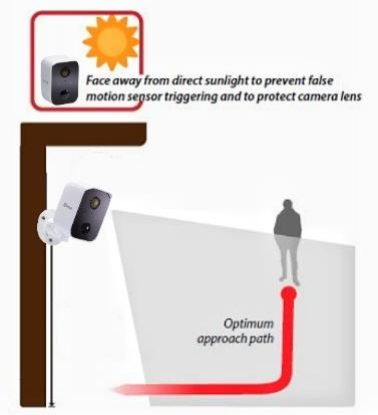
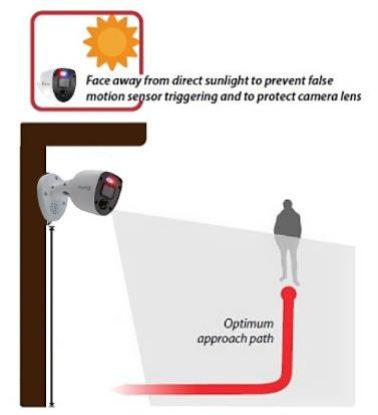
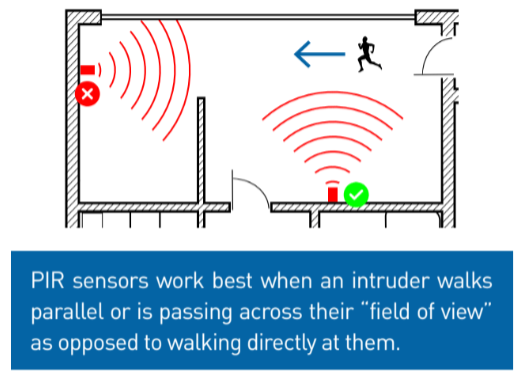
Did you know that most issues with recording, night vision, and video quality are based on incorrect location of camera installation? Any product that has not been installed in accordance with the installation instructions or damaged due to incorrect installation will void any warranty claim.
Follow all these tips to prevent such issues:
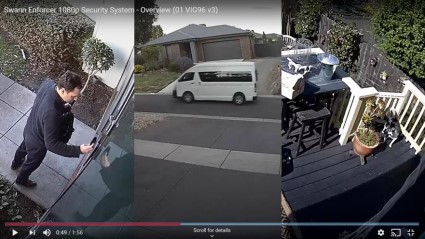
Can Add-on Cameras Be Connected Straight to a TV or Monitor or Paired to An App
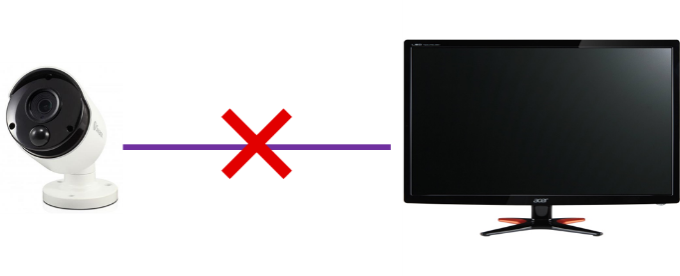
Add-on Cameras such as the PRO, NHD, and NVW Series are not capable of providing a direct live feed to a TV or monitor without a DVR, NVR, and NVW respectively. For the same reason, these system cameras are not capable of being paired to a phone app without a recorder (box).
For more information, go to this link: Are all Swann cameras compatible with any Swann recorder?
Reason for PRO- cameras
Reason for NHD- cameras
Reason for NVW- cameras
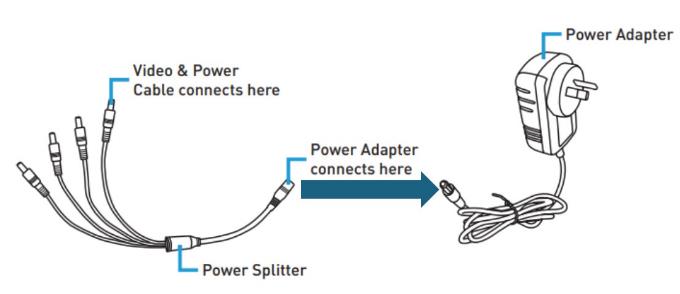
Connecting your DVR, Cameras, BNC or Coaxial cables, and Power Adapter (PSU)
Depending on the type of camera or DVR kit you purchased, you may receive two different types of BNC “Bayonet Neill–Concelman” cables for the cameras. Our BNC or Coaxial cables are color coded based on the camera resolution it’s used for.
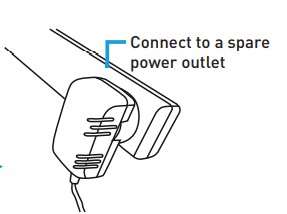
How to properly connect
Display connection guide for DVR/NVR/NVW
HDMI Setup
VGA Setup
Note: NVW-650/NVW-800 do not have a VGA port.
What to do next?
If the recorder outputs a display on your screen but not your preferred connection, usually all that is required is to change the resolution. Your manual has instructions on where to find the resolution configuration, but here are the key points you need to remember:
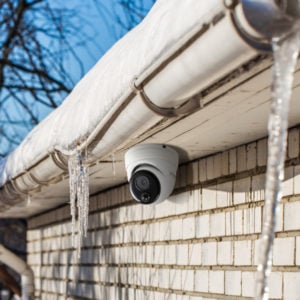
Can this camera be mounted under the eaves?
Answer: The camera is designed for indoor use and can be placed on a flat surface or mounted on a ceiling or walls (except pan & tilt cameras) without the need to drill and then screw to mount it.
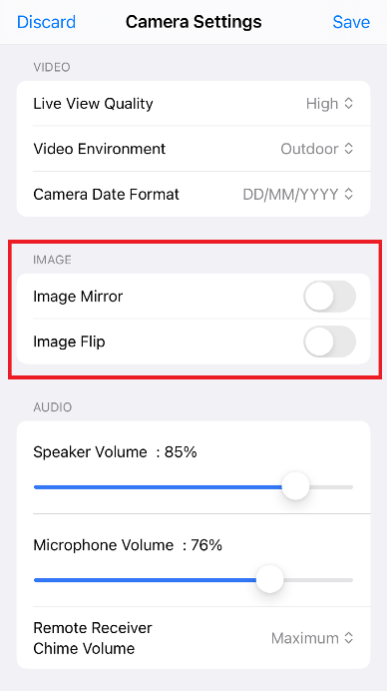
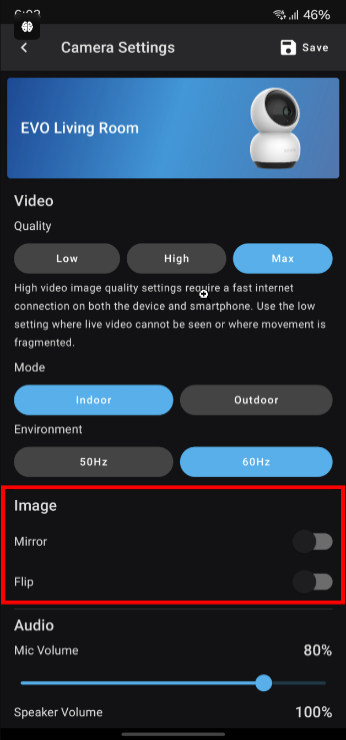
Don’t worry if the image is upside down due to how the camera was mounted, as you can flip the image horizontally (Mirror) and vertically (Flip) in the camera’s settings within the app.
Enable both and you’ll rotate the image 180 degrees.
| ANDROID | IOS |
 |
.
. . |
Can this camera be mounted under the eaves?
Answer: Yes. You can mount it to either wall or ceiling.
Don’t worry if the image is upside down due to how the camera was mounted, as you can flip the image horizontally and vertically in the camera’s settings within the app.
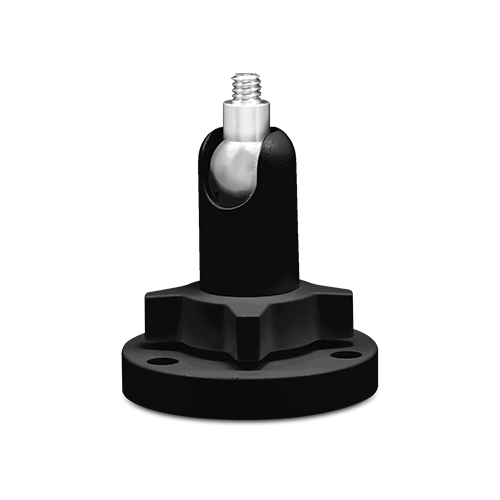
SWIFI-CAM and SWIFI-XTRCM that use the magnetic mount, the camera’s angle might not be optimal for a clear view. However, using an outdoor stand allows for secure attachment to eaves or ceilings while providing an adjustable angle for better coverage. For wall mounting, both the magnetic and outdoor stands are suitable options.
Can You Send A Field Technician or Professional Installer
The purchase of a Swann product and its warranty do not include any costs associated with the installation or uninstallation of your Swann products, whether or not you have a successful warranty claim against Swann.
Swann specialises in DIY security systems, so we do not dispatch installers nor field technicians. We are also unable to provide information or manuals about cable/wiring termination or custom hardware modifications to third party wiring and electrical boxes, as these require professional installers. Installers are third-party companies or technicians and may vary in their knowledge and scope of installing and modifying CCTV hardware. While Swann doesn’t specifically have installers to deploy, we can refer you to partners or recommended installers that may help you with your hardware setup.
Connecting a wired camera to a VCR
Firstly, ensure the camera is connected to mains power and is powered up.
The easiest way to check this is cup your hand around the front of the camera, hold it to your eye and look for the red LED’s to light up. Once that is completed take the video cable from the camera which is usually a yellow RCA plug and connect it to the video “INPUT” or “IN” plug on the back or front of your VCR.
Make sure that Yellow goes to video (usually yellow on the VCR as well) and that audio (usually either white or red, or both) goes to the white or red plugs. These plugs will be the same ones you would connect something like an Xbox or play station to.
Once that is done, please turn on your TV and set your TV up in the same way you would to watch a VCR tape, and once done, please put a VHS tape with a previous recording on it in your VCR and press play.
If you cannot see the VCR tape playing you will need to check your channel settings and try to get it working correctly before we can continue.
Once you can see the tape being played, this means the VCR is sending a signal to your TV correctly and we can try to tune the VCR into the camera now.
Please look on your VCR remote for buttons called “INPUT” or “INPUT SELECT”, or you can try setting the VCR channel to “1” and scroll down in channels. We are looking for an input channel that will take the video footage from the RCA connections we are using, this will usually be called something line “Line 1”, “Video” or “Video1”, “Game”, “Aux” or “Auxiliary”, or sometimes “Input”.
Once we hit this channel your camera picture should appear on the screen right away and you can hit record on your VCR when it has a tape inside, and it will record everything you camera sees.
After this has been completed, your TV does not actually need to be there anymore, we merely use it to test the channel with the VCR and to check playback. You may switch off or even remove the TV if you wish once you have the correct channel on the VCR and know you can see your camera footage.
If you have any further queries feel free to contact us.
How long can I run a HDMI cable from my Swann DVR/NVR to my HD TV?
Answer: We recommend no more than 10 meters / 32 feet cable run between the DVR and the HD TV or HD monitor without an active repeater
How long can I run a VGA cable from my DVR to my VGA monitor/TV?
Answer: No more than 10 meters / 32 feet of cable run between the DVR and the TV or monitor through the VGA
NOTE: This is for DVRs and NVRs that have a VGA port on their back panel. NVW-650/NVW-800/NVW-MR4K do not have a VGA OUT port.
How Do I Get the Best Out of my Built-in Solar Panel
Answer: Like all solar chargers, the solar panel fitted to the top of the MaxRanger™ camera will work best when it gets full sun. Consider this when fitting your camera and try to minimise how much shade it gets and adjust the direction it faces to ensure it can receive the most sunlight while covering your area of interest. It is also a good idea to clean the solar panel from time to time as dirt and such can impact the charging efficiency, keep this in mind when installing the cameras as well.
Frequently-asked questions and tips to complete the Startup Wizard
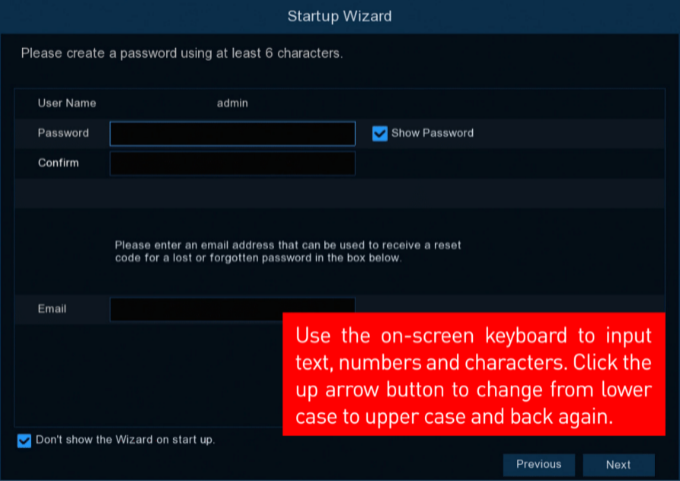
Tip 1: Set up your password
The purpose of this page is to set up the password of your recorder for the first time so that you can protect your recordings from being accessed by others. This is required and should not be skipped or set up by someone else.
If you are seeing this Error: “Please enter an email address that can be used to receive a reset code for a lost or forgotten password in the box below.”, it means that you may have typed a comma “.” instead of a period or dot “.” in your Email. Please double check your email address and try again. Visit this link: Error: Please enter an email address that can be used to receive a reset code for a lost or forgotten password in the box below.
Tip 2: Check the box beside “Don’t show the Wizard on start up.”
If you don’t want to keep seeing the Startup Wizard every time you reboot the recorder, check the box.
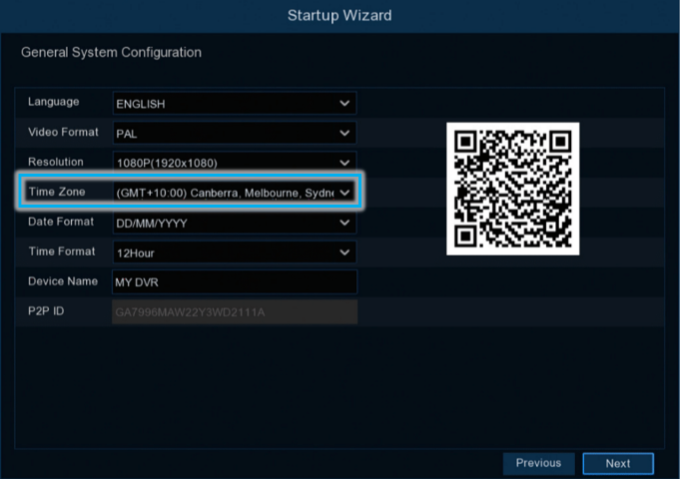
Tip 3: Set the Time Zone
The Time Zone you set should be based on the time zone of the location of your recorder. The timestamp of the cameras and their recordings depend on this important setting. Incorrect time zone will make playback of footage difficult.
GMT is the same as UTC. Identify the UTC of your location using Google or Bing if you cannot find your city.
We also recommend not changing the other settings such as Resolution or Video Format as they can be changed later on based on the display resolution of your TV and resolution of your cameras.
Tip 4: Disable Email if you do not want to receive an email every time there is motion
This setting in the Startup Wizard is not mandatory and will not affect remote access via mobile device, push notifications via mobile device, nor the recording or streaming function of your DVR / NVR. If you forget your password, you can still click on Forgot Password in the future to receive an email.
An alternative to Email Alerts is to enable Push Notifications in your mobile device later on.
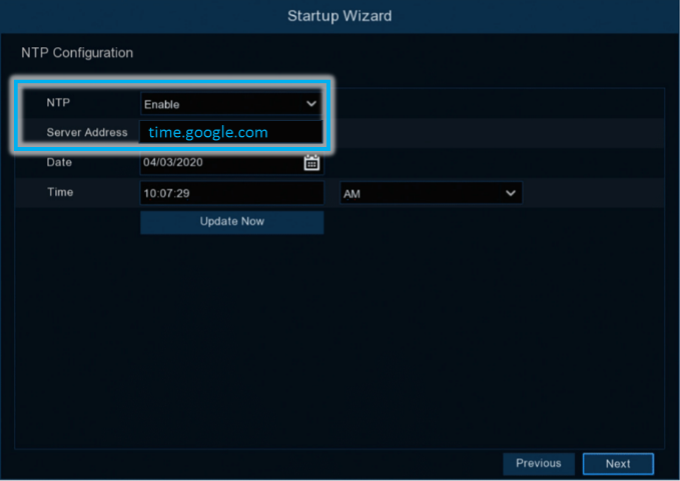
Tip 5: Enable NTP to auto-update the current date and time of your DVR
Use the Server Address time.google.com if you enable NTP. Make sure your DVR is connected to the Internet. (See What do I need for my DVR/NVR to go online?)
Tip 6: If you have no Internet for your DVR / NVR, then enable DST
DST must be set up manually in order for the date and time shown on the cameras real time. To know what to put, see How to Set the Correct Date and Time in DVR/NVR
Tap on Finish when you are done configuring the fundamental settings outlined in the tips above.
