How to reset passwords on AV Costar Cameras, Arecont Vision Costar, LLC is a US-based company founded in 2018 to offer complete video surveillance solutions to customers around the world. AV Costar’s headquarters, R&D, and support operations are in Glendale, California in the Greater Los Angeles metro area. Our manufacturing is nearby in Duarte, California, while our Advanced Technology Center is located in the city of Clovis, in California’s Central Valley region. Sales offices are located throughout the Americas, Europe, and the Middle East.
Issue:
A password has been set on a camera and neither the customer nor integrator knows it.
For best results see the below:
• Once a nonce file has been generated, do not do anything with the camera (i.e. power cycle it) until you are ready to apply the key files. If the camera was powered down before the reset code was applied then a new Noncefile will have to be generated and reapplied.
• Nonce files are valid for approximately 24 hours. If it does not work reach out to technical support.
• Directly connect to the camera with a PoE injector for the best results.
• Disable any firewall or security software on the workstation.
• Disable sub-interfaces on the Ethernet adapter
• JCI Specific: Disable the Cisco AnyConnect Security Mobility Client and the virtual Ethernet (Default Switch) adapters.
• We have encountered issues resetting passwords over Ubiquiti Wireless networks. If a password reset fails, connect directly to the same physical switch as the camera.
• For Verint Systems, remove the camera from the VMS then attempt a password reset. Password resets performed while connected to a Verint system have failed.
• If the camera says “Inaccessible” your workstation is not in the same network range as the camera. Change the workstation to match the camera. Relaunch AV IP Utility and it should say “Pwd Protected.”

Resolution:
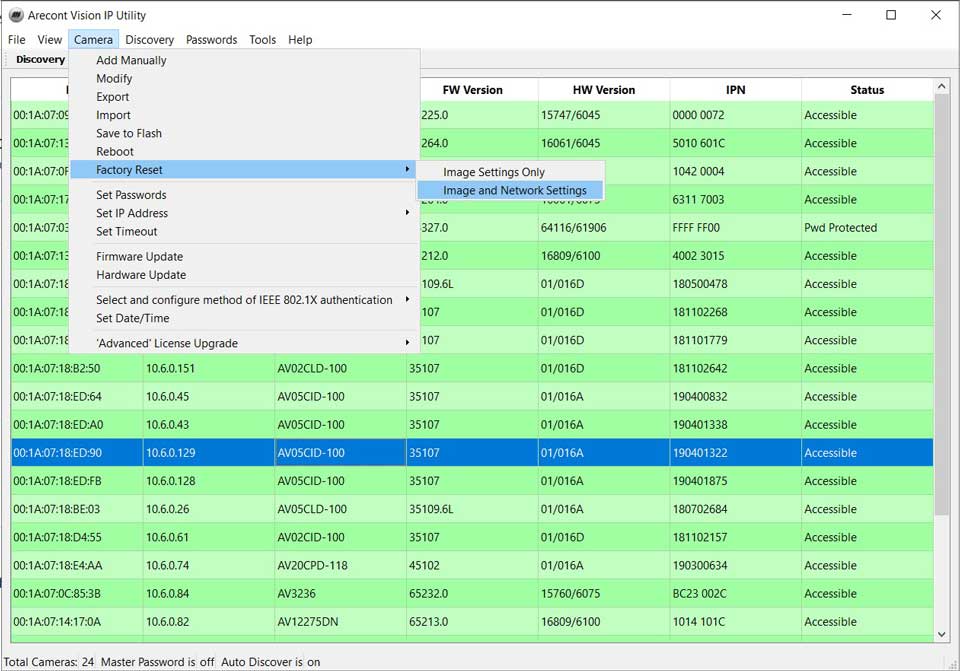
2.Click on a camera. If needing a password reset for multiple cameras, press CTRL and click on each camera needed. It/They should be highlighted blue.
3.Click Passwords > Reset Passwords > Create Nonce / Magic Code File.

4.Save and email this file to Technical Support (support@arecontvision.com).
• Do not do anything else with the camera until you upload the file provided by Technical Support.
5.Click Passwords > Reset Passwords > Reset Passwords.

8.Locate the key that was provided by Technical Support and click Open.
9.The camera status should change from Pwd Protected to Accessible within 30 seconds.
10.If the password reset fails you will need to follow the instructions here: Password Reset Failure
How to reset passwords on AV Costar Cameras
AV IP Utility / Costar Utility cannot discover a camera
Issue:
Cameras are not being discovered by AV IP Utility or Costar Utility.
Prerequisite:
Verify physical connections and power requirements for the specific camera.
a.Refer to the datasheet of the product regarding PoE / Auxiliary power requirements.
b.Ethernet runs should be no longer than 100 meters using either EIA/TIA 568A or 568B standards.
c.Use a PoE injector to bypass any potential network issues.
d.Verify the NIC on the camera and switch are lit.
a.Test or replace the cable as needed.
b.Bypass the Ethernet pigtail on the camera.
c.Move the camera to a different port on the switch.
d.If these are managed switches, verify PoE is enabled and that there are no security policies in place that would prohibit the camera from coming online.
e.For Contera cameras, try to press and hold the physical reset button for 10 -15 seconds.
Resolution:
2.Set your Ethernet adapter to DHCP.
• Both tools find cameras regardless of what network scheme the cameras are on.
3.For AV IP Utility, verify the Ethernet adapter is enabled.
• Discovery > Select Network Interfaces > Select the local Ethernet interface > Click Refresh Camera list > Click OK.
4.If neither tool is able to discover the camera they will look like the below.


6.Install Wireshark accepting all the defaults.
7.Launch Wireshark then double click on the Ethernet interface.

8.Power cycle the camera and let it boot up. After a minute or two, stop the capture.

9.In the filter field, type arp then click Enter.


10.You should see an ARP entry similar to the one below. The camera IP in the below example is 169.254.127.7 and the last 6 digits of the MAC address on the second line are 1B-25-8A.

11.If you open a webpage to 169.254.127.7 you should be able to configure the camera.
12.If the camera is found using this method, you will need to reach out to local IT to identify if there is something on the PC or network that is blocking the camera discovery.
Password Reset Failure
Problem
The key file fails to erase password, even with admin rights and after the ARP Table confirms routing.
Note: This is only for Gen 1 Arecont Vision cameras. This will not work on Contera series cameras.
Resolution
You can deploy firmware as an alternate way to reset a camera’s password, but you must use an older version of deployment software “without authentication“.
Note: Before updating firmware, stop all streams and views from the camera.
1.Download and extract the attached firmware loader utility to your desktop (attached below).
2.Right-click FirmwareLoader.exe and select Run As Administrator.
3.Select Find Cameras — This creates a firewall exception for the tool as well.
1.If the camera is found: Increase the camera’s timeout to 1000.
2.If the camera is not found: Enter the camera’s IP Address and Increase the timeout to 1000.
4.Select Upgrade Firmware.
5.Find and select the firmware you want to update to (in most cases, this is the same version as currently installed on the camera).
6.Select Open. The update may take some time to complete.
Use a constant ping to monitor for a reply from the camera to confirm the process has completed. The camera should no longer require a password. If you can go to the camera’s IP address in a web browser without being prompted for user and password, the process was successful.
FirmwareLoader.zip
ConteraIP Micro Dome | How to reset to factory default
Environment:
• ConteraIP Micro dome series
Procedure:
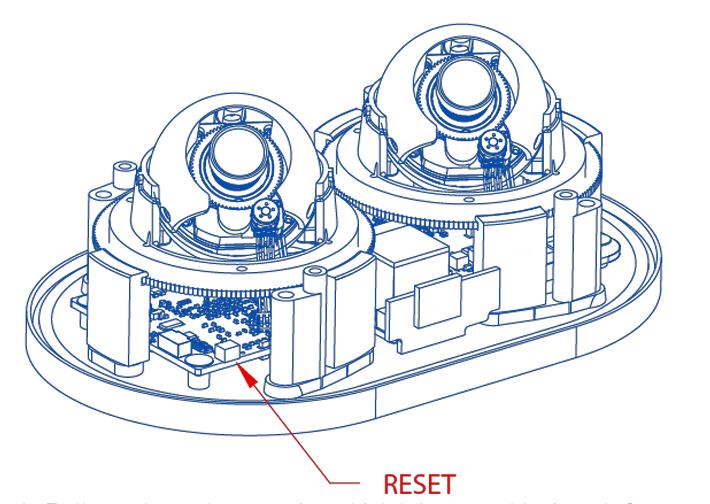
1.Press and hold the reset button for 2 to 5 seconds, then release the reset button.
This resets the camera to the factory default except for the network settings.
2.Press and hold the reset button for more than 5 seconds, then release the reset button.
This reset the camera to the factory default, and this resets the network settings to the factory default.
Costar Utility | How to Factory Default a Costar camera
Environment:
Procedure:
1.Locate the Costar camera from the list and “Left-Click“ on it.
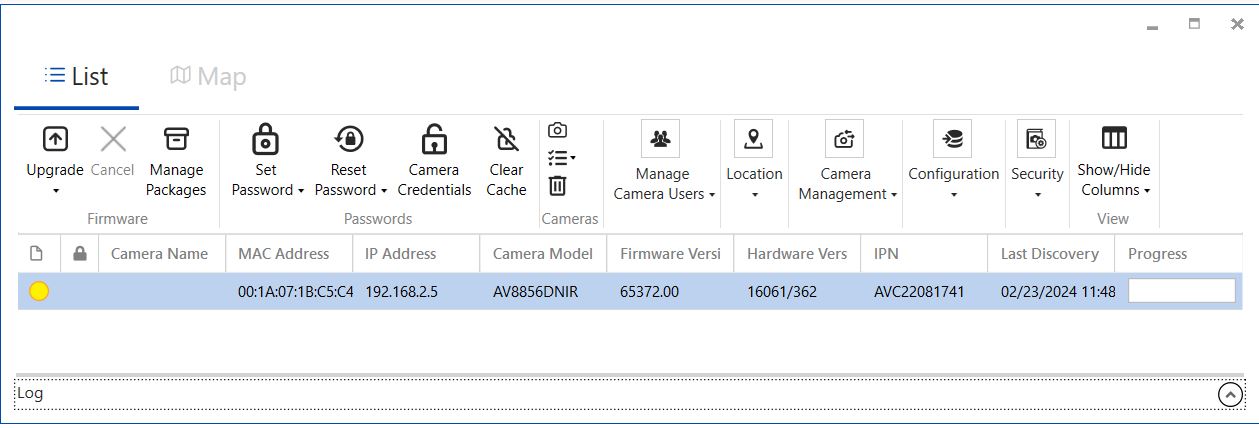
2.Select the “Factory Reset” from the Camera

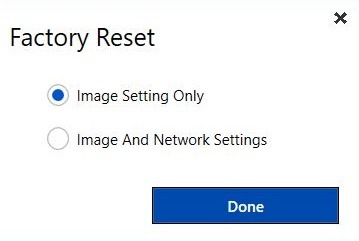
3.Select one of the options from the Factory Reset prompt menu and Click on “Done”
Note: If “Image and Network Settings” is selected, Review Set IP address
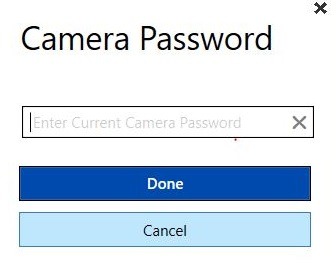
4.Enter your password to proceed and Click on “Done”
5.Your Progress status will Display Rebooting.

.

