Zosi Security Camera Troubleshooting
Zosi Camera Not Working On Phone
If you are suffering the same (or similar) security camera issues like below, try the solutions to quickly solve all of them. And if you have any other questions or need any help, leave it in your comment. We will reply ASAP.
The most common”IP security cameras won’t work” issues and problems:
- My security camera playback is not working, just can’t play back the video.
- Can’t view my security cameras remotely.
- No video but camera LEDs are on.
- Video surveillance cameras work in daytime but video loss in night time.
- Night vision doesn’t work, can’t record anything, or infrared is not working.
- Can’t connect to the NVR security camera on my iPhone/iPad.
- 24/7 recording is not working, it won’t start.
- Got Swann/Lorex common security camera problems.
- No WiFi signal, it’s so weak, my security camera can’t connect o WiFi.
- Your DVR system or NVR system has a green and red light flashing.
- Your security camera is not in color, not clear, or not responding.
You know how to verify if a CCTV camera is functional or not without knowing anything about how CCTV cameras work. If any of these problems occur, you will be stuck with a security camera not working complaint. If you’re having other “security camera not working” issues, check out the security camera troubleshooting – 10 best ways.
Take a quick glance at the 10 effective security camera troubleshooting techniques in the infographic below and start troubleshooting on your own, or continue reading if you want to learn thorough ways to solve your CCTV camera not working or recording.
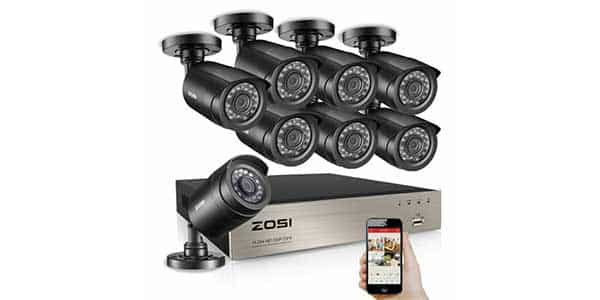
Here is the Zosi Security Camera Troubleshooting Steps:
1. Check the Security Camera Connection and Power
How come my security camera isn’t working? In the first step, ensure that all of the connections are right and that the camera is turned on. A user handbook or brief guide is usually included with the security camera product. Check the handbook or guide to ensure that you’ve connected the camera correctly.
Whether you have problems with a wireless home security camera, you should verify the WiFi connection (if the wireless security camera is linked properly through WiFi) – you may test the network connection with a network cable. Check that your router is operational. More information may be found in our earlier piece, Security Camera WiFi Troubleshooting. You should also check the power supply
If you are using a wired or PoE security camera, make sure the video signal and power supply are well transmitted. For a PoE security camera, check if there is a correct and workable PoE injector or PoE switch. If you have an NVR security system, make sure all the connections to the system are correct.
2. Make Sure the Cabling Is OK
A high frequency of connection issues centers around cabling problems. If the security camera doesn’t work properly, such as the lights (for example the IR LEDs) are not on in dark at night, it’s likely a cable problem, and it will cause no image and no video recording at night.
Use another cable to connect the camera to see if the problem is solved. For a PoE security camera, you are suggested to use a Cat 6 or Cat 5 Ethernet cable.
3. Check the Settings If Security Camera Won’t Work
Camera settings are something that many people overlook. Most of you may discover that your security cameras aren’t recording 24/7, don’t have motion detection alerts, can’t connect to Wi-Fi, or can’t record video at night because you haven’t configured them properly.
Always keep in mind that security cameras contain functions, some of which are active by default and others that require your manual activation.
In most cases, you may alter the settings using software on your computer or an app on your mobile phone. As an example, consider ZOSI. You may download and install ZOSI Client on a computer, connect to a ZOSI security camera on the Client, navigate to the settings, and configure the PC for 24/7 recording.
4. Reboot the Security Camera to Fix Issues
The ”Golden Rule” in IT troubleshooting, especially for the not working security cameras, is to reboot the device. You can reboot your security camera to release the cache to flush, settings to recalibrate, and connections to self-revise. To reboot the surveillance camera, directly plug off the power supply, wait for a few seconds, and plug on again.
5. Check If There Are IP Address Conflicts
Each IP security camera must have its own IP address in order to send and receive data over the Internet or a computer network. If another device shares the same IP address as the camera, there will be a conflict, and your security camera will stop operating. Check to discover whether your faulty security camera has an IP address conflict.
There are two methods for checking. To enter the DOS command prompt, type “cmd” (without the double quotes) into the Windows search box on the computer to which your camera is connected. You may check for IP conflicts by typing “arp -a” (without the double quotes).
Alternatively, you can type the commanding camera IPaddress -t” (without the double quotes) – for example, if your IP camera’s IP address is 192.168.0.999, you should type ”ping 192.168.0.999 –t”. If you receive results with “Unreachable” or ”Timed Out”, it means the IP security camera is not connecting to the network. Change the camera’s IP address or assign it with another one.
6. To Resolve Security Camera Not Working, Upgrade to the Most Recent Firmware.
Most brands or manufacturers will constantly provide firmware upgrades to correct security camera bugs and glitches, as well as to introduce some new capabilities. Check the brand’s official website to check whether new firmware for your camera has been available, and then upgrade it to the most recent version.
There will be tutorials to help you quickly obtain the updates. Check that the firmware you download is the right version for your security camera. Don’t update to the incorrect one.
7. Upgrade to the Most Recent Client Software
If you are unable to connect to the security camera using software, it is most likely due to incompatibility between the program and the firmware. This problem can be resolved by updating the software and firmware to the most recent versions.
For example, if you are unable to make video camera settings on software from a computer, or if you are unable to remotely view the camera using the app on a mobile phone, you must upgrade the software and the app to the most recent versions.
Always remember to utilize the manufacturer’s software or app. That is the ideal one for your camera to function with all of its features and without any incompatibilities. There is third-party software available, but you must validate that all of the camera’s functions are supported.
8. Reset the Security Camera to Its Factory Default
Factory default is always a workable method to fix security camera not working problems. Some security cameras come with a reset button, which enables you to one press to do the factory restore settings; some come with a pinhole as the reset function and you need to use a needle thing to enable it.
Remember factory reset means it will remove all settings and configurations to the ”factory default” settings. And you need to enable the features you want again.
2nd Problem
Zosi Camera Not Showing Picture
Security Cameras Not Showing Picture – Possible Reasons & Troubleshooting
1. Inadequate Power Supply
Let’s be clear about something. This is not the same as a power outage. This is a circumstance in which there is insufficient power, resulting in video signal loss, camera blackout, or camera video flashing on and off. Here are some of the most prevalent causes of inadequate power supply:
Here are some common reasons for insufficient power supply to CCTV cameras:
- Loose cable connections
- PoE switch or PoE injector not working
- The cable is too long, or one cable is supplying too many cameras at once
- Faulty power cables (old, damaged, degraded)
Loose cable connection, for example, between DVR/NVR with cameras, between CCTV cameras and monitor or screen, power adapter, or any possible loose connection in camera power supply could cause video loss.
Quick Fixes:
- Check all power connections, power splitters, and cable connectors to rule out any connection difficulties.
- Switch ports to ensure that the DVR/NVR port is powering the cameras.
- Connect the cameras directly to the NVR rather than through a PoE switch in case the PoE switch is giving inadequate power. This is due to the fact that PTZ cameras and IR cameras consume more power.
- To power cameras, use shorter BNC or Ethernet cables and avoid using low-quality extension cables or extension cords.
- Check that the battery is not dead or that the solar charger is not obstructed if you are utilizing battery-powered cameras.
If you are using battery-powered security cameras, such as ZOSI C1 and ZOSI C306, make sure the battery is not dead or charged via a power adapter or solar panel.
2. Interference & Power Spike
A power spike can be a disaster for a system. It is possible that it may result in a sudden loss of video, entire blank displays, or vertical lines, as well as catastrophic damage to the camera’s circuit boards or other components.
Here are some common reasons for power spikes & interference:
- Mounting the cameras to a metal/conductive surface
- Lightning strikes
- Electrical current interference from nearby electrical equipment
Quick Fixes:
- To protect your electronics, use power and lightning surge protectors.
- UPS (uninterruptible power supply) systems help safeguard your equipment in the event of a power outage.
- If there is no non-metal surface for placing your cameras, place a block of wood between them.
3. Weak Wi-Fi connection or insufficient bandwidth
Video loss or a weak video signal on security cameras on a wireless network segment may be caused by unstable network connections, a poor Wi-Fi connection, or insufficient internet speed.
Here are common reasons for network-induced video loss:
- The camera(s) are too far away from the home router
- There are too many physical barriers between your camera and the router
- Wi-Fi signal interruption and interference
Quick Fixes:
- If feasible, relocate your cameras closer to the router (or your router closer to the cameras if not)
- Select the appropriate channel (some routers can emit 2.4 and 5 GHz signals)
- Avoid physical impediments (walls, trees, etc.)
- Make use of a WiFi range extender)
- To resolve video loss on analog and IP PoE cameras, reconnect the BNC connector and remove the PoE switch.
- Cameras on a wireless network section, checking network and potential network outages
- Check that the SIM card is correctly inserted and that the data is not maxed out on cellular security cameras.
4. IR Cut Filter & Faulty IR Night Vision
One of the main reasons many security cameras are installed is to keep an eye on things at night when the business is closed and unoccupied. The building is dark inside and out and the need for IR night vision cameras is essential. So not having working IR night vision is a big hassle.
Here are common reasons for IR cut filter & faulty IR night vision video loss:
- You don’t have an IR camera installed
- Faulty IR sensor
- Forgot to turn on the IR
Quick Fixes:
- Check the settings on your NVR/DVR to make sure the IR is on
- Use external IR illuminators or a floodlight
5. Compatibility & Signal Type
If your DVR or NVR displays visual loss or no video, it is possible that your system is unable to decode the video stream from various types of cameras.
Here are common reasons for signal type & compatibility video loss:
- Cameras and NVR/DVR aren’t compatible
- Cameras with a 5MP or 4MP is not compatible with NVRs and DVRs that decode 1080p cameras
- Some DVRs can’t decode from older CCTV cameras
Quick Fixes:
- Consult a local technician
- Use the same brand of DVR/NVR as your cameras
6. Cable or wire problems
BNC cables or Ethernet network connections may have an effect on the functioning of security cameras. This is especially true for analog CCTV cameras, which may experience more video or signal loss than PoE cameras.
Here are common reasons for cables or wires problems video loss:
- Hardwired (analog, PoE) cameras can get twisted or bent cables
Quick Fixes:
- Check every inch of the wiring—no frayed wires, cuts, bends, chews
- If necessary, try replacing the cabling
7. Hardware and Firmware Issues
If you’ve eliminated all other possibilities but still haven’t resolved the issue, it’s possible that your NVR/DVR or security cameras are in poor condition.
Here are common reasons for hardware & firmware problems video loss:
- Old or bug-ridden firmware
- Firmware needs an update
Quick Fixes:
Update your firmware (USE CAUTION: updating the firmware without a thorough understanding of the update could create more problems than it fixes!)
Replace your cameras with a new, quality system. Feel free to request a quote for recommendations for your location.
8. IP Address Conflicts
If two IP cameras are on the same network and have the same IP, then they will kick out each other from the network, causing video loss on your system. This is not related to a power supply issue, it’s a network issue. Each device on the network must have a unique IP address.
Quick Fixes:
- Scan the IP address of your security cameras to see if there are any conflicts, for example, duplicated IP addresses on the network.
- Ping the IP addresses before assigning them to an IP camera.
- Make sure you’ve assigned the correct gateway to the camera or DVR/NVR. It has been reported that a wrong gateway (or missing) may cause video loss.
9. Power Outage
Power surges are another issue with security cameras. This reason is likely to result in sudden video loss on all of your security cameras at the same time, especially if your cameras use coaxial cable (IP cameras are less susceptible).
If your DVR/NVR or cameras are not properly grounded during a thunderstorm, they may be fried. In some situations, the camera’s circuit board will be destroyed, resulting in moving horizontal or vertical lines on the TV screen.
Here are common reasons for power surge video loss:
- Installing the security camera on metal or any other conductive surface
- Lightning strikes may fry the whole CCTV system.
- Heavy thunderstorms.
- Grounding done improperly or not done at all.
- Electromagnetic interference from other electrical devices or transmitters.
Quick Fixes:
- Use power surge protectors or lightning surge protectors to protect your CCTV security system from lightning.
- Deploy UPS (Uninterruptible Power Supplies) in your CCTV security system design to ensure that the security cameras will work even if there’s a power outage in the area.
- Don’t mount the camera on a metallic surface, or if you have to do it, put a wooden block in between to make the setup non-conductive.
- Ground all your CCTV equipment according to each device’s manual.
More:
- How to add an IP camera to a Zosi NVR
- ZOSI Dvr Upgrade Tools Firmware and Guide
- Reset password on Zosi NVR DVR
3rd Problem
Zosi connecting failed issue
The first step in resolving the Zosi connection failed problem is to ensure that your DVR or NVR security system is online. If the machine does not have internet access, you will receive a failed connection notice.
Go to DVR or NVR (locally), access the Main Menu and then navigate to Information > Network. Here you have to make sure that the Network Status shows Connected.
If it says not connected, that implies the DVR isn’t linked to the internet and you can’t watch the cameras remotely. In this instance, double-check the cabling.
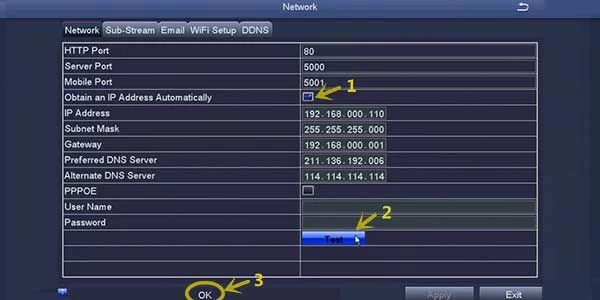
The next step is to go to your Zosi DVR/Network NVR’s Settings and update the network settings. It may sound strange, but this method resolves the problem, so simply apply the changes once more.
Go to the Main Menu > Network. In this section, you can either set a dynamic or a static IP address. We recommend going with a dynamic IP. Tick the box that says “Obtain an IP address automatically”. Then click Test to confirm the connection. Click OK and after that apply.
Note: If you use a static IP address, make sure there’s no IP conflict and enter the correct Subnet Mask, Gateway, and Preferred/Alternate DNS (you can get this information from your router’s settings).
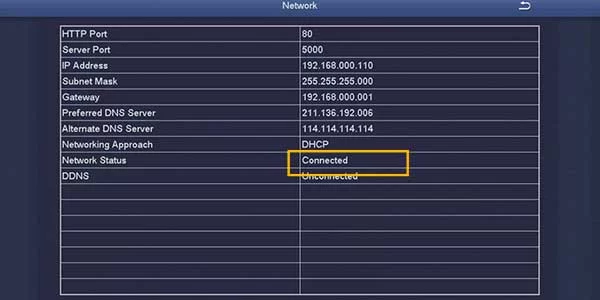
Return to your phone app and try seeing the cameras again after refreshing the Network settings on your Zosi DVR/NVR. If everything is in order, instead of the “connection failed” message, you should get “Ready.”
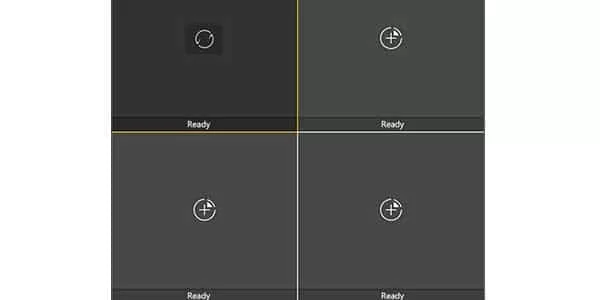
Load your cameras and watch for them to appear online. As a result, this easy method will resolve the Zosi connection failed problem. You should also double-check that your DVR’s login and password are appropriately entered into the app. Keep an eye out for unintentional dark gaps.
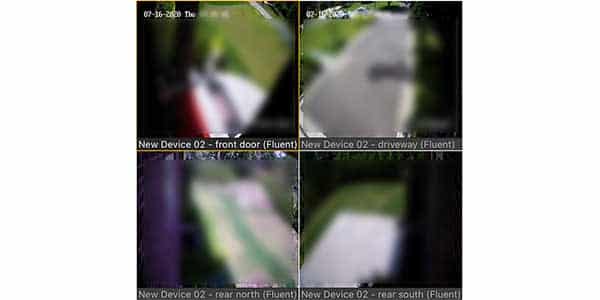
If the error is not fixed, consider the tips listed below:
- Ensure that your DVR or NVR is updated to the latest firmware. Contact the seller or the manufacturer to get the correct firmware for your machine.
- Make sure you’re using the correct app. Read the manual or contact the seller to find which app you’re supposed to use. Some recorders need to use the Zosi Smart app, others use the Zosi View app.
- Update the phone app. Check if you’re running the latest version.
- In rare cases, the connecting failed issue may be related to a firewall blocking the connection on your router. Take a look at the settings to ensure that your recorder is allowed to connect. Additionally, update the firmware on the router as well.
- Lastly, try the oldest trick in the book: power cycle the recorder and try if you can see the cameras.
