Used to snapshot any frame picture of real time video monitoring or replay and manage the pictures
Function instruction: real-time video monitor picture capture, frame picture capture in replay, linkage alarm picture capture and store them into HDD
Operation steps:
Function instruction: Manage screenshots and there are three types of screenshots, manual screenshots, alarm screenshots and video screenshots
Operation steps:
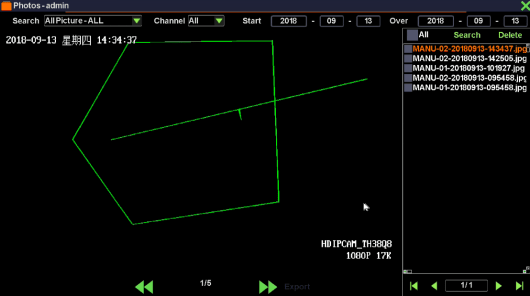
Function instruction: Backup screenshot file into U-disk or move them into HDD, as the picure shows:
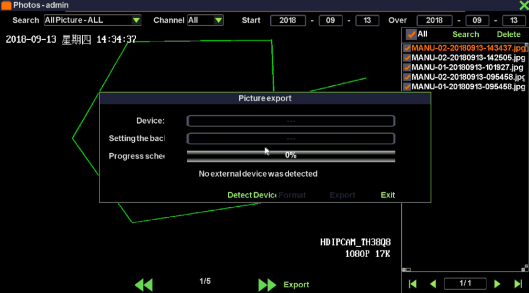
Operation steps
Function instruction: set recording plan
Operation steps:
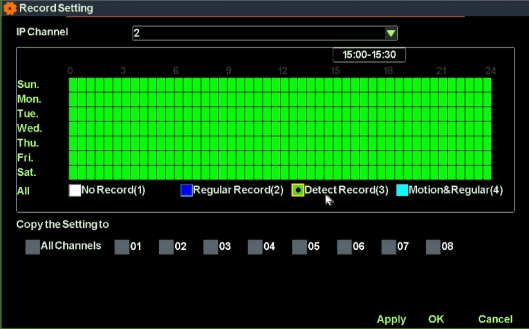
Remarks: When you set current record plan to ‘Motion Detect Record’, NVR will automatically record only when motion incident happens.
When you set current record plan to ‘Motion & Regular Record’, NVR will make motion record when motion incident happens and make regular record when there’s no motion incident.
Function instruction: Used to search video recording data.
Operation steps:
Function instruction: Used to operate on video recording data, such as playback, suspend, fast backward, smart fast backward, speed, slow, backup, start/close audio, screenshot, full screen playback, playback window proportion adjustment, rewind down 30s, fast forward 30s.

|
Serial number |
Name |
Explaination |
Serial number |
Name |
Explaination |
|
|
1 |
Fast backward |
Recording back fastly |
11 |
Audio |
start/close video audio |
|
|
2 |
Choose Fast backward |
Choose back fastly |
12 |
1/4 screenlayout switch |
playback recording |
|
|
3 |
Play/Suspend |
Click to play/suspend |
13 |
Aspect ratio |
Cut 4:3/16:9 playabck screen ratio |
|
|
4 |
Stop |
Stop playback |
14 |
Full screen |
Playback full screen |
|
|
5 |
Screenshot |
Capture to recording playback |
15 |
Rewind down 30s |
Rewind down 30s |
|
|
6 |
Time fast forward |
Fast forward by time |
16 |
Fast forward 30s |
Fast forward 30s |
|
|
7 |
Smart fast forward |
Different play speed between regular record and motion record |
17 |
Time slice |
Set record playback time point |
|
|
8 |
Speed |
Video fast forward |
18 |
Earliest Play |
If ticked, NVR will automatically start playback from 10 minutes ago. |
|
|
9 |
Digital Zoom |
Zoom in record video |
19 |
Close |
Exit playback page |
|
|
10 |
Backup |
Enter backup interface |
|
|
|
|
Function instruction: backup video file to U-disk or HDD
Operation steps:
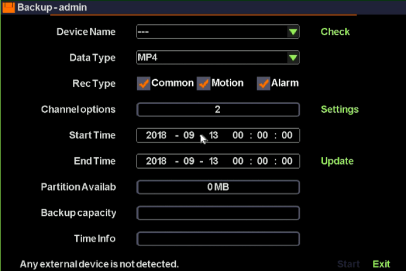
REMARKS: Install media player and you’ll be able to check the video backups.
Function instruction: general function setting like language, transparency , output resolution, wizard, auto log out time
Operation steps:Left click ‘system setting’ in contextmenu or in bottom menu, system opens a new dialog as the following picture shows:
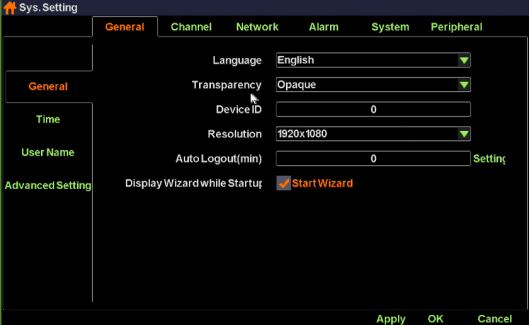
Detailed Function List
|
Function Name |
Function Description |
|
Language |
Set NVR system language,support Chinese/English and so on |
|
Transparency |
Set user interface transparency,support transparent/translucence/opacity |
|
Resolution |
Set the resolution from NVR to display, support 3840×2160,1920×1080,1440×900,1366×768,1280×1024, 1024×768 and so on. The default resolution is 1920×1080 |
|
Auto Lock Time |
Set auto lock time |
|
Start Show Guide |
After checking the function, it will show wizard window when system starts. |
|
Boot wizard |
Open wizard configure window |
Function instruction: set time, date format, time zone setting, time synchronize, as the following picture shows:
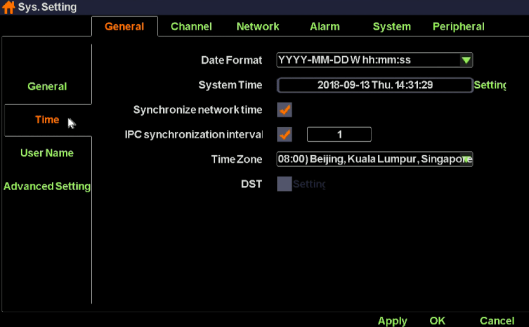
Operation steps:
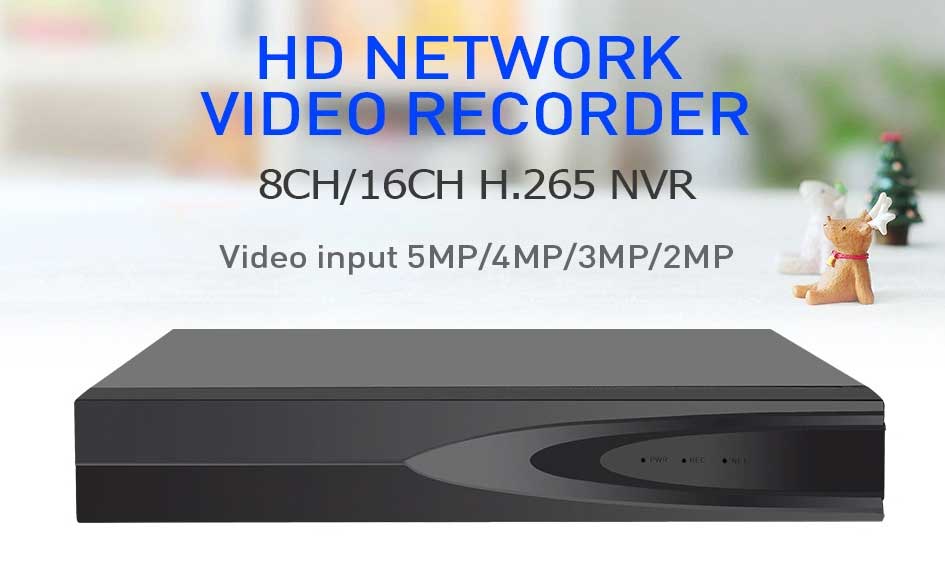
How to set recording system