Seetong NVR USER MANUAL, NVR4.0 series are the latest professional monitoring storage devices which have been developed and launched by our company, adopting Hisilicon video processing chipset,integrating excellent video encoder video codec algorithm .NVR4.0 series products own four features that are stability,ease of use.
NVR4.0 USER MANUAL
NVR4.0 series are the latest professional monitoring storage devices which have been developed and launched by our company, adopting Hisilicon video processing chipset,integrating excellent video encoder video codec algorithm .NVR4.0 series products own four features that are stability,ease of use, intelligence and perfection. Our NVRs use H.264, H.265, H.265+ compression algorithm which support ultralow code rate and super-long cable access and embedded Linux real time operation system,support ONVIF protocal,achieve IPC’S auto search,preview and recording without commissioning; APP one second connection to show picture,let our customer enjoy more perfect experience.
|
Mouse key |
Action |
Function |
Example |
|
Left Key |
Click |
Select |
1.Select a preview window,playback window and picture 2.Select a button,edit box,combobox, check box |
|
Double click |
Zoom in/out |
1.Switch different screen layout during preview 2. Double click on the video recording bar to start video replay |
|
|
Drag |
Adjust channel distribution |
Exchange two channels |
|
|
Middle Key |
Roll |
Change current view |
1.Zoom in playback scale; 2.scroll to view ipc device search list 3.scroll to view screenshot search list; |
|
Right Key |
Click |
Return |
Single click to close current window |
|
Press Right mouse button for more than 10s |
Set NVR resolution to 1920×1080 |
Press Right mouse button for more than 10s in any dialog. Resolution will be set to 1024×768 |
|
Name |
Key Instruction |
Function instruction |
|
Number |
0~9 |
Input number from 0~9 |
|
Character |
!@ # $ % ^ & * ( ) – { } :"|?<> |
Input symbol |
|
English |
a~z A~Z |
Input English letters |
|
Big/Small |
Shift |
Capital letters/lowercase letters switch |
|
Chinese/English |
EN/CN |
Chinese and English Switch |
|
Delete |
← |
Delete last character |
|
Page-turning |
PageUp/PageDown |
Turn to last/next page when current input method is simplified chinese. |
|
Name |
Operation |
Function Operation |
Example |
|
Button |
Left click |
Save or Cancel |
Application,confirm, cancel |
|
Open sub window |
NVR network setting,wizard,video resource setting |
||
|
Edit Box |
Left click |
Modify |
Modify channel name |
|
Drop-down box |
Left click |
Select |
Change language,select resolution |
|
List Box |
Roll |
Change current view |
View search list and added-device list |
|
Check Box |
Left click |
Select or Cancel |
Copy a channel to other channel |
|
Character |
Null |
Instruction |
Headline, Name |
|
Name |
Function |
Name |
Function |
|
Close |
Close user operation window |
Copy |
Copy the channel setting to other channels |
|
Application |
Save configuration and put into effect.It won’t close current window |
Default |
Set all parameters to default. |
|
Confirm |
Save configuration and put into effect. It will close current window |
Check All |
Select all items of current window |
|
Cancel |
Cancel just now operation |
Single check |
Select one item of current window |
|
Details |
Explanation to some function |
Activate |
Activate NVR to get online service |
|
Preview window icon |
Instruction |
Preview window icon |
Instruction |
|
|
Recording |
|
Window setting alarm without trigger |
|
|
IO alarm detected |
|
Window move alarm |
|
|
IO alarm has been set up but without triggered |
|
Window remote control |
|
|
Intelligent analysis alarm detected |
|
Current channel exceeds NVR’s maxium decode capacity |
|
|
Intelligent analysis alarm has been set up but without triggered |
|
|
Bottom menu: Audio test(only 32-channel-NVR and 36-channel-NVR support), system setting, screen layout,rotation, zoom in/out, output adjust, PTZ control, snapshot, snapshot filemanager, recording plan setting, video replay, system close, audio switch
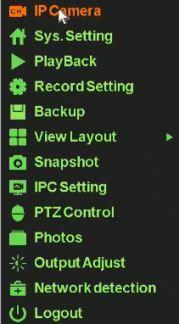
Context menu:video management,system setting, video replay, recording plan setting, screen layout, snapshot, remote IPC setting, PTZ control, snapshot filemanager, output adjust, network diagnose, system close
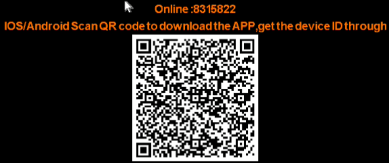
Status menu:cloud logging status,cloud ID and QR code
Move mouse to screen bottom,will popup following menu

Right click on desktop to popup following menu :
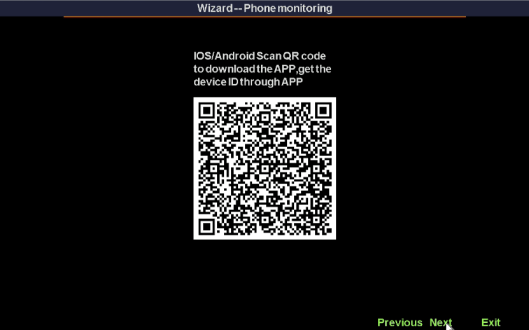
Move your mouse to the top of the NVR screen and you’ll see the QR code.
 ,
,
Seetong NVR USER MANUAL
Read More : Tpsee Topsee Firmware Software And Tools Download
As professional monitoring device, when user use our HD NVR, Please read below information before use
Note:switch off power before installation.
Step 1: twist off the sideway sreew of NVR case,take down upper cover plate
Step 2: align screw-socket on HDD and case bottom plate,screw on HDD screw and fix
Step 3: connect hard disk data line to main board and the other to HDD.
Step 4:cover upper cover plate and fix screw
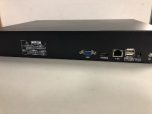

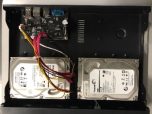

1 2 3 4
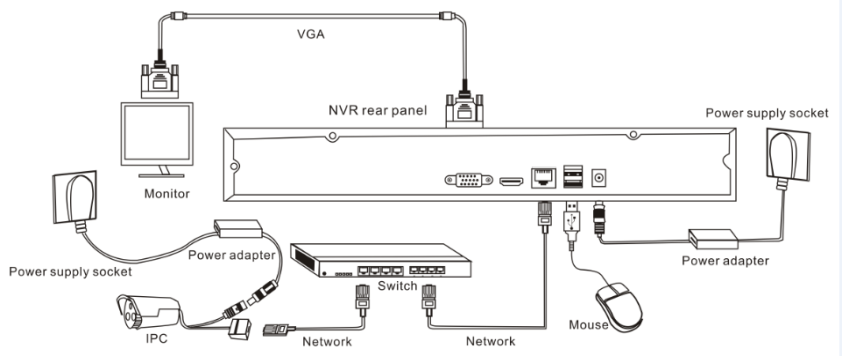
Non-POE NVR device connection diagram
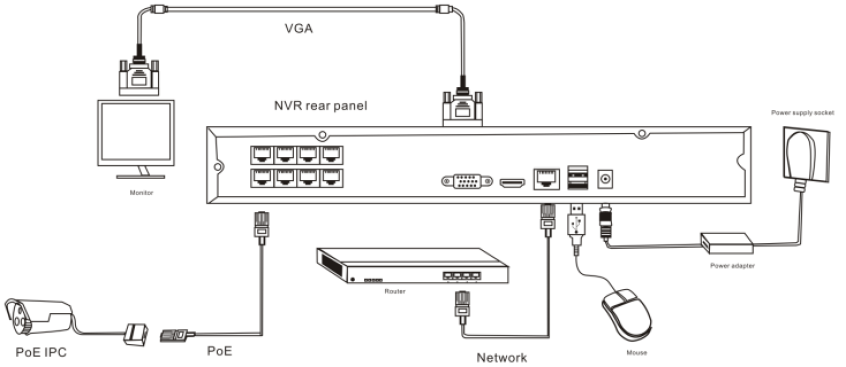
POE NVR device connection diagram
When NVR system starts at the first time with the access of the Internet, the status menu displays a message which says ‘Inactivate: Click to activate’, as the following picture shows:

You need to Left-click here to activate NVR by setting your own password to ensure your NVR is online. As the following shows:

REMARKS: Your own password can only involve letters or numbers and cannot be empty. It also cannot be set to default password ‘123456’
When NVR system starts,it will search and connect IPC devices automatically and then popup login dialog, as the following picture shows:

Operation steps :
Function instruction: when you forget your own system login password, you’ll need to use this function to get a new password.
Operation steps:
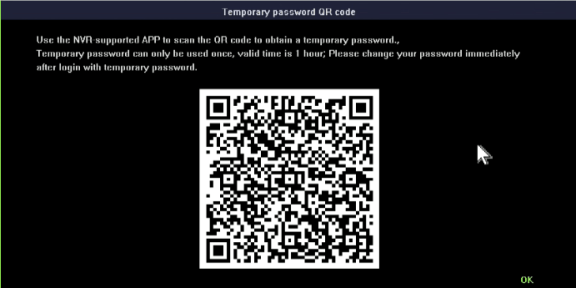

REMARKS: The temporary password loses effectiveness when user logged in or when it’s generated for 1 hour.
Function instruction:Log out after you have saved the configuration in case that unidentified user access to your NVR.You can also configure an auto-logout parameter to log out automatically.
Operation steps:manual log out, enter system main menu—right click —select “close system”—click on“logout” button.
Auto log out,enter main menu—right click—select“system setting”—general,set auto log out time
Function instruction:reboot or shut the system down
Operation steps:

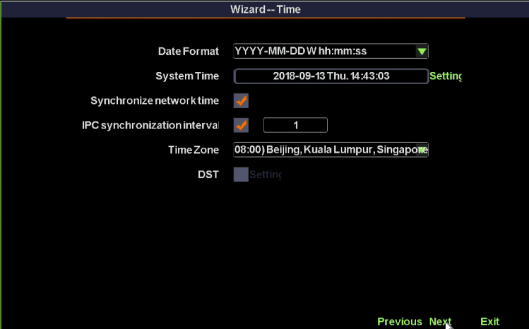
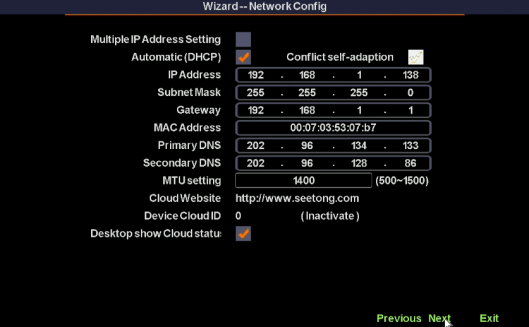
Function instruction: Help user make a basic configuration
Operation steps:
Setting 1: Set up system language,menu transparency,device number,auto logout time and whether the wizard window shows again when reboot.
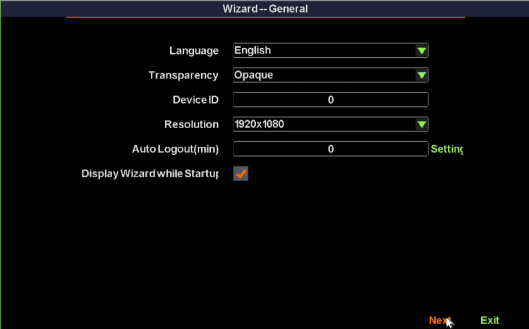
Setting 2: User password settings including admin password modification,whether to remember password and pattern unlock set.
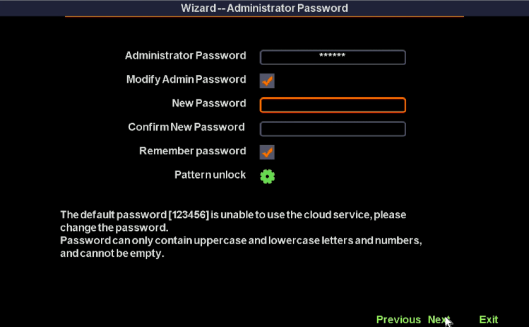
Setting 3: Set up date format, date, time zone, daylight saving time
Setting 4: Network settings
Setting 5: Scan QR code to download Seetong app and get NVR’s device ID
Setting 6: HDD formatting and recording strategy
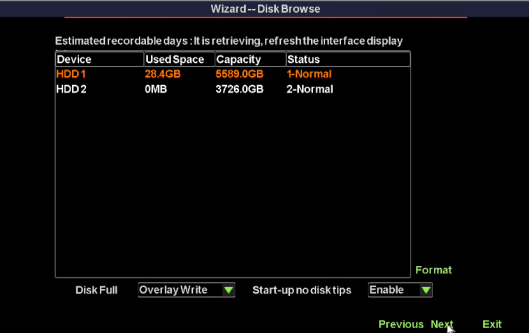
Setting 7: List all IPC devices. Left click ‘OK’ button to finish the wizard.


How to set recording system