Guarding Vision is good with huge numbers of the CCTV camera brands. A few brands may not permit similarity with this application because of the accessibility of their own cam applications. Anyway, it works with the vast majority of them. Uniquely intended to give a decent presentation. It works with DVRs, NVRs, and IP cameras that help cloud P2P Functions. Presently you can control your cameras remotely. Your cell phones will fill in as a remote and LCD, both at once. That sounds fascinating, numerous individuals can get help through this application. Any place you go, in the event that you have a web association, you can see the live recordings there.
How to Reset Password of NVR/ DVR via Guarding Vision App
Preparation:
This function may vary according to the device model and current firmware version.
6 0 O
My Device
DS-7108HQHI-K1 (680587737) < Q
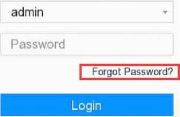
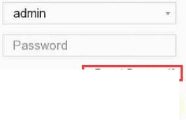
1. Click DVR Forget Password on login menu.
Welcome

2. Choose Verify by Guarding Vision.
Retrieve Your Password
| ® Verify by Guarding Vision ]
Verify by Email
![]()
![]()
![]()
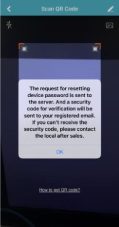
3. Run Guarding Vision app. Tap More – Reset Device Password.
4.
5.
-‘<!’J^L ^’1 j-ü-q S-I::nci
Configure Network
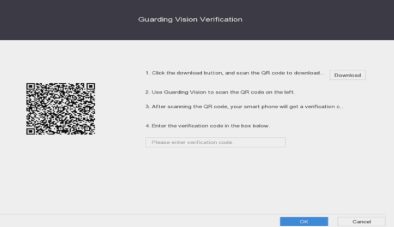
Scan the QR code on local GUI.
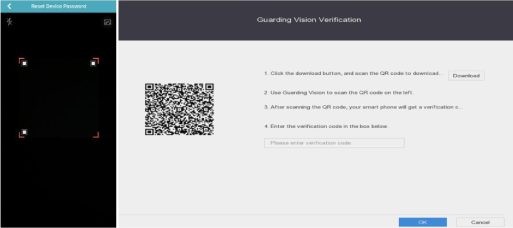
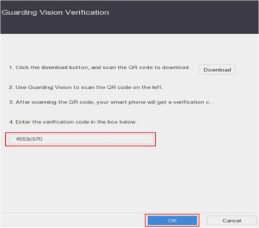
Enter the verification code in the box below.
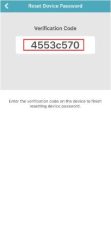
6.
Click OK, the system allows to create new password.

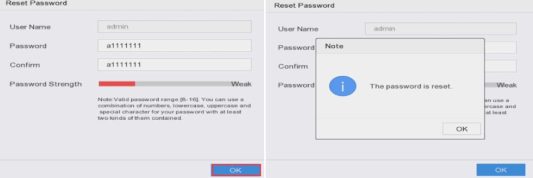
7. Login system successfully
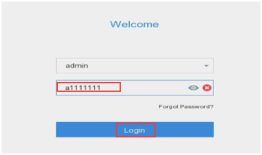
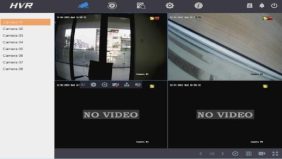
Note:
⟡ If the device has not been added, Verify by Guarding Vision will not show up.
⟡ If the device is added by others, the QR code will not work.
How to Reset Password of NVR/ DVR via Email
Preparation:
This function may vary according to the device model and current firmware version.
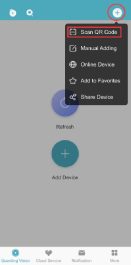
Password reset success ^
From: pwrecovery <pw_recovery@device-service.com> QH
Date: Thursday, Dec 2, 2021 11:11 AM
Dear customer.
We have received a password reset request from you. You are authorized to use the following
verification code to reset your password. Meanwhile, you agree to take full responsibility for this action.
The verification code for the device with serial number G80587737 is|19dc83bf|(valid for 48 hours).
Do not forward or give this code to anyone. Please note that the verification code will become invalid if the device is rebooted, the reserved email address is changed, or 48 hours elapse.
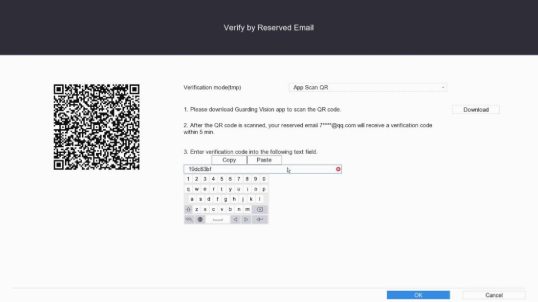
7.
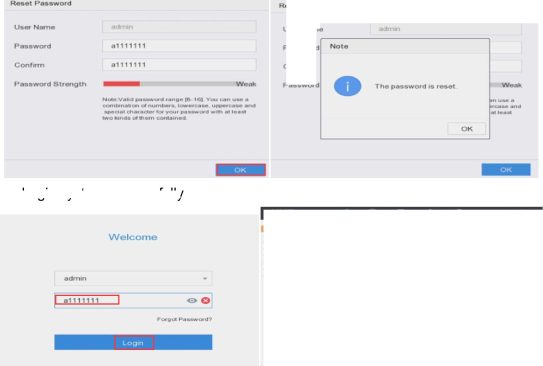
The system allows to create new password. Click OK.
User Name
Password
Confirm
Password
Password
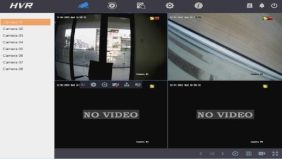
8. Login system successfully
Read More : Guarding Vision Troubleshooting Guides
Guarding vision Setup from browser (www guardingvision com)
Step 1: Open browser (Internet explorer/Chrome) and input the address www.guardingvision.com. And click on “Register” to register for a new account.
Step 2: In the registration page, input the mandatory credentials and select “Email” for registering with email or “Country Code” for registering by a phone number.
Step 3: Once the account is created, select “Device Management” and select “Add” to add a new device.
Step 4: In the “Add Device” pop-up window, input the device serial number (Last 9 digits of the serial number found on the device sticker) and click on “Search”.
Step 5: If the platform access is enabled on the device, then you should see the device on the “Add device” window. Click on the ‘+’ icon for the device. Click on the link for Enabling “Platform Access” https://app.box.com/s/ftj2keo6pvvvkpif9ukquyp7jrvhktwx.
Step 6: Enter the verification code found on the platform access page of the device. Click “Add”.
Step 7: Click “OK”. Now the device should be added into the Guarding vision account. To view video stream, download the Guarding vision ass on your mobile phone and login with the account credentials just created.
Sharing the device:
To share the device with another Guarding vision account, click on the “Share” icon next to the device name
Select “Email” for sharing by email or select “Mobile Phone Number” to share by mobile number. Click on the check mark next to the device and click “Share”.
Add Guarding Vision Device to CMS/Guarding Vision Lite Windows Application
Add and View Guarding Vision device on CMS Lite/Guarding Vision Lite Windows Application
Purpose:
This document provides steps to add and view your devices remotely by using the CMS Lite Application.
Step to take before proceeding:
- Please Install the CMS Lite from the link below:
https://app.box.com/s/0g82wazo6j7b7cwh6r1wyx8q4d1w34hb
- Create a guarding vision account
Creating an Account for the application:
Step 1: When you open the application for the first time you should see the following welcome page.
Step 2: Create a password, confirm the password and select ‘Enable Auto-login’ and click ‘Login’ to proceed.
Adding your Guarding vision device into the Application:
Step 1: You should see the following page after you create the password.
Step 2: Select ‘Maintenance and Management’ option on the top right and select ‘+Add’ and proceed to the next step.
(Note: Click on “Online Device” option to add the device over the local network)
Step 3: Select ‘Cloud P2P’ in the adding method, Select the region to login as ‘USA’ and click ‘Login’ this will open the login page for Guarding vision.
Step 4: Input the Guarding vision Account credentials and click ‘Login’.
(Note: If you do not have a guarding vision account created, Click on ‘Register’ to create a new account)
Step 5: Input the last 9 digits of the serial number for ‘Device Serial No’ and ‘Verification Code’ and click ‘Add’. Or close the “Add” window if you already have a device existing your account.
Step 6: You should see your device added into the list
Step 7: Select ‘Live View’. The left pane will show your device listed under ‘Camera’ click on ‘+’ next to your device name to see the cameras connected to your device. You can double click on a desired camera or double click on the device name to start viewing the live video.
You can also select number of cameras you can view at the same time by selecting the options under ‘Default View’
