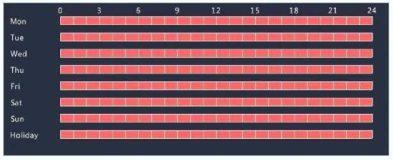
4.Set a schedule under Storage > Recording. For the detailed steps, see Draw or Edit a Schedule. Make sure the schedule type is Alarm. The set schedule appears in red, which stands for alarm-triggered recording. The following shows an example.
.
Manual Recording
Record video manually by clicking
.
on the window toolbar.
Alternatively, click Manual > Recording, select the desired camera and then click Start. To stop manual recording, click @ on the window toolbar, or select the camera and then click Stop under Manual > Recording.
□Select Camera Status
0 DI IP Camera 01 ® Started
□D2 IP Camera 02 Q Stopped
.
Holiday Recording
Holiday recording allows you to specify certain time periods as holidays for scheduled recording. First you specify certain date(s) as holidays, and then configure recording schedules on these days.
Holiday Recording
1.Click System > Holiday.
2.Click the Add button in the lower right corner. The Holiday window is displayed. Complete the settings including the holiday name, start and end dates. By default a holiday is enabled when added and does not repeat.
.
|
Holiday Name
|
NEW YEARS DAY
|
|
Status
|
SEnable
|
□ Disable
|
|
Repeat
|
ONo
|
0Yes
|
|
Mode
|
3 By Day
|
□ By Week
|
|
Start Date
|
01 ’ 01
|
.
|
|
End Date
|
01 ’ 01
|
–
|
3.Click OK. The holiday appears in the list.
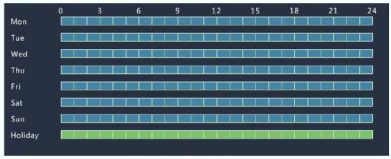
4.Click Storage > Recording and then set a recording schedule as described in Draw or Edit a Schedule. Make sure Holiday is selected in the Select Day drop-down list. In the following example, motion detection recording is enabled on the set holiday.
.
Other Recording Types
Other recording types:
• Event: Including the types below. Any of these types will trigger
event recording.
•Motion detection AND alarm triggered (M and A for short): recording is triggered only when a motion detection alarm AND an input alarm occur simultaneously.
•Motion detection OR alarm triggered (M or A for short): recording is triggered when a motion detection alarm OR an input alarm occurs.
When you choose an Event type of recording, make sure you have enabled the corresponding alarm function and configured alarm- triggered recording. The configuration steps are similar. See Motion Detection Recording for more details.
7 playback
Instant Playback
Instant playback plays the video recorded during the last 5 minutes and 30 seconds. If no recording is found, it means there is no recording during this period.
1.Click the desired window, and then click on the toolbar to start
instant playback.
2.You may drag the slider to control the progress. Pause and resume as needed.

Table 7-1 Playback Toolbar Buttons
.
Playback by Camera and Date
Use this method to play recordings found by camera and date.
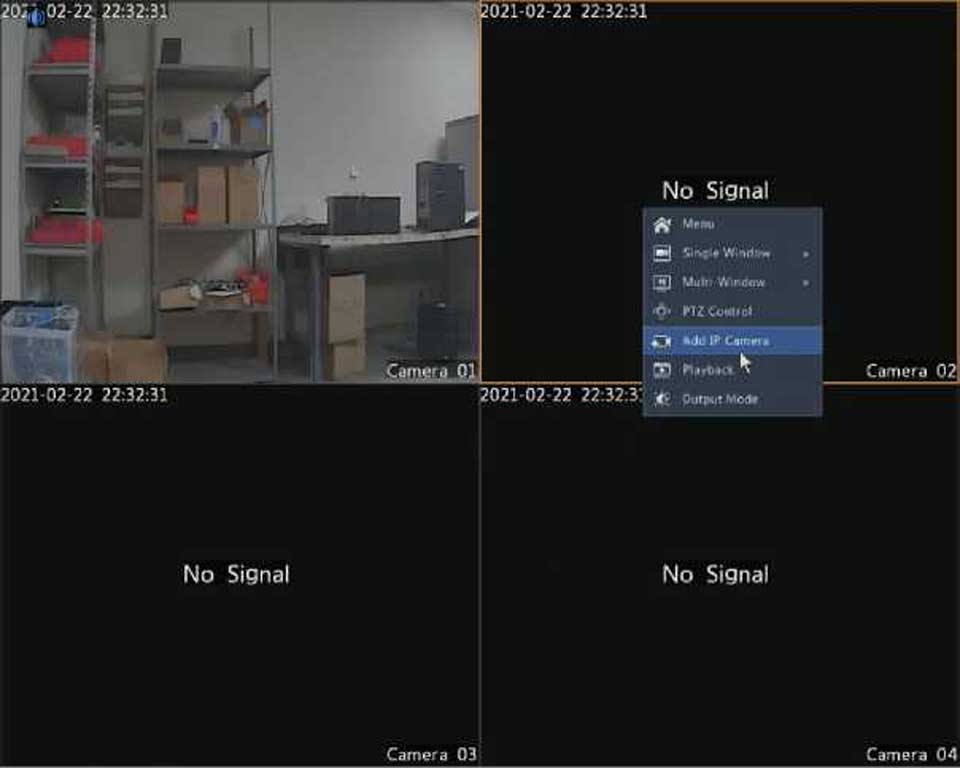
1.Right-click the mouse and then choose Playback.
2.Select the desired camera. By clicking Max. Cameras in the upper right corner you will select the maximum number of cameras allowed.
S’ NOTE!
You can select multiple cameras for synchronous playback. Clicking Max. Camera selects the maximum number of cameras allowed, and clicking Close All stops playback for all cameras. The performance varies with DVR model.
|
Button
|
Description
|
|
.
|
Show playback progress.
Note:
•A small window displaying video of the selected window is displayed as you drag the slider, helping locate the part of the video you want to view.
•The first progress bar indicates playback progress of the video playing in the highlighted window. The second indicates the overall playback progress for all the selected cameras.
|
|
.
|
.
|
.
|
Timeline.
|
|
/
|
Zoom in or out on the timeline.
Note: Alternatively, scroll your mouse wheel.
|
|
/ / /
|
Play, pause, stop, and reverse.
|
|
/
|
Rewind or forward 30 seconds.
|
|
/
|
Slow down or speed up.
Note: Click to restore the normal playback
speed after clicking , and vice versa.
|
|
□
|
Forward by frame.
|
|
/
|
Start or stop clipping video.
|
|
0
|
Lock.
|
|
/
|
Add a default or custom tag.
|
|
.
|
Manage files (clips, locked files, tags).
|
|
ESI
|
Zoom in on images. For more details, see Zoom.
|
|
/
|
Turn off/on audio.
|
|
.
|
Adjust sound volume for the current window.
|
3.Select the desired date on the calendar and then click □ to start
playback. Double-clicking the date will start playback directly.
NOTE!
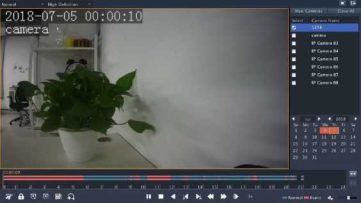
•The calendar uses different flags to indicate different recording types. No flag means no recording. The blue flag means normal recording. The red flag means event-triggered recording.
•In the drop-down list right to playback mode: High Definition means video recorded with the main or sub stream; Standard Definition means video recorded with the third stream.
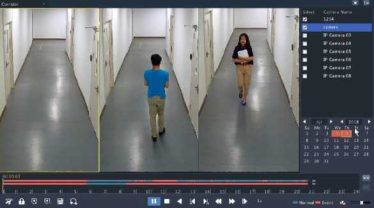
Playback in Corridor Mode
Play recordings in corridor mode in multiple windows.
1.In the playback window, select Corridor from the drop-down list in the upper left corner.
2.Select cameras and then double-click the desired date to start
playback.
.
Playback by Tag
Add tags named with keywords such as event name and location to a recording and use tags to quickly locate the part of the video you need during playback.
Adding a Tag
1.Right-click and then click choose Playback.
2.Click H to add a default tag named TAG. To add a custom tag, click and then set the tag name, for example, tag1.
3.To manage the added tags, click , and then rename or delete tags as needed.
.
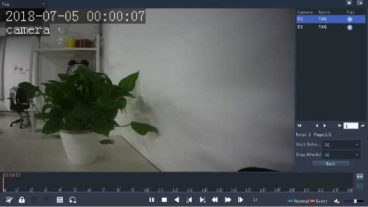
Playback by Tag
1.In the playback window, select Tag from the drop-down list in the upper left corner.
2.Select cameras, set the time period, enter keywords, and then click Search. Search results, if there are any, are displayed with names of cameras and tags.
3.Click for the desired tag to start playback. You may use the Start Before and Stop After drop-down lists to set when the tagged video starts and ends.
Playback by Event
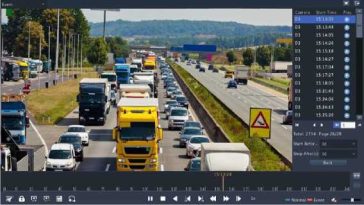
Specify an event type and search for and play videos recorded for one or more cameras during a specified time period.
1.In the playback window, select Event from the drop-down list in
the upper left corner.
2.Select the desired event type, for example, motion.
3.Select the desired camera, set the time period, and then click
Search.
|
Carrera
|
Name
|
Time
|
Edit
|
Delete
|
|
014
|
TAG
|
2016-04-15 00:01:16
|
J
|
B
|
|
014
|
TAG
|
2016-04-15 04:57:29
|
.
|
B
|
|
D14
|
Tagl
|
2016-04-15 05:49:38
|
.
|
B
|
4. Click o for the desired recording to start playback.
.
Playback by Smart Search
This function provides an efficient way to review recordings containing smart search results such as detected motions. In smart playback mode, the system analyzes recordings for smart search results. If such results are detected, the progress bar is highlighted in green, and the video plays at the normal speed, allowing you enough time to catch details; otherwise, the video plays at 16x speed to save time.
1.In the playback window, select Smart from the drop-down list in the upper left corner.
2.Click o for the desired camera to start smart playback.
3.Click . The smart search window is displayed. By default, the full screen is the smart search area. To clear all, click g; to restore the full-screen search area, click □ .
4.Set smart search rules, including detection area and sensitivity.
5.Click IS to start search. To quit, click 1..
Playback by External File
Use this function to play recordings stored in an external storage device, for example, a USB drive or a portable USB hard drive.
1.In the playback window, select External File from the drop-down list in the upper left corner.
2.Click Refresh and then wait for the DVR to read the external storage device.
3.Select the desired recording file and then click o to start playback.
File Management
File management allows you to manage video clips, tags, and lock or unlock files.
1.Click □ for the recording you want to lock in the playback window.
Locked files will not be overwritten when storage is used up.
2.Click El and then click the Locked File tab to view the locked file. To unlock a file, click 6, and the icon changes to ■f. To back up a file, select the file and then click Backup.
8 recording backup
Backup, also known as recording backup, is the process of searching for video stored on a hard disk of the DVR and then saving it to a USB storage device. Make sure the USB storage device has been formatted into FAT32 or NTFS format and is connected to the DVR. The default backup format is .mp4.
Normal Backup
1.Click Backup > Recording. All cameras are selected by default.
2.Set search conditions and then click Search. Search results are
displayed.
You can lock/unlock and play recording files in this window.
3.Select the desired recording(s) and then click Backup.
5.Set the destination in the USB storage device and then click Backup. The recording(s) will be saved to the specified directory.
NOTE!
•You may want to create a new folder for the recording(s) by clicking New Folder.
•If the connected storage device has a capacity that is greater than 2T, clicking Format will format the device to NTFS file system; if the capacity is 2T or less, the device will be formatted to FAT32 or NTFS. Only certain devices can format a storage device that has a greater capacity than 2T.
•A progress bar (e.g., Exporting X/Y is displayed to indicate the progress, where X indicates the current number being backed up, and Y indicates the total number of recordings. To cancel the operation, click Cancel.
•A backup file is named in this format: camera name-recording start time.file extension. For example, Ch9-20150630183546.mp4.
Video Clip Backup
A recording can be clipped and saved to a USB storage device.
1.Open the playback window. For the detailed steps, see Playback.
2.After playback starts, click and on the playback toolbar to clip videos.
3.Click and then click the Video Clip tab to view video clips.
4.Select the desired video clip(s) and then click Backup.
5.Select a destination in the USB storage device and then click Backup. The selected video clips are saved to the specified directory.
9 alarm
Alarm Input and Output
Alarm Input
1.Click Alarm > Input/Output > Alarm Input.
2.Click for the desired camera. In the Alarm Input window, select Enable to enable alarm input.
3.Select the normally open (N.O.) or normally closed (N.C.) trigger mode, and then click OK.
Alarm Input
.
Buzzer
Send Email
Pop-up Window
Recording Preset Preview Alarm Output Snapshot
I All DI D2 FID3 I 04 DS D6 D7 FlD8
D9 ODIO nDll DD12 D13 3D14 HD15 OOIS
NOTE!
•The number of cameras that can be connected may vary with DVR model.
•Actions that can be triggered may vary with alarm type.
|
Alarm Input
|
^Enable
|
|
Trigger Mode
|
NO.
|
–
|
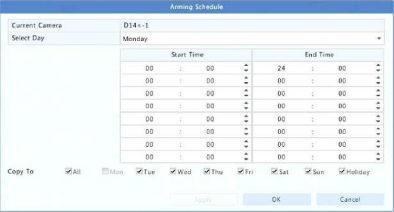
5.Click under Arming Schedule and then set the time when actions will be triggered.
.
NOTE!
•The default schedule is 24×7. You may change it as needed and set up to eight different periods for each day. Time periods cannot overlap.
•To apply the same arming schedule to other days, select the intended days right to Copy To.
•To apply the same settings to other cameras, click Copy, select cameras, and then click OK.
Alarm Output
1.Click Alarm > Input/Output > Alarm Output.
2.Click under Edit for the desired camera, and then set the default status and duration. After you have completed the settings, click OK.
3.Click under Arming Schedule and then set the time when actions will be triggered.
s NOTE!
To apply the same settings to other cameras, click Copy, select cameras, and then click OK.
Motion Detection
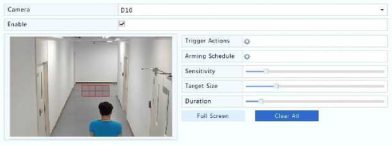
When enabled, a motion detection alarm occurs if an object inside the detection area moves to certain extent, and an alarm icon appears in the upper right corner.
Motion detection is enabled on the DVR by default. Unless modified, the detection area covers the full screen, and recording is triggered only for the current camera. The settings remain if you disable motion detection and then enable it.
2.Select the desired camera and then select Enable to enable motion detection.
3.Use the mouse to draw a detection area, and drag the slider to set detection sensitivity, target object size, and duration. The higher the sensitivity, the more likely a moving object will be detected.
.


