|
Parameter |
Description |
|
Video Compression |
Video compression standard, for example, H.264, H.265. The listed options depend on the standards supported by the camera. |
|
Resolution |
Image resolution. |
|
Bitrate Type |
•CBR: Constant Bit Rate (CBR) is used to maintain a specific bit rate by varying the quality of video streams. CBR is preferred when limited bandwidth is available. The disadvantage is that video quality will vary and may decrease significantly with increased motion in the scene.
•VBR: When using Variable Bit Rate(VBR), video quality is kept as constant as possible, at the cost of a varying bit rate, and regardless of whether or not there is motion in the image. VBR is ideal when high quality is a requirement, especially when there is motion in the picture.
|
|
Bit Rate(Kbps) |
Number of bits transferred per second. Select a value or select Custom and then set a value as needed. |
|
Range |
Bit rate range. Currently the range is fixed. |
|
Frame Rate(fps) |
Number of frames per second. |
|
Image Quality |
This parameter is effective only when Bitrate Type is set to VBR. 9 levels are provided. |
|
I Frame Interval |
Number of frames between two adjacent I frames. |
|
I Frame Range |
Range of I frames. Currently the range is fixed. |
|
Smoothing |
Use the slider to control the sudden increase of bit rate. |
|
Audio Stream |
Enable or disable audio stream. |
|
Audio Source |
Audio source for the selected channel. |
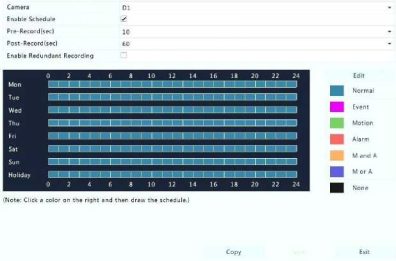
Make a recording schedule by drawing (pressing and dragging) or by editing (using the Edit button).

When editing a schedule, you may clear the All Day check box and set up to eight different periods for each day. To apply the settings to other day(s), select the day(s) right to Copy To.
Scheduled Recording
Scheduled recording records video according to the set schedule and it is different from manual recording and alarm-triggered recording. A 24×7 recording schedule is enabled by default and may be edited as needed to record video in specified periods only.
See Draw or Edit a Schedule for the detailed steps. Make sure the schedule type is Normal. The set schedule appears in blue, which stands for scheduled recording.
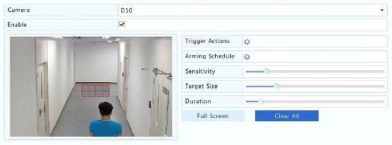
When enabled, a motion detection alarm occurs if an object inside the detection area moves to a certain extent (see Motion Detection for more details).
modified, the detection area covers the full screen, and recording is triggered only for the current camera. The settings remain if you disable motion detection and then enable it.

