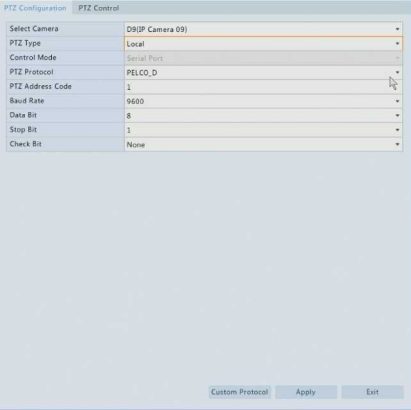
If Local is selected, information about the PTZ protocol, bit rate, etc. needs to be filled in. The possible protocols to choose from are: PELCO_D and PELCO_P.

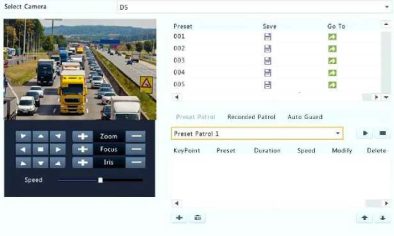
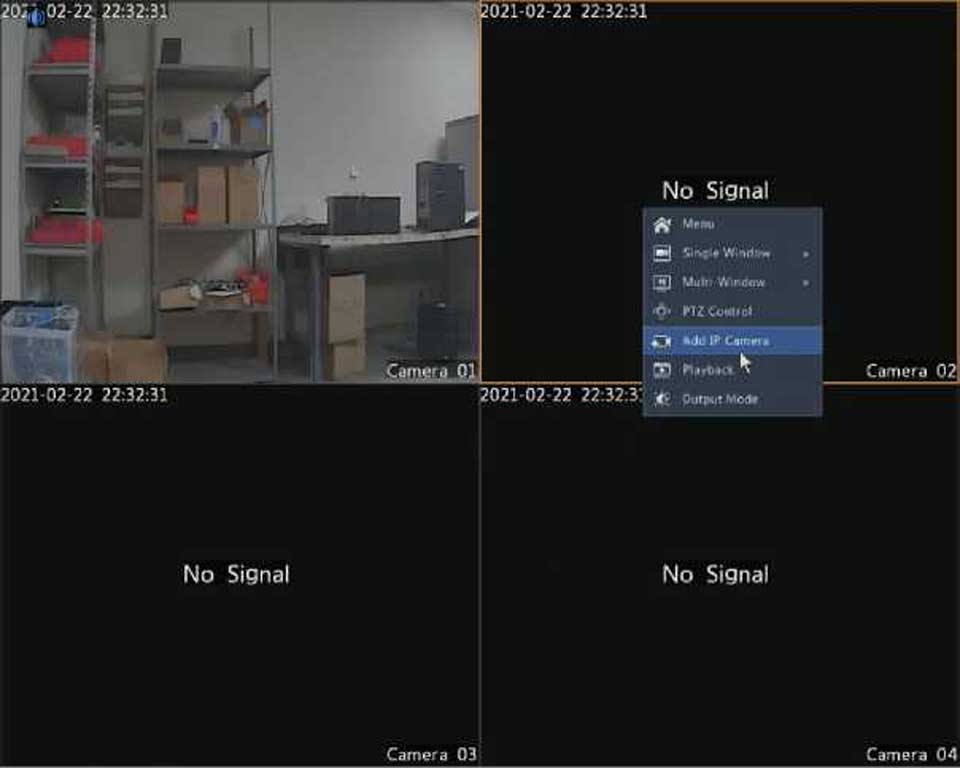
PTZ Control Window and PTZ Management Window

Table 5-1 PTZ Control Window Buttons
|
Button |
Description |
Control the rotation direction of the PTZ camera or stop rotation.
Adjust the zoom, focus, and iris of the PTZ camera.
Note: You can also zoom in or out using the scroll wheel on your mouse.
Control the rotation speed of the camera. 1 means the slowest, and 9 means the fastest.
Click to display the PTZ Management window.
Preset
Button
Description
Note:
and are displayed for saved
Note:
presets only.
Preset Patrol |
Recorded Patrol
Preset patrol, recorded patrol and auto guard. For detailed information, see Setting a Preset Patrol, Setting a Recorded Patrol, and Setting Auto Guard.
Start or stop.
A preset position (preset for short), is a saved view used to quickly steer the PTZ camera to a specific position. A preset consists of the following settings: pan and tilt positions, zoom, focus, and iris.
1. Access the PTZ Management window. For the detailed steps, see PTZ Control Window and PTZ Management Window.
![]()

Save.
Presets can also be triggered by alarms. See Alarm-Triggered Actions for details.
Set the PTZ camera to patrol by presets (go from one preset to the next in specified order). You need to set presets first and then select some as
keypoints. Up to four patrol routes (Preset Patrol 1, 2, 3 and 4) are allowed for each PTZ camera, and each patrol route can have up to eight presets (keypoints). After setting presets, follow the steps to set a preset patrol. The following takes preset patrol 1 as an example.

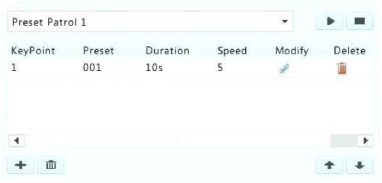
2. Select a preset from the drop-down list, set the duration (time the camera stays at the preset, unit: second), and then set the rotation speed (1: slowest, 9: fastest). Click OK to save the settings. The preset is added as a keypoint, as shown in the figure below.

a preset by clicking or ^ . Clicking Uli will delete all the added
keypoints.
s NOTE!
The duration ranges from 0 to 1800 seconds (default: 10). The rotation speed ranges from 1 to 9 levels (default: 5).
This function requires the camera’s support. The drop-down list and the buttons on the right are hidden if this function is not supported by the camera. Currently only one recorded patrol route is allowed.
Record a patrol, including the patrol route, the time that the camera stays at a certain direction, rotation speed, zoom, focus and focus.
2. Click ■ to stop recording. All the patrol actions have been recorded.

3. To start the recorded patrol, click * . Click ■ to stop.
Use auto guard so the PTZ camera automatically operates as configured if no operation is performed by any user during a certain time period. Auto guard avoids situations where the camera is left to monitor incorrect scenes by user’s negligence.
