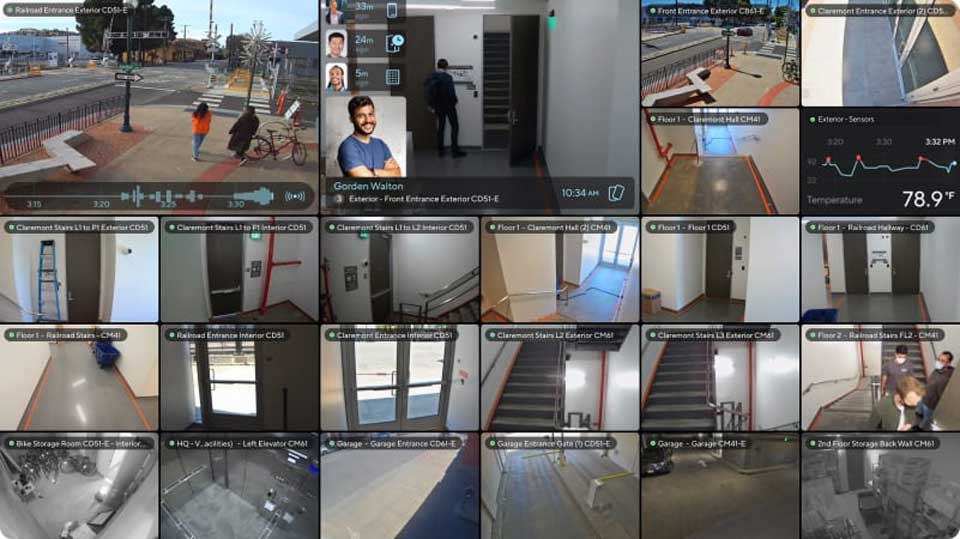
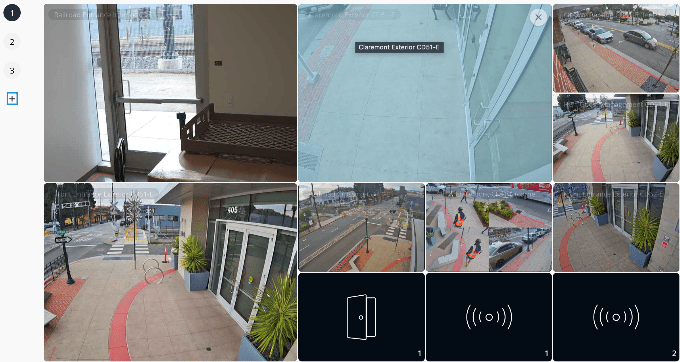
Verkada VX52 Viewing Station Guide, The VX52 is a dedicated device that streams up to 300 camera feeds to any display with ultra-low latency, crisp video playback, customizable layouts, and configurable Smart Tiles. For customers with mission-critical real-time viewing requirements, the VX52 is the viewing platform of choice.
Set Up Your Viewing Station
Learn how to set up your Verkada Viewing Station for live viewing
The Verkada Viewing Station provides a plug-and-play solution to stream multiple camera feeds simultaneously on a display with no local configuration needed.
Step 1: Connect your viewing station
When you open your box, you should find an HDMI cable, a power cord, and a viewing station remote. You only need to provide an Ethernet cable. See Viewing Station Network Settings.
Once you take the viewing station out of the box, follow these setup steps:
Step 2: Claim your viewing station
Note: You must be an Org Admin to ensure you have access to all devices on your viewing station and to claim the viewing station.
Find your viewing station’s serial number
The are 2 ways to find the serial number:
When you’re ready, claim the viewing station (as you would for a camera):
Once the VX52 is powered on you will see a serial number displayed along with a QR code. When you are ready you can claim the viewing station just like a camera from command.verkada.com/add-device.
Once claimed you are now ready to configure your viewing station.
Step 3: Configure your viewing station
Find your viewing station
To find your newly added viewing station, go to the Devices page and filter for viewing stations.
Edit the viewing station name (optional)
To edit the name of the viewing station, select its name at the top of the page and enter a unique name.
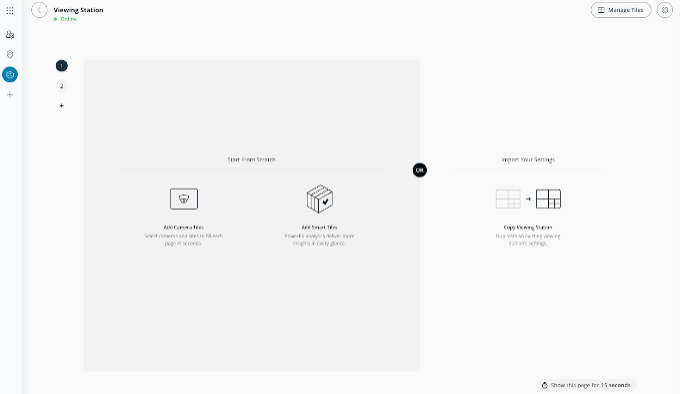
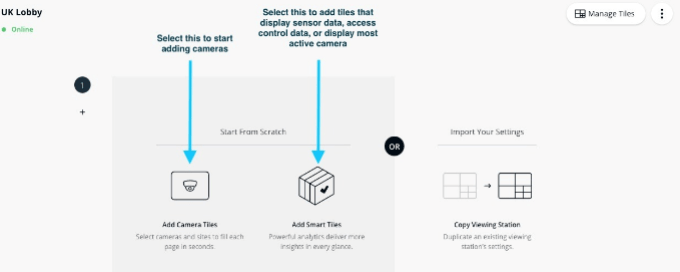
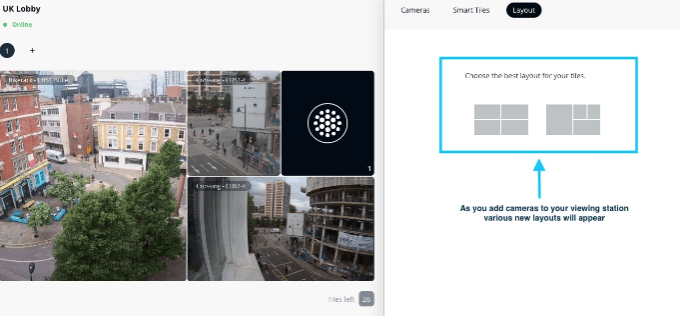
Add camera tiles and Smart Tiles
Note: You can add up to 10 pages and up to 30 live feeds per page.
Add Verkada viewing station admins
Note: You need to be Org Admin to ensure you have access to all devices on the viewing station.
A device that is moved to a different site (where the user does not have access) causes the same issue. It’s possible for an org to have sites that an Org Admin does not have access to, but they can grant themselves access.
Step 4: Configure viewing station settings
The Settings menu consists of the following options:
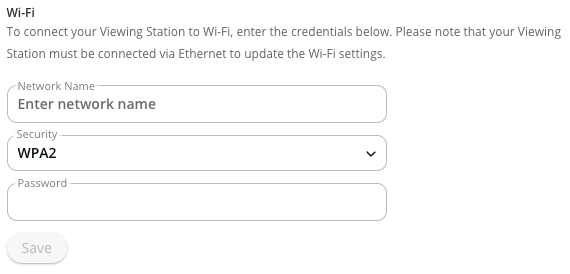
Configure Wi-Fi
Note: Wi-Fi support on the viewing station requires Verkada software version 2.2.0 (137) or higher. You can find the software version and the serial number in the Device section (below Wi-Fi). If your viewing station has not yet automatically updated to this software version, please contact Verkada Support.
Copy an existing viewing station
You can copy live feed configuration and viewing station settings from other viewing stations in your organization.
Restart viewing station
The viewing station becomes unavailable for a few minutes while it restarts.
Required Network Settings
Verkada devices need to communicate with Verkada Command, and they use the network they are connected to to do this. In most cases, minimal updates to your network settings are needed. Additional configuration may be required for complex or highly secure networks.
Device-specific network settings
Each device type has required domains to allow them to properly operate on the network. Select a product from the list below for more information on its required network settings.
Note: Some firewalls do not allow wildcards (*), so you may need to allow each endpoint individually.
Compatibility
Verkada devices are incompatible with local area networks (LANs) that require proxy servers or Secure Socket Layer (SSL)/Transport Layer Security (TLS) inspection. If either is in use, a bypass for all Verkada devices must be implemented for your Verkada devices to communicate with Verkada Command.
IP address
Verkada devices must be assigned an IPv4 address to communicate on the LAN and to Verkada Command through the internet. By default, all Verkada devices use Dynamic Host Configuration Protocol (DHCP) and User Datagram Protocol (UDP) to obtain their IP addresses and network configurations.
If you require your device to have a specific IP address, create a DHCP reservation using the device’s Media Access Control (MAC) address (found on the device’s label). You can also set up static IP addresses in Command for cameras.
Domain Name System
Verkada devices use the Domain Name System (DNS) server to resolve Verkada’s fully qualified domain names (FQDN) to IP addresses to communicate with them. Your DHCP server tells the Verkada device where the DNS server is on the network and the device communicates using UDP port 53.
Note: DNS over HTTPS (DoH) is currently not supported.
Power
Most Verkada devices are powered through Power over Ethernet (PoE). You can use the product datasheets to figure out the power requirements for your Verkada devices.
These are the most common power requirements:
Viewing Station Network Settings
Learn about the required network settings for Verkada viewing stations
.
This article outlines the required network settings that your Verkada viewing stations need to communicate with Verkada Command. For more information on the required network settings for other Verkada product lines see Required Network Settings.
Note: Verkada devices are incompatible with LANs that require proxy servers or Secure Socket Layer (SSL)/Transport Layer Security (TLS) inspection. If either is in use, a bypass for all Verkada devices must be implemented for Verkada devices to communicate with Verkada Command.
IP address
Viewing stations must be assigned an IPv4 address to communicate on the LAN and to Verkada Command. Viewing stations support both wired and wireless internet connections. They use Dynamic Host Configuration Protocol (DHCP) and User Datagram Protocol (UDP) to obtain their IP addresses and network configurations.
If you require your viewing station to have a specific IP address, create a DHCP reservation using the device’s Media Access Control (MAC) address (found on the device’s label).
Domain Name System
Viewing stations use the DNS server to resolve Verkada’s fully qualified domain names (FQDN) to IP addresses to communicate with them. Your DHCP server tells the intercom where the DNS server is on the network and the intercom communicates using UDP port 53.
Note: DNS over HTTPS (DoH) is currently not supported.
Firewall settings
Viewing stations require access to many endpoints to ensure they can communicate with Command and all features will be accessible. Many customers may want to allow the viewing stations to communicate with the general required endpoints.
These are the general domains to allow, applicable for all organization-regions:
If your firewall does not allow wildcard masking, or you prefer to have the entire FQDN of the endpoint in your firewall rules, you can add the domains to your allowlist based on the region your devices are in.
Note: Your region is selected when you create an organization in Command.
Region: United States
Region: Europe
Set Up Smart Tiles on the VX52
Learn how to set up smart tiles on the Verkada VX52 Viewing Stations
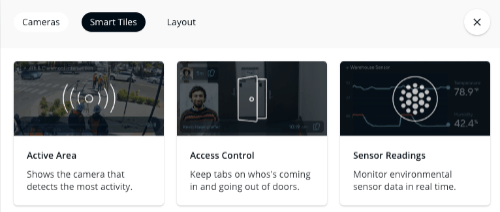
The Verkada Smart Tiles feature provides a way to display the most notable options from access events, sensor events, and notable camera data and data sets. Admins can remotely manage the Verkada VX52 Viewing Station, select video feeds and Smart Tiles to display, and customize layouts.
Find the smart tiles for your VX52
Once you set up your VX52, you can configure the tiles on the VX52 and add smart tiles.
Choose the type of smart tiles to add
There are 3 different types of Smart Tiles you can add to your VX52:
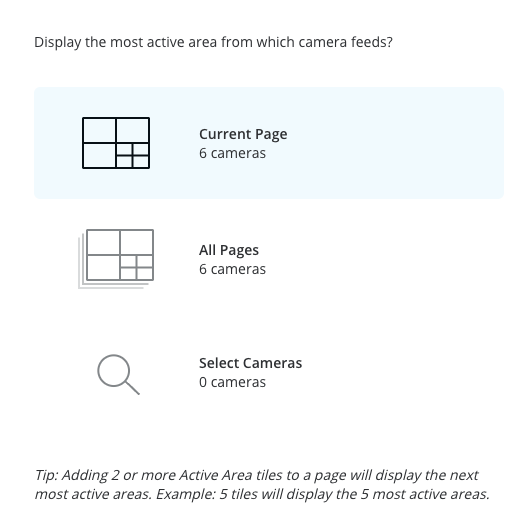
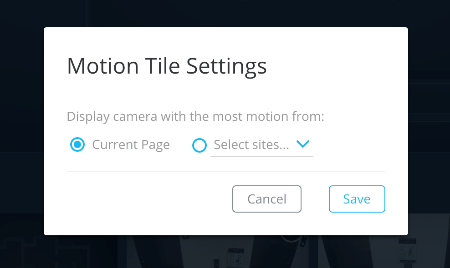
Active Area
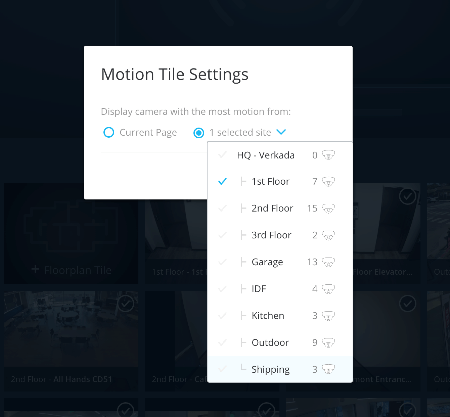
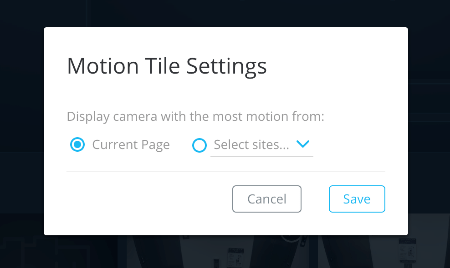
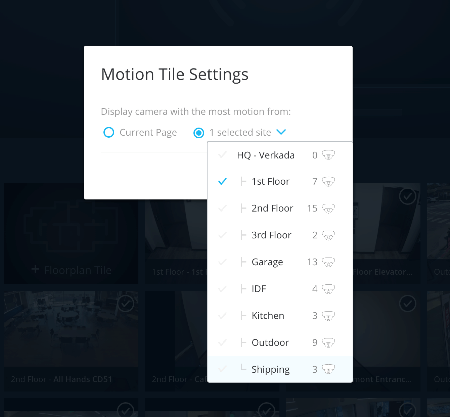
Displays the camera with the most motion. To change which camera(s) display on the active area tile, select the tile to see the information panel where you can select from the following options:
Access Control
Displays all most recent door events, including any door event that you would see indoor history, such as:
When you select this tile, you can choose which door is displayed on the VX52.
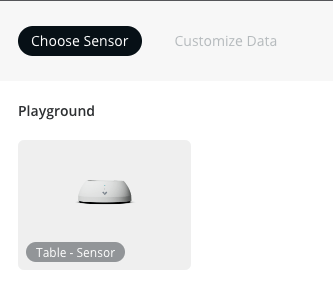
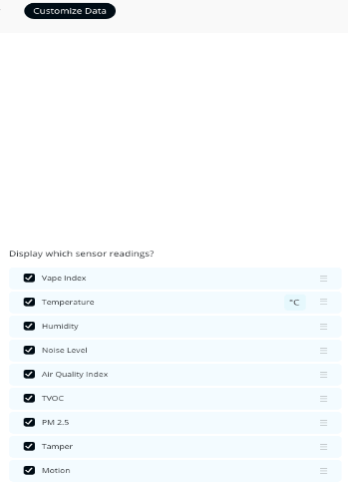
Sensor Readings
Displays the air quality readings of your choice. From the Customize Data tab, you can select a sensor reading when you select the sensor tile. See Air Quality Sensor Readings.
Configure Motion Tiles
The Verkada Motion Tile feature enables the viewing station to intelligently select video feeds that are most important and brings them into a dedicated tile. This designated motion tile switches to feeds where a significant amount of motion is detected, allowing viewers to quickly see important activity and take any necessary action. You can configure motion tiles to search for activity across one or more sites, or even across an entire organization.
Configure the Motion Tile feature on VX51
Configure the Motion Tile feature on VX52
See how this works
Watch this video to see how this feature works
Finished Motion Tile (example)
VX51 Viewing Station Click to Expand
Learn how to use this feature with a VX51 viewing station
.
You can use the Click to Expand feature to enlarge a selected tile to full screen.
Required. To utilize this feature, you must have a mouse connected to your Verkada VX51 viewing station.
Access the Click to Expand feature
Note: This feature also allows the VX51 to start playing audio from the camera.
Verkada VX52 Viewing Station Guide Video
