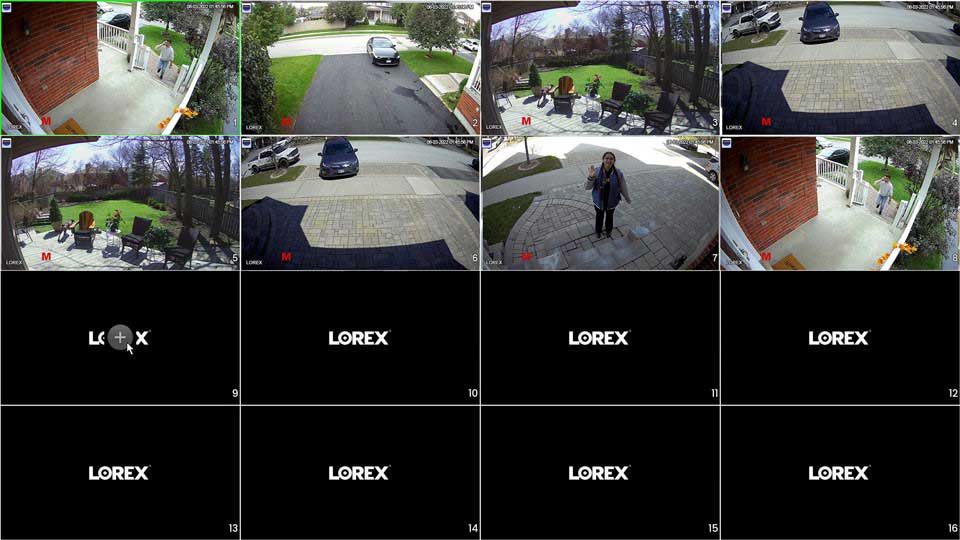
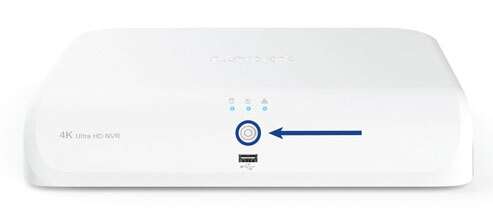
Lorex 4K Fusion DVR Manual v1, Record and view your indoors and outdoors with the Lorex 4K Ultra HD Digital Video Recorder. Keep your recordings private and secure, thanks to the local storage of up to 8TB on the 12-channel DVR. Enjoy ample storage for your video footage at no monthly fees. Always know what’s happening with Person and Vehicle Detection on compatible cameras. Receive smartphone notifications only when there’s a person on your property or when a vehicle pulls into the driveway. Create a tailored home security system with Wired and Wi-Fi cameras— simply pair up to 8 Wired Cameras and 4 Lorex Fusion Wi-Fi security devices to the DVR for complete peace of mind.
DVR / NVR – Download the Lorex App
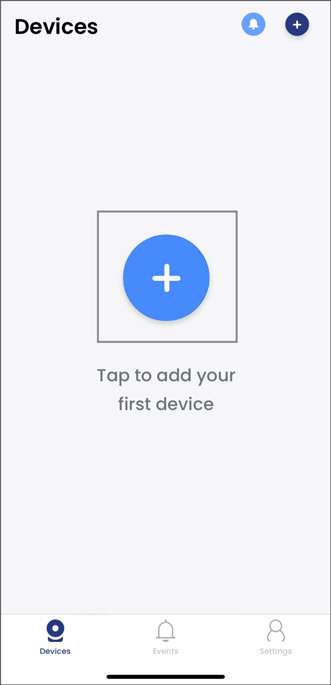
The following article provides instructions for downloading the Lorex App and connecting your Lorex recorder to the app.
Prerequisite
Before you start, your recorder must be powered on and connected to your router using the included Ethernet cable. For Basic System Setup instructions, refer to your Fusion recorder’s Quick Start Guide or Manual on the product support page. Visit help.lorextechnology.com and search your Fusion recorder’s model number.
Download the Lorex App
DVR / NVR – How to Playback Recorded Videos on Your Computer
You can download recorded videos from your DVR or NVR to a USB flash drive and play them back on your computer. Depending on the file format of your video, you need the Lorex Player or the VLC Media Player.
Lorex 4K Fusion DVR Manual v1
Part 1 – Download Video
Here is how to playback a video on your computer.
Step 1. Format your USB flash drive on your recorder.
TIP: See this guide on how to format your USB flash drive on your recorder.
Step 2. Download recorded video from the DVR or NVR to your formatted USB flash drive.
Step 3. Next, choose a file format for your video:
IMPORTANT: If you choose .dav, you will have to download the Lorex Player. If you choose .avi, .mp4, .asf, you will have to download the VLC Media Player.
Step 4. Play video on your computer using Lorex Player or VLC Media Player.
Part 2 – Download Player
Again, the type of video file you choose when downloading the video will dictate the player to use when watching the video.
If you have a .dav file, please download the Lorex Player. Otherwise, please download the VLC Media Player for other types of video files (e.g., .avi, .mp4, and .asf).
Lorex Player
Please down the Lorex Player below:
VLC Media Player for Mac and PC
Please download the official VLC Media Player here:
DVR / NVR – How to Remove and Install a New Hard Disk Drive
Your recorder comes with a pre-installed 3.5″ SATA hard drive. You can replace the hard drive with one up to a maximum size of 8TB or 10TB (varies per model).
Section 1 – Replacing hard drive on newer models
WARNING: Make sure that your recorder is OFF and the power adapter is disconnected before removing/installing a hard drive.
Removing the hard drive
Step 1. Power off the system, and unplug all cabling from the system.
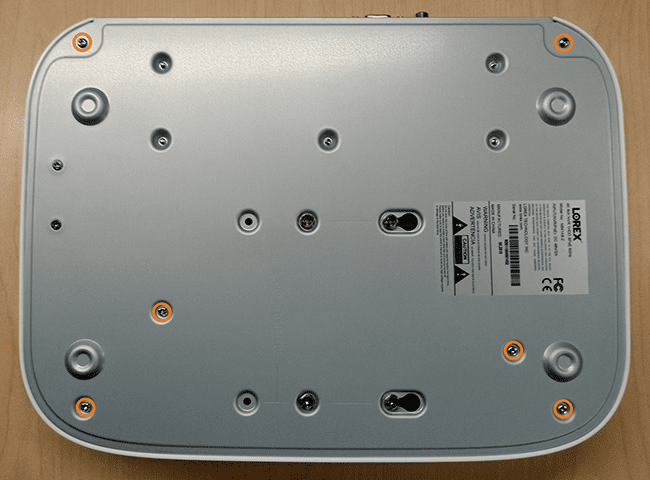
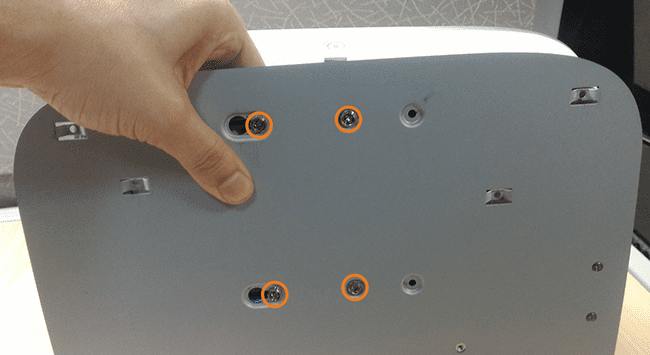
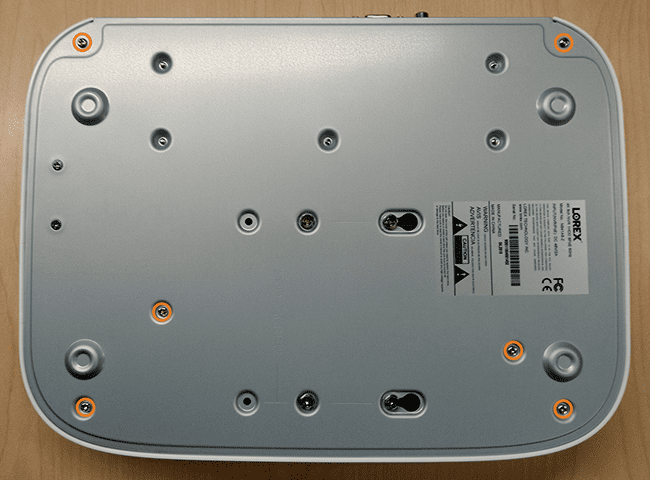
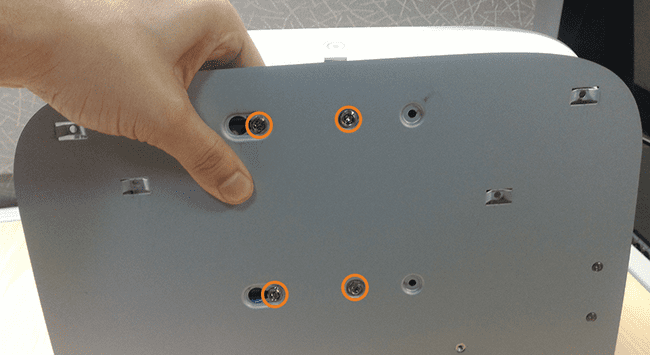
Step 2. Turn the recorder over, then remove the 6 bottom panel screws as shown in the image below.
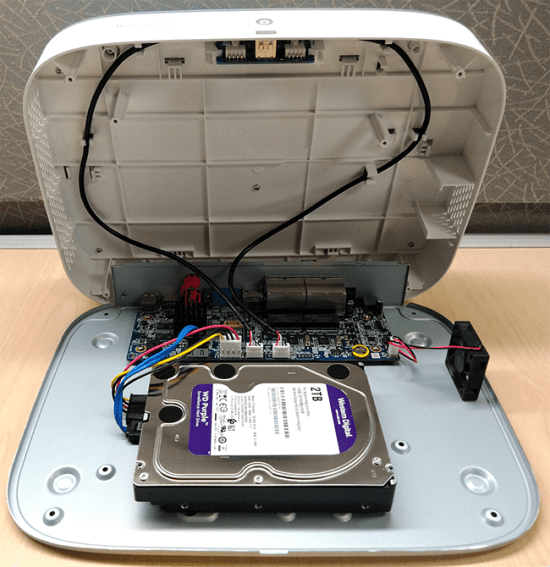
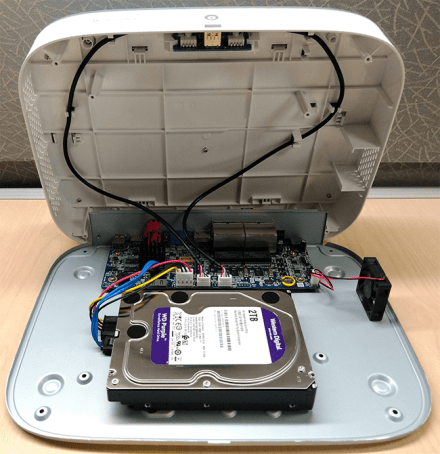
Step 3. Turn the recorder over carefully, then lift the top panel so you can access the hard drive.
IMPORTANT: The wiring to the front panel button and USB port runs along the top panel of the recorder. When separating the top panel, rest it carefully beside the bottom panel as shown below.
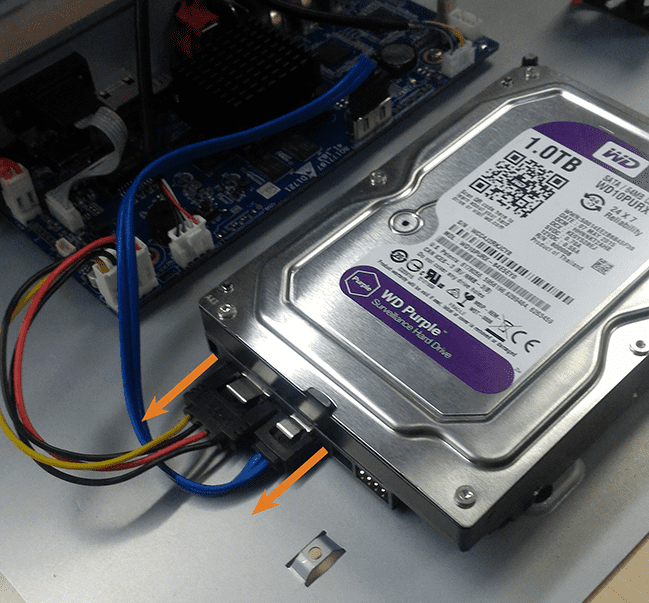
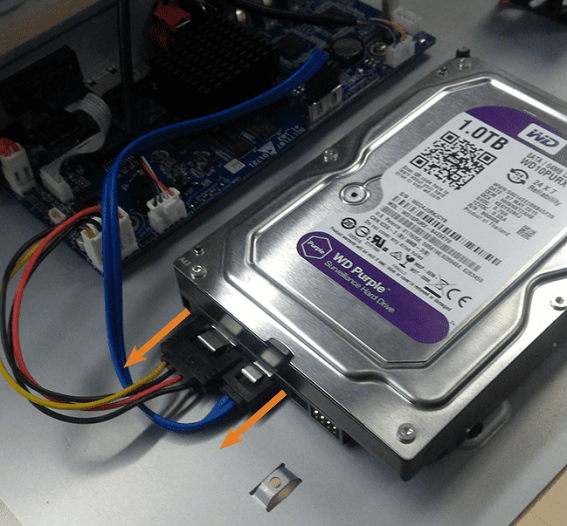
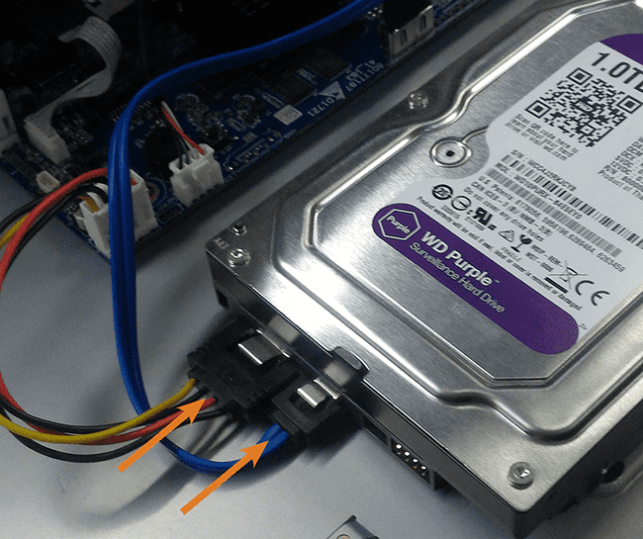
Step 4. Now carefully remove the power and SATA cables from the hard drive as shown below.
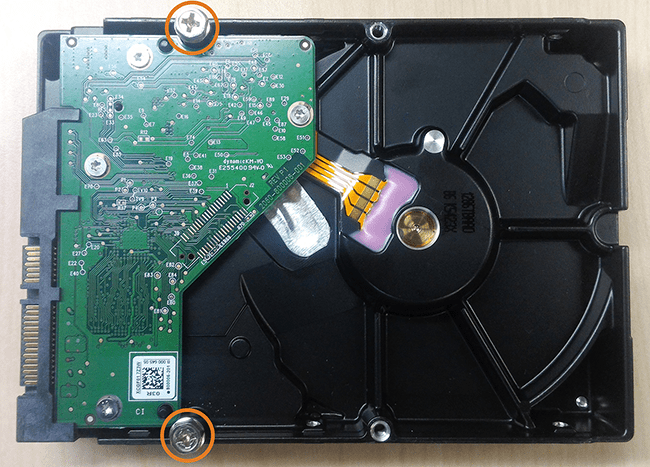
Step 5. Carefully pick up the hard drive to lift the bottom panel, being mindful of the sharp edges of the bottom panel. Remove the hard drive screws (4×) from the bottom panel. Hold onto the hard drive so it remains in place when all screws have been removed.
Step 6. If you are not immediately going to install a new hard drive, replace the top panel and the 6 bottom panel screws.
Installing a new hard drive
IMPORTANT: If you are replacing your hard drive, please note that you don’t need an extra SATA cable. Your recorder is already equipped with one SATA cable inside it which you can use for your new hard drive.
WARNING: Make sure that your recorder is OFF and the power adapter is disconnected before removing/installing a hard drive.
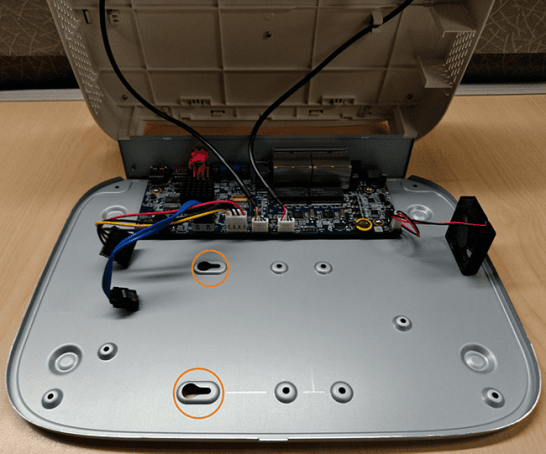
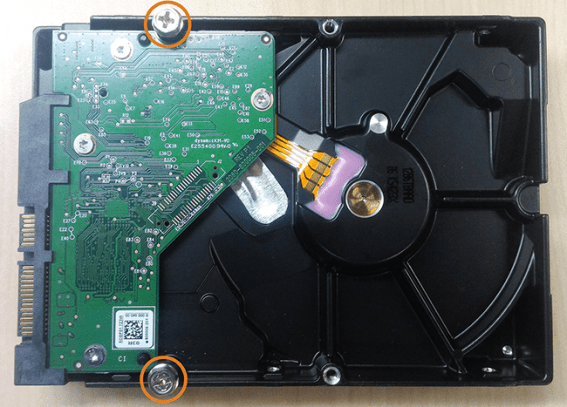
Step 1. Insert the 2 hard drive screws closest to the SATA and power ports on the hard drive and tighten them half way. See image below.
Step 2. Power off the system, and unplug all cabling from the system.
Step 3. Turn the recorder over, then remove the 6 bottom panel screws as indicated in the image below.
Step 4. Turn the recorder over carefully, then remove the top panel.
IMPORTANT: The wiring to the front panel button and USB port runs along the top panel of the recorder. When separating the top panel, rest it carefully beside the bottom panel as shown below.
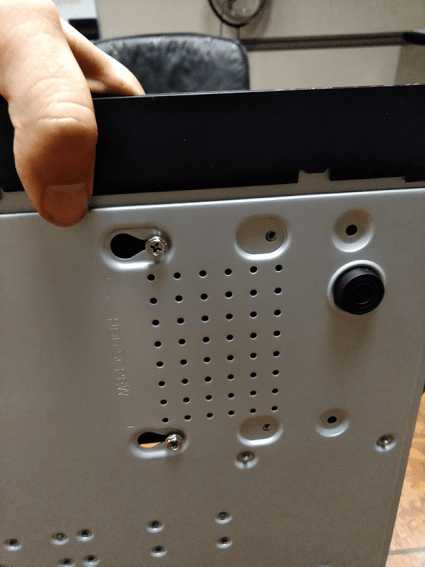
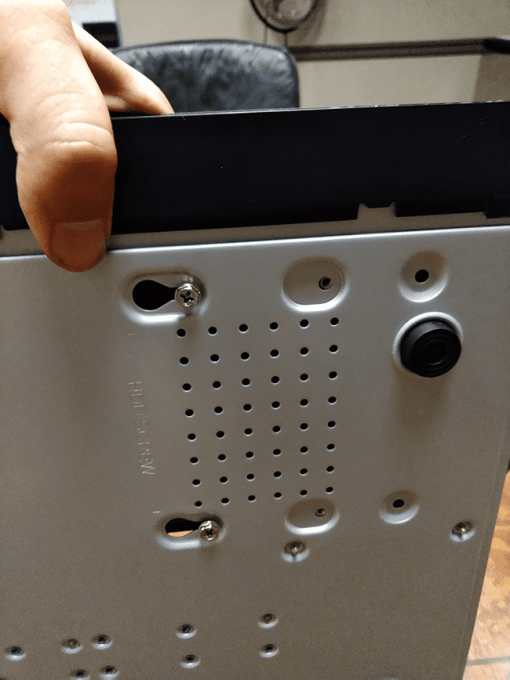
Step 5. Line the 2 half-inserted hard drive screws with the 2 holes shown in the image below.
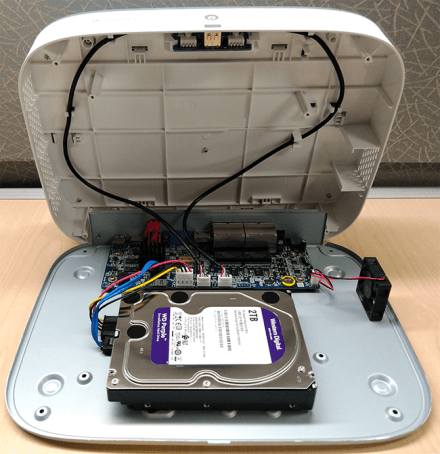
Once you have inserted the hard drive screws to their respective slots, it should look like this.
Step 6. Carefully pick up the bottom panel with the hard drive, being mindful of the sharp edges of the bottom panel. Slide the 2 pre-inserted screws into the locked position, then tighten the screws. Insert and tighten the 2 remaining hard drive screws.
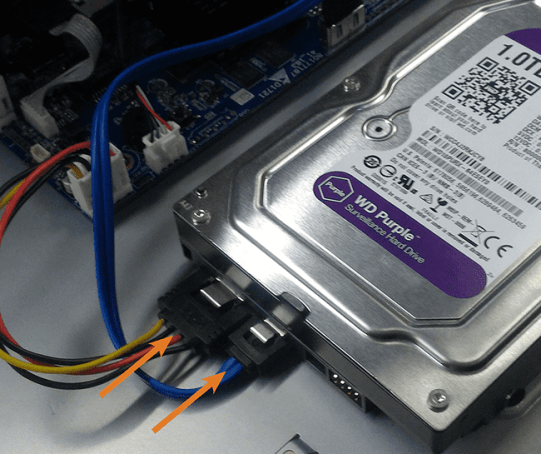
Step 7. Connect the power and SATA cables to the hard drive.
Step 8. Replace the top panel and the 6 bottom panel screws.
Section 2 – Replacing hard drive on older models
Removing the hard drive
WARNING: Make sure that your recorder is OFF and the power adapter is disconnected before removing/installing a hard drive.
Step 1. Power off the system, and unplug all cabling from the system.
Step 2. Remove the back panel screws (4×). Remove the cover by sliding it backwards.
Step 3. Turn the recorder over carefully. Remove the 2 hard drive screws closest to the edge of the recorder. Loosen the remaining 2 hard drive screws, but do not remove them.
Step 4. Remove the power and SATA cables from the hard drive.
Step 5. Slide the hard drive out of the recorder.
Step 6. If you are not immediately going to install a new hard drive, replace the top panel and the 4 back panel screws.
Installing the hard drive
IMPORTANT: If you are replacing your hard drive, please note that you don’t need an extra SATA cable. Your recorder is already equipped with one SATA cable inside it which you can use for your new hard drive. If your recorder has two bays, you can install one more hard drive (for a total of two hard drives). When installing an additional hard drive, please note that the extra SATA cable is included in the accessory box.
WARNING: Make sure that your recorder is OFF and the power adapter is disconnected before removing/installing a hard drive.
Step 1. Insert the 2 hard drive screws closest to the SATA and power ports on the hard drive and tighten them half way.
Step 2. Power off the system, and unplug all cabling from the system.
Step 3. Remove the back panel screws (4×). Remove the cover by sliding it backwards.
Step 4. Insert the hard drive so the 2 pre-inserted screws line up with the holes in the bottom panel as shown below. Slide the hard drive in place. Insert the remaining 2 hard drive screws, and tighten all 4 screws tightly.
Step 5. Connect the power and SATA cables to the hard drive.
Step 6. Replace the top panel and the 4 back panel screws.
How to Change or Reset Your Recorder’s Password (Compatible with Lorex App)
This article offers guidance on how to change the password of your Lorex recorder for security purposes or reset it in case you have forgotten it.
Note: These instructions apply to recorders supported by the Lorex App. Refer to the Lorex App Product Compatibility Chart for a list of compatible recorders.
