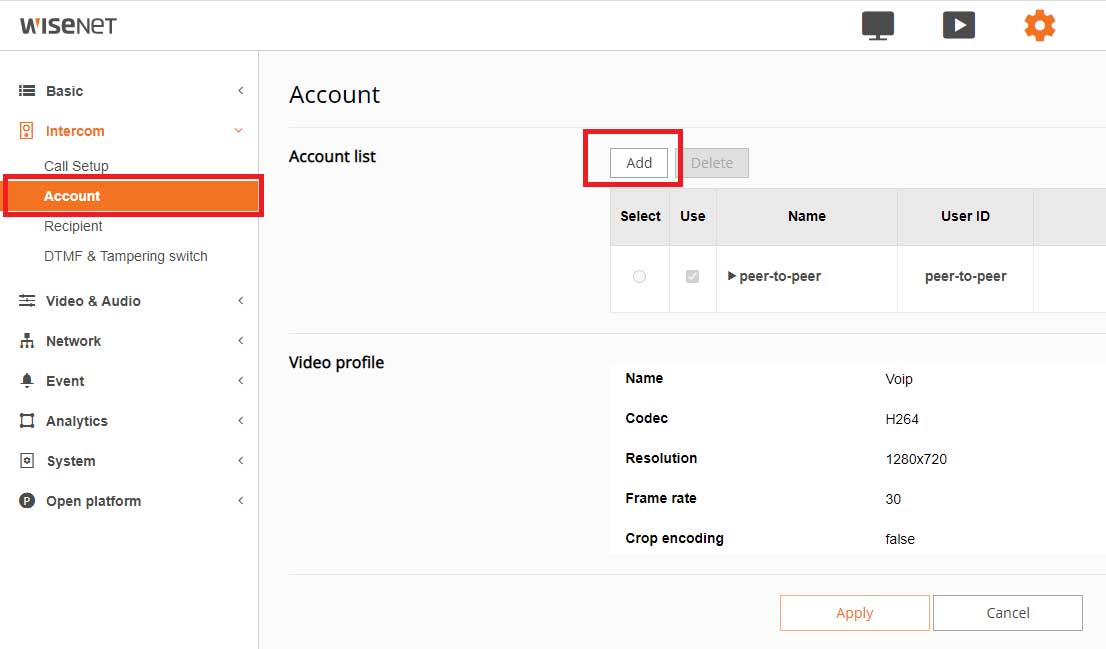
After creating an extension from a PBX server, you can register the intercom with the
extension number(User ID, Authentication ID), the password for the extension, and
the IP address of the PBX server.
Program Recipient to call the extension and DTMF to trigger the relay.
Step By Step Guide:
1. You need to enable SIP under the Call Setup in the Intercom Web setting. Enable the “Allow incoming SIP calls” to allow the operator to page out of the intercom.

2. Click on the Add button under Account for the PBX Extension registration.

3. Type in Name of your choice, User ID, Authentication ID, Password, Domain Name (IP of your PBX server) from your PBX server.

4. Make sure to save the setting by clicking on the Apply button at the bottom.

5. Click on the Add button under the Recipient to program the extension number of the phone that the user desired to receive the call when the intercom button was pressed.

6. Type in Name of your choice, SIP address in the format of sip:Extension # @ IP address of the phone. Set the type to Registrar.

7. Make sure to save the setting by clicking on the Apply button at the bottom.

8. To trigger the relay to open the door, you need to program DTMF. Enable DTMF under the DTMF& Tampering switch. Define the digit (triggers the delay when you press this digit from the receiving phone) of your choice. Set the Alarm output 2(NO/NC port) to your desired time. Set the event activation time to Always unless you need th scheduled time set. Make sure to press the Apply button to save.

8. Enable the tampering switch so that the intercom can behave in the way that you want in case of the tamper event happens. Click on the Tampering switch tab under the DTMF & Tampering switch, and then check the Enable tampering switch box, set the parameters at your will. Press Apply to save.

